How to make your own earrings and bracelets with seed bead flowers
Daisy chain stitch is a beading technique for creating rows of cute little flowers.
Here you find inspiration and DIY guides for making bracelets and earrings with seed beads. Smyks offers a vast variety of seed beads in different colours which can be combined with other kinds of beads like crystals, for example Swarovski crystals with a diameter of 3mm.
Summer is on the way and invites you to make earrings and bracelets which match your new summer outfit.
DIY Daisy chain bracelet with seed beads
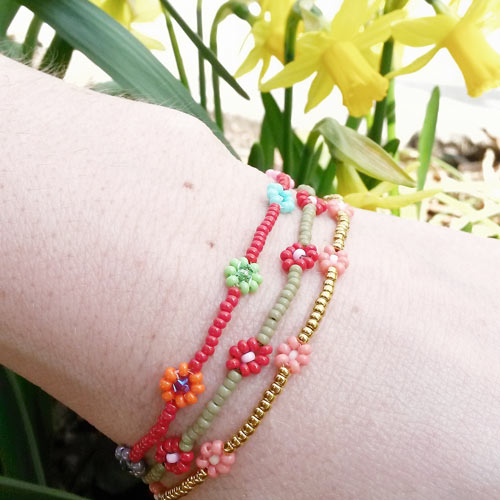
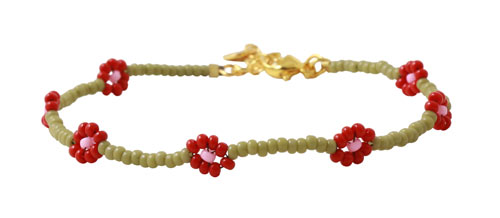
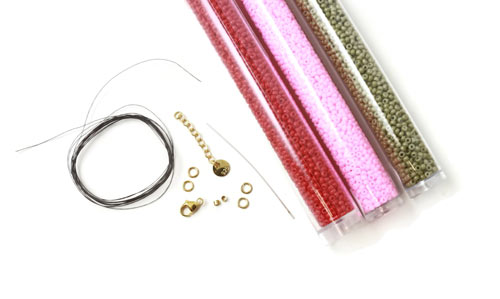
We used the following materials to make this daisy chain bracelet:
- Seed beads, red
- Sead beads, pink
- Seed beads, cactus green
- ca. 1m FireLine, black, 8lb
- 2 closed rings, 4mm, gilded sterling silver
- 2 jumprings, 4mm, gilded sterling silver
- 2 crimp beads, gilded sterling silver
- lobster claw clasp, 9mm, gilded sterling silver
- chain extender, gilded sterling silver
(alternatively, you can take cable chain as chain extender) - beading needle
- chain-nose pliers
For this bracelet we have used 8 red beads per flower, but you can make do with 6 beads per flower as shown below in the example with the earrings (see the instructions further down).
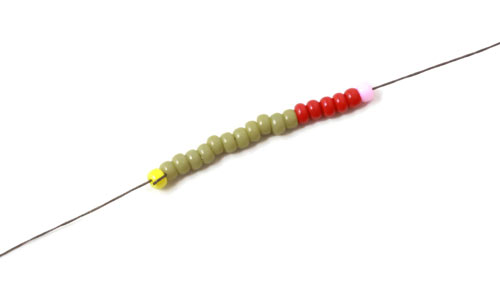
First you thread 11 green seed beads, then 5 red ones and 1 pink one.
Here we use the yellow bead as a stopper which prevents the other beads from falling off.
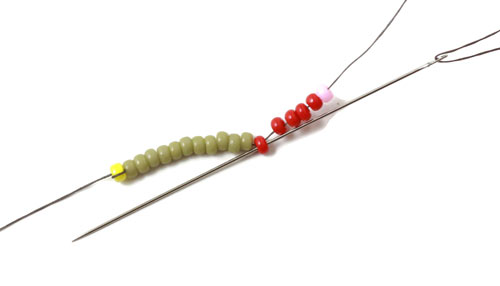
Sew back through the first red bead.
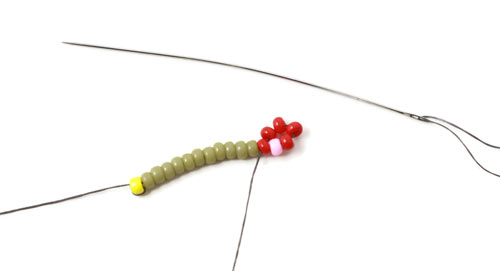
Tighten the thread.
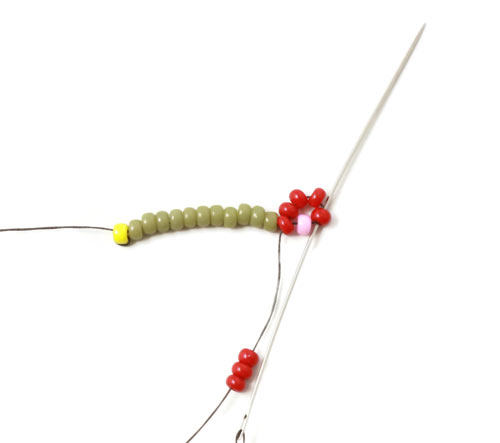
Now you thread 3 more red beads and sew through the last of the five red beads.
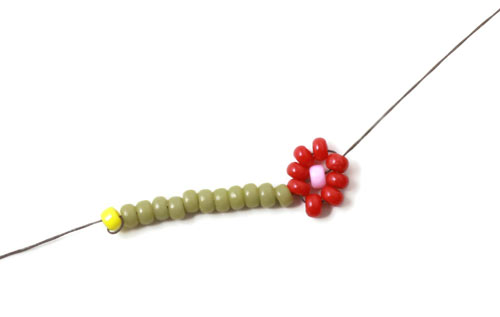
Tighten the thread. The flower is not yet in the middle, but it will be once you have sewn back through the bracelet.
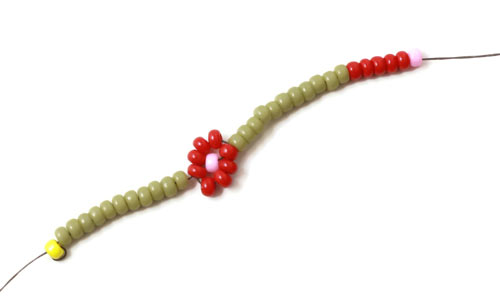
String the appropriate number of beads again like for the first flower.
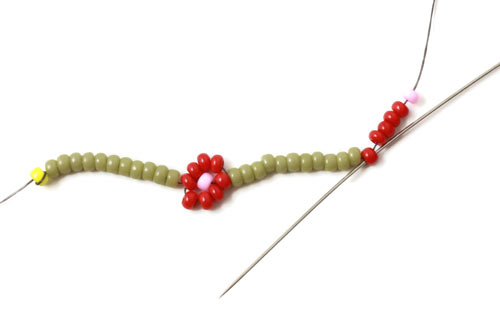
The next flower is made exactly like the first by sewing back through the first red bead.
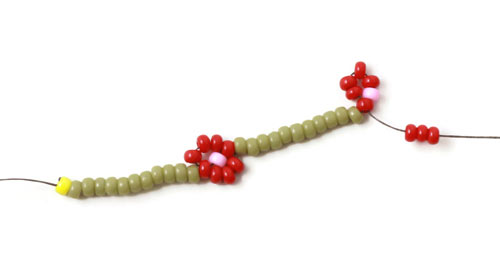
Tighten the thread and string the next three of the red beads.
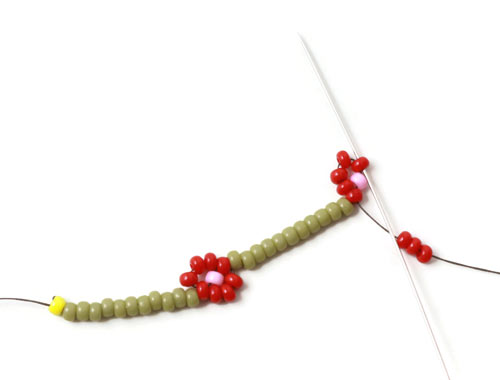
Then you sew back again through the last of the five red beads.
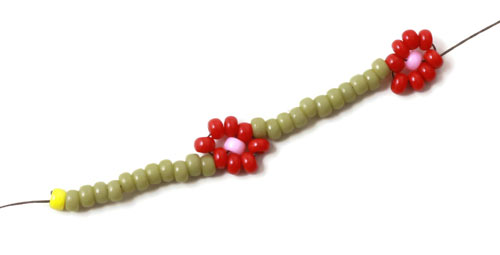
Tighten the thread again. Now the second flower is done.
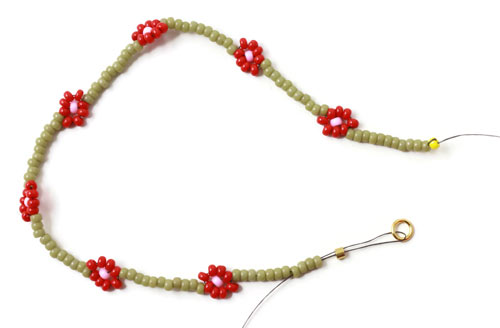
Continue like this until the bracelet has reached the desired length.
Once this is done, you string a crimp bead, sew through the closed ring and back through the crimp bead and some of the green beads.
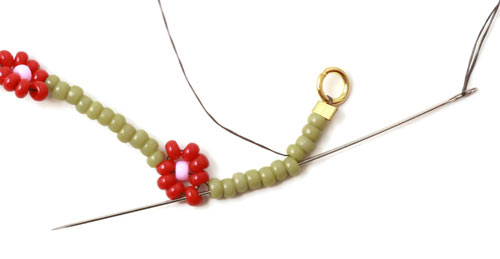
Tighten the thread. Take a pair of chain-nose pliers and press the crimp bead flat.
Now you sew back through the green beads.
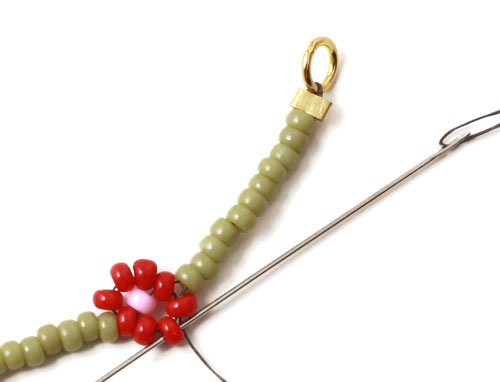
In order to centre the flower, sew back through the two beads opposite the ones where the thread comes out.
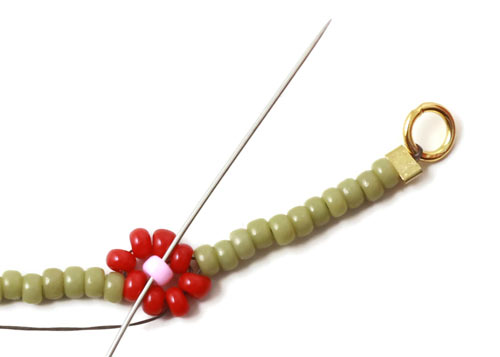
Now you sew through the pink bead in the middle.
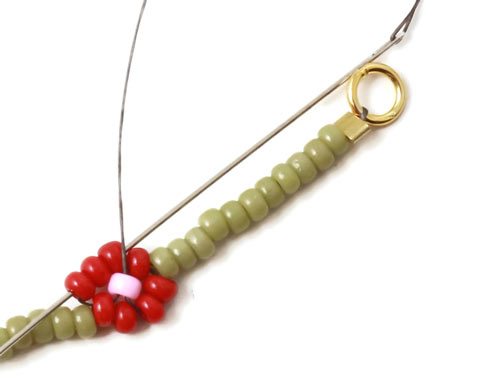
After that, you sew through the 3 red beads on the other side of the flower.
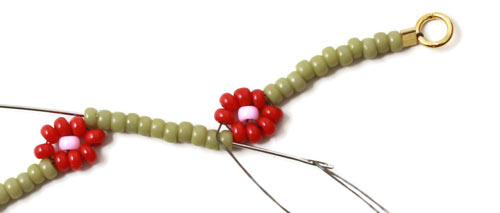
And then you continue through the next row of green beads.
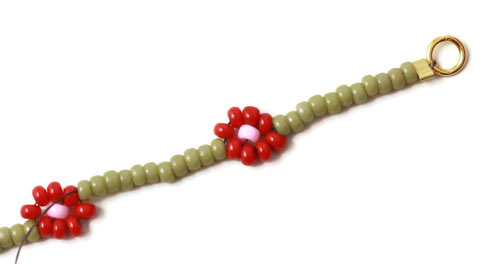
Continue sewing through the bracelet in the same way, so the flowers finally come to sit in the middle of the bracelet.
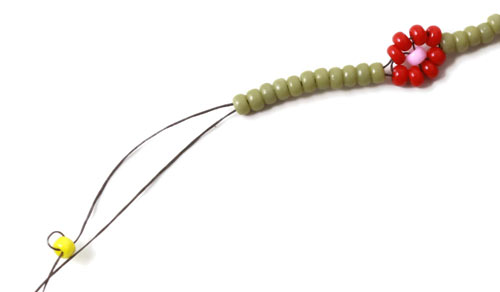
Now you remove the bead used as a stopper.
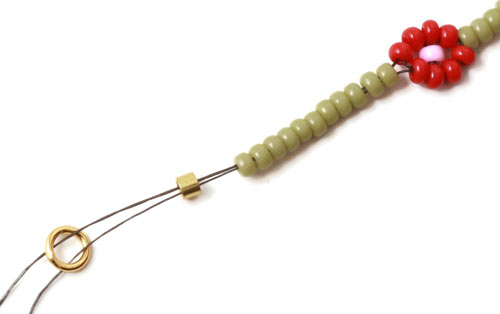
String a crimp bead and pull the two threads through a closed ring.
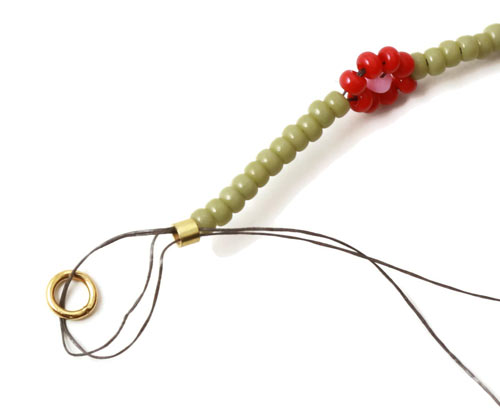
Then you pull the threads back through the crimp bead.
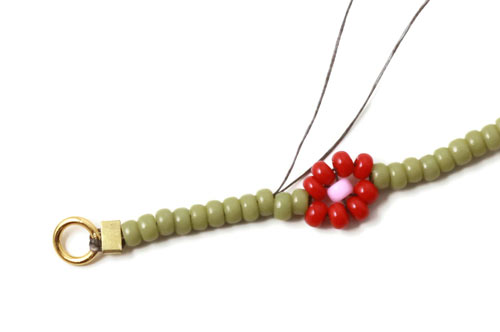
Tighten the threads and press the crimp bead flat with chain-nose pliers.
Now you pull both threads through a few of the green beads, before you cut them.
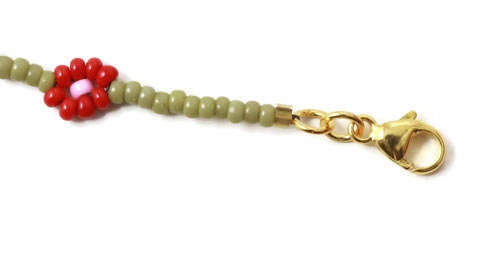
ake a 4mm jumpring and fasten a lobster claw clasp on the one end. In our blog post on mens’ necklaces we explain how to open and close a jumpring correctly.
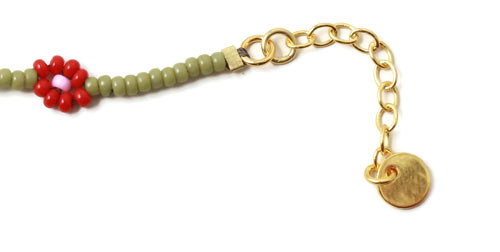
At the other end you attach the chain extender with the other 4mm jumpring.
(The chain extender is not essential and can be left out.)
DIY Daisy chain earrings with seed beads
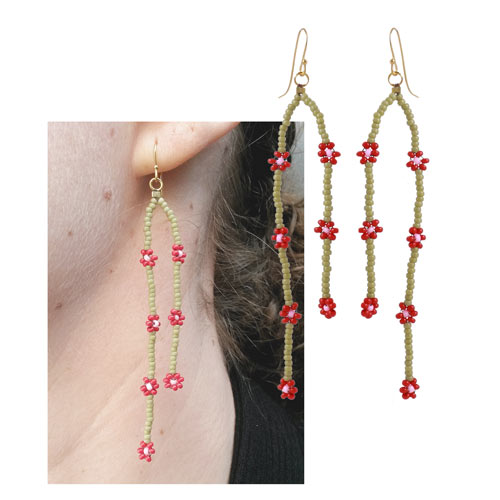
For these daisy chain earrings we used the following materials:
- Seed beads, red
- Seed beads, pink
- Seed beads, cactus green
- ca. 1m FireLine, black, 8lb
- 2 closed rings, 4mm, gilded sterling silver
- 2 crimp beads, gilded sterling silver
- 1 pair of earwires with ball, gilded sterling silver
- beading needle
- chain-nose pliers
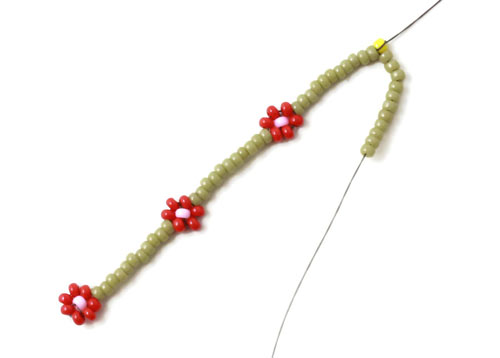
ou proceed with the earrings in the same way as with the bracelet. Here we use 6 red beads for making one flower.
Finish the first strand in the desired length.
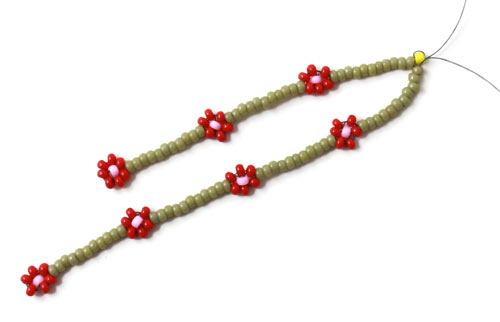
Then you go on making the second strand. Once the second strand has the desired length and you have sewn all the way back through the strand, you remove the stopper bead.
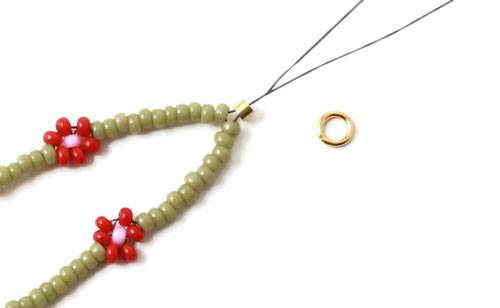
Then you pull the two threads through the crimp bead and the closed ring.
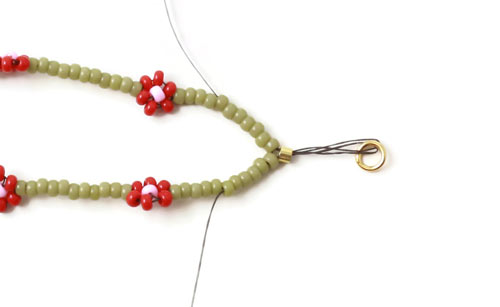
Pull both threads back through the crimp bead and some of the green beads.
Pull one thread on each side, so the crimp bead is centred.
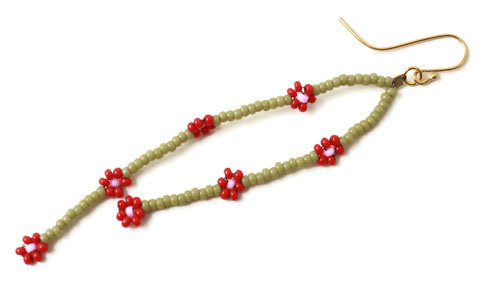
Now you tighten the threads, press the crimp bead flat with chain-nose pliers and cut the threads closely at the beads.
Finally, you pull the earwires through the closed ring.
DIY Daisy chain earrings in golden and salmon-pink
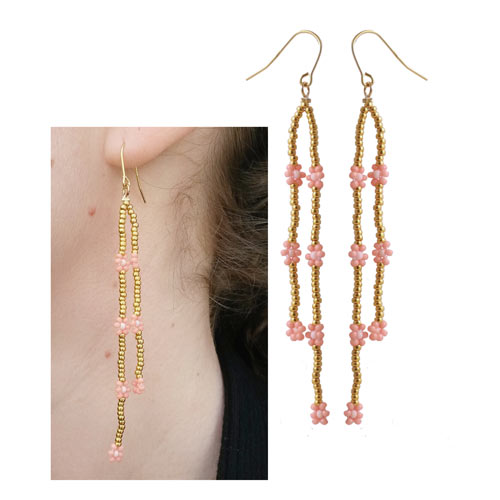
For these earrings we used seed beads in the following colours:
Furthermore: Fireline thread 8lb in white.
All the other materials are the same as listed above.
Have fun making your own daisy chain jewellery!
For more jewellery with seed beads and beading instructions click here:

Response
We will publicly show your name and comment on this website. Your email is to ensure that the author of this post can get back to you. We promise to keep your data safe and secure.