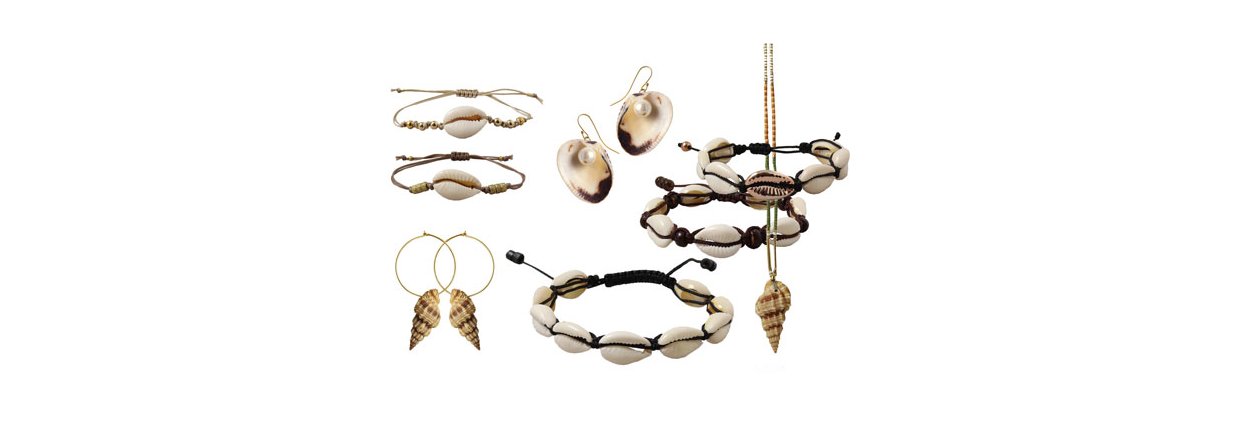
Make your own jewellery with cowrie shells or other seashells and conch shell horns.
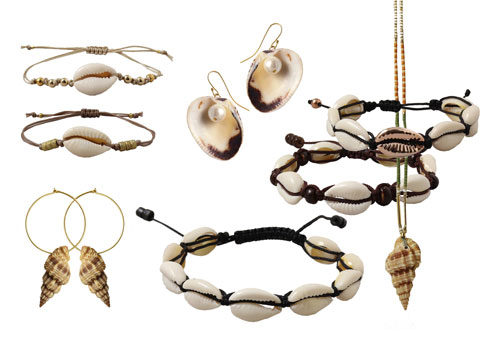
Cowrie shells is the name of the pretty seashells we used for the macramé bracelets.
In this blog post we want to inspire you to make your own necklaces, bracelets and earrings with cowrie shells and conch shell horns which at the moment can be found in all kinds of jewellery.
They are also beautiful as pendants and charms on chokers and ankle bracelets.
See also the related blog post: DIY seashell necklaces

DIY macramé bracelet with cowrie shells
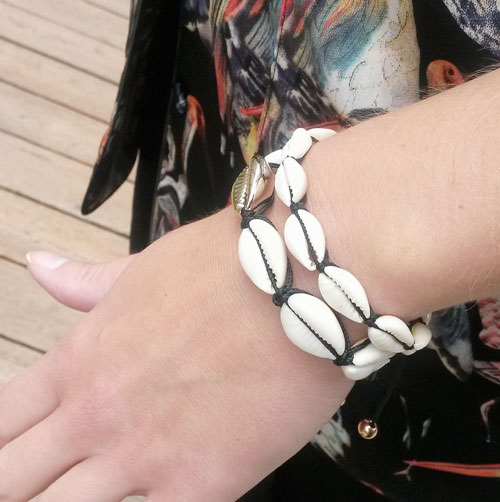
DIY macramé bracelet with cowrie shells and coconut beads
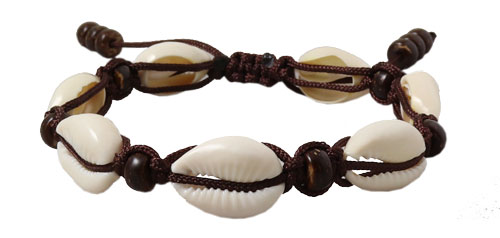
The bracelets shown above were made by using the popular knotting technique called macramé. Click here to read our DIY guide on macramé.
If you incorporate cowrie shells into your bracelet, the sliced ones are preferable because they are flat and come to lie smoothly on the skin.
You need the following DIY materials to make this bracelet:
- 7 pcs cowrie shells, sliced 16-18x12mm
- 12 pcs coconut beads, flat and round, 7×4mm
- approx. 1.5m nylon cord, 1.5-2mm, brown
- beading loom
- lighter
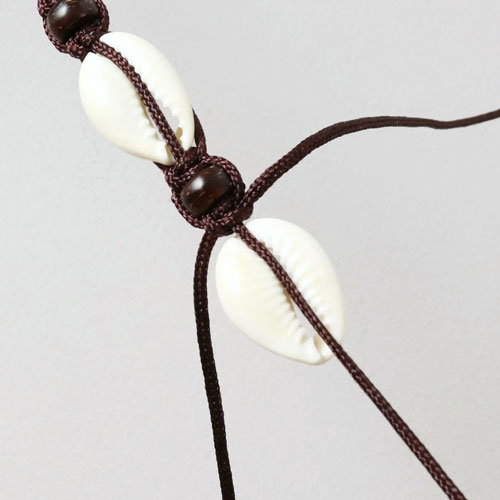
In this example we use a beading loom. (If you are in doubt about how to do that, please go to our DIY guide on macramé.
Tighten the cord in the middle. Now you can start the knotting.
Put the cowrie shell underneath the cord in the middle and press it into the shell, in order to make it stick.
As an extra precaution in order to prevent the shell from falling out, you can press the middle cord into the shell and then sling it around the shell one more time.
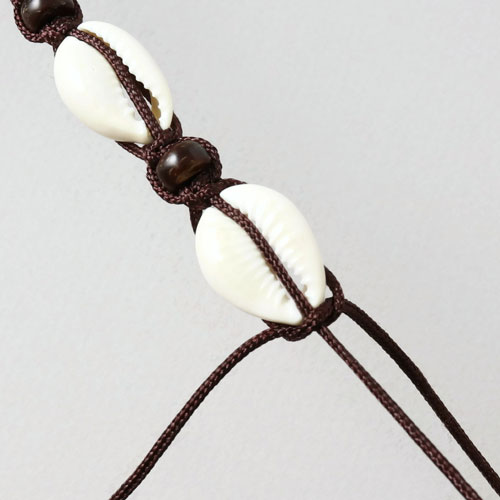
Tighten the cords carefully when you tie the next knot, so the two knotting cords slide underneath the shells.
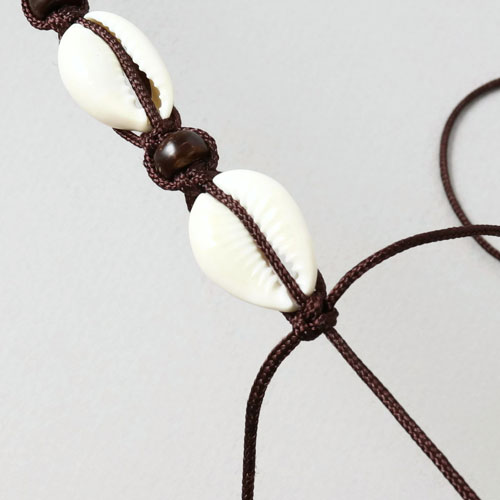
Continue with your knotting so the knots cannot open up again and the cowrie shells sit tightly within the cords. You can also cross the cords underneath the shells so they exchange places for the next knot.
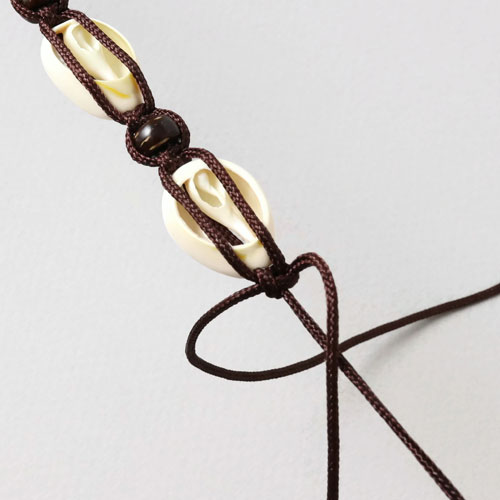
Now the cords lie parallel underneath the shells.
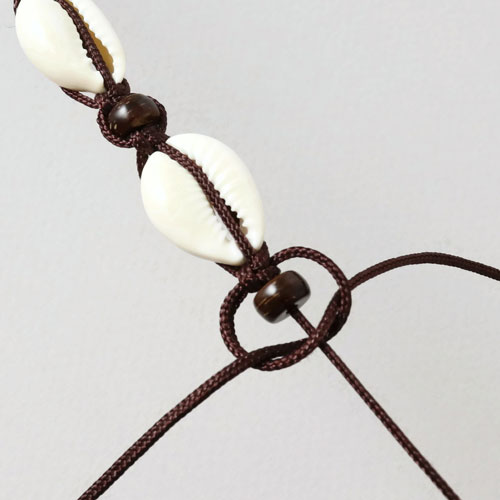
Next, you string a coconut bead onto the cord behind the last knot, then you continue knotting.
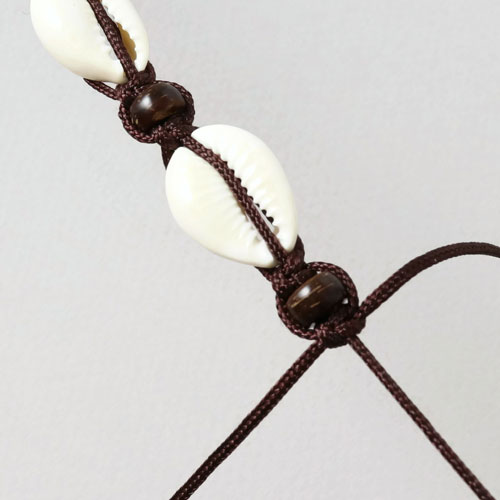
Carry on like this until the bracelet has reached the desired length.
You close the bracelet with a sliding macramé closure with three coconut beads on each end.
DIY macramé bracelet with golden cowrie shell
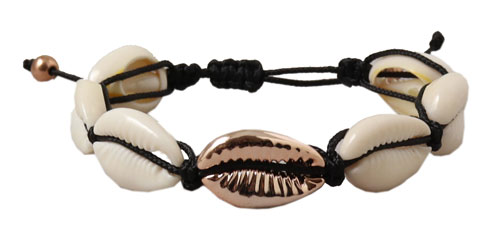
You need the following DIY materials to make this bracelet:
- 6 pcs cowrie shells, white, sliced, 16-18x12mm
- 1 pc cowrie shell, sliced, golden
- 2 pcs steel beads, gold plated, 6mm
- approx. 1.5m nylon cord, black, thickness 1.2mm
- beading loom
- lighter
For this example we used the classic macramé knotting technique once again. The procedure is the same as explained above.
DIY macramé bracelet with cowrie shells
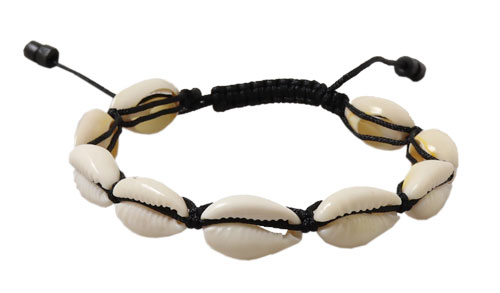
You need the following DIY materials to make this bracelet:
- 7 pcs cowrie shells, white, sliced, 13-15x10mm
- 4 pcs wooden beads, small black cylinders
- approx. 1.5m nylon cord 0.9mm, black
- beading loom
- lighter
For this example we used the classic macramé knotting technique once again. The procedure is the same as explained above.
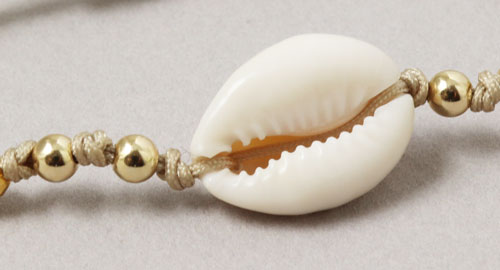
DIY bracelet with cowrie shells and stardust beads
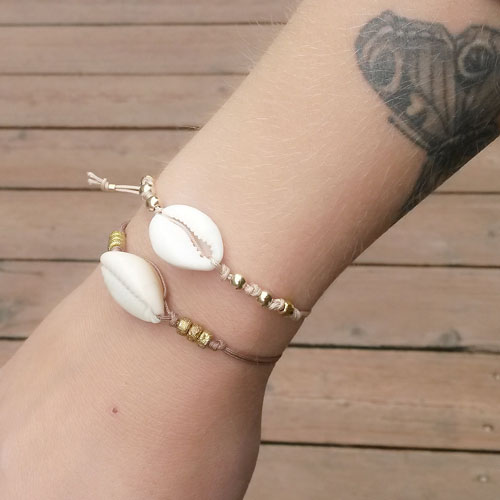
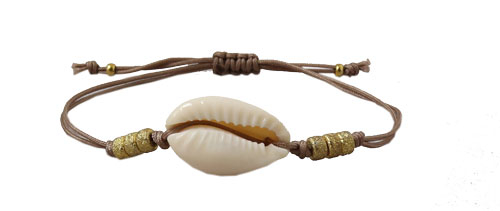
You need the following DIY materials to make this bracelet:
- 1 pc Cowrie shell, 20x12mm with a single hole at the end.
- 6 pcs startdust beads, round and flat, gilded brass
- 2 pcs crimp beads, gilded brass (only for decoration at the cord ends)
- approx. 1m nylon cord, khaki brown, 0.9mm
- beading loom
- lighter
For this bracelet we used a cowrie shell with a hole in the bottom. But you can also use a sliced cowrie shell which lies flat on the arm.
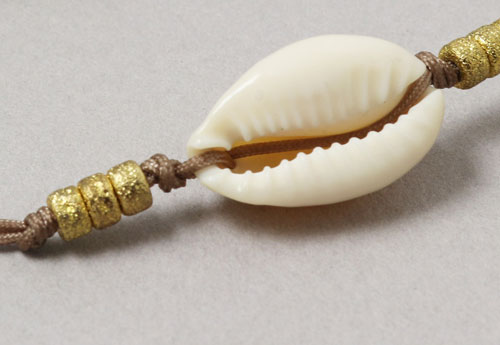
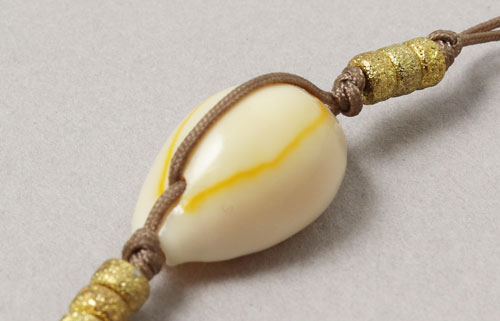
We want the shell to be fastened well, this is why you insert a cord into the shell and pull it out again through the hole. Then you pull a second string through the shell from behind and out again through the hole. Now you tie a knot with both cords on either end of the cowrie shell.
Next, you string 3 stardust beads on either side and tie a knot. You close the bracelet with a sliding macramé closure. Find out how to make one with our DIY macramé guide.
Finally, you string a crimp bead on each of the cords ends and tie a knot. It is easier to string the beads, if you melt the ends carefully and form needle points.
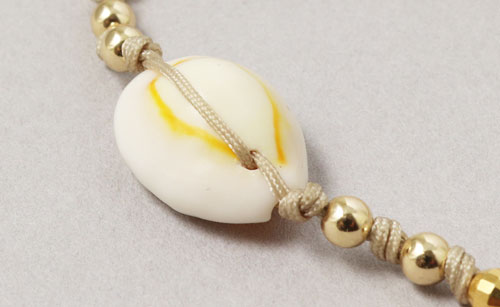
DIY bracelet with cowrie shell on nylon cord
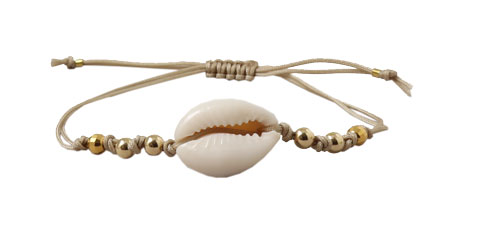
You need the following DIY materials to make this bracelet:
- 1 pc cowrie shell 20x12mm with a single hole
- 4 pcs gold-filled beads, round 4mm
- 2 pcs faceted beads, round, gilded sterling silver
- 2 pcs crimp beads, gilded sterling silver (only for decoration at the cord ends)
- approx. 1m nylon cord, light brown, 0,9mm
- beading loom
- lighter
For this bracelet example we tied knots in between the beads. Other than that, we made the bracelet in the same way as explained above.
DIY earrings with conch shells and gilded beads
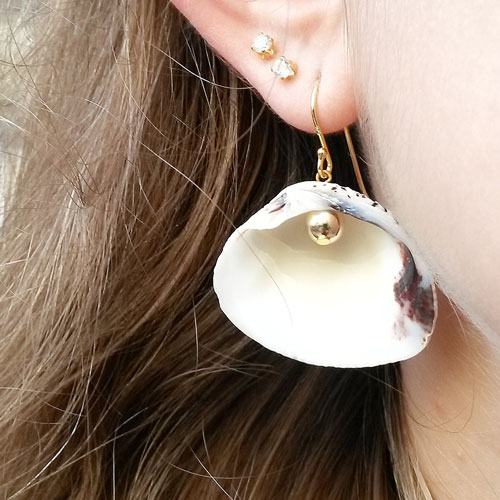
For this example we used gilded beads together with seashells.
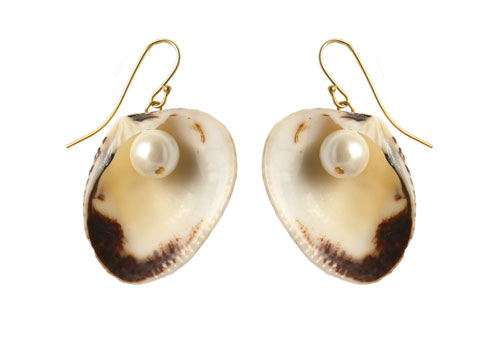
You need the following DIY materials to make these earrings:
- 1 pair of earwires with ball, gilded sterling silver
- 2 seashells
- 2 shell pearls, 8mm
(alternatively: 2 gilded beads, 6mm + 2 headpins with 2mm pad) - 2 headpins with 1.5mm pad, gilded sterling silver
- round-nose pliers
- chain-nose pliers
- flat-nose pliers
- side-cutter-pliers
(alternatively: jewellery pliers set)
First, you string the bead on the headpin, then you pull the headpin through the hole in the shell.
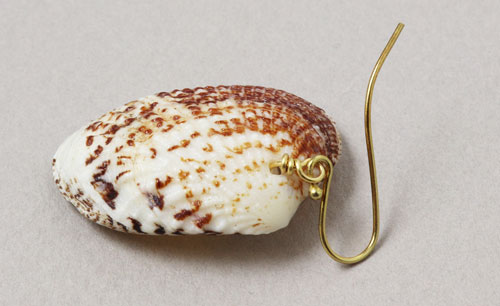
Next, you form a loop close to the shell’s upper side. (In our blog post on men’s necklaces we explain how to make a loop.)
Having done that, you bend the loop forward so the inside of the seashell will face forwards once it hangs on the earwire.
DIY hoops with conch shell horns
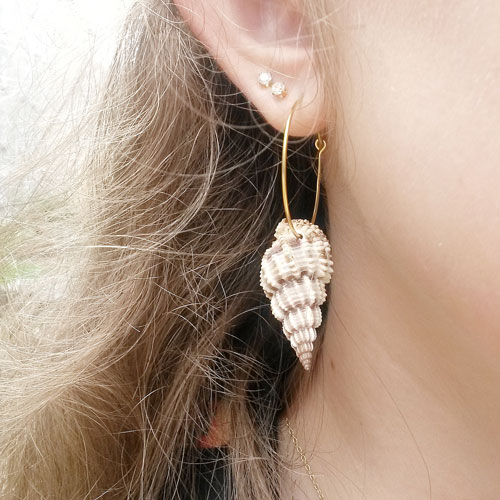
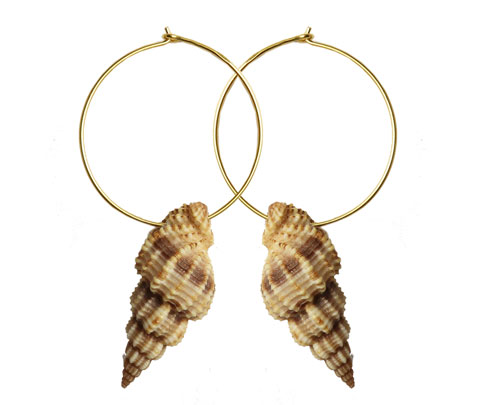
You need the following DIY materials to make these hoops:
Straighten the hoop’s hook carefully before you pull it through the hole in the conch shell. Once the conch shell hangs on the hoops, you bend the hook again into its original position.
DIY necklace with conch shell horn and Delica beads
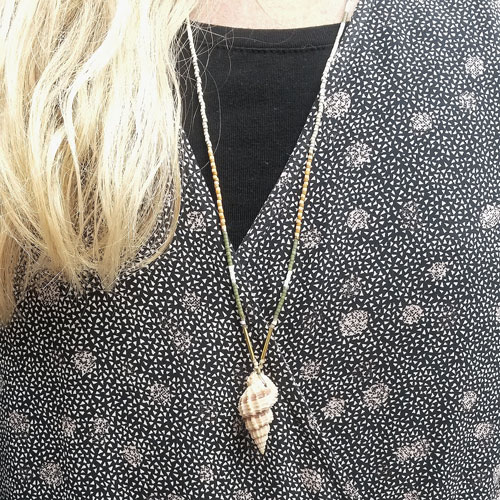

You need the following DIY materials to make this necklace:
- 1 conch shell horn
- approx. 1m nylon cord, khaki grey, 0.5mm
- 2 tube beads, gilded brass
- various Delica beads, size #11
- 1 crimp cover, 3mm, gilded sterling silver
- jewellery glue
- lighter
First you melt the two ends of the cord carefully and form needles. Then you pull them through the conch shell horn. Tie a knot or make a loop on either side.
Now you can string Delica beads in the colours and patterns you like. In this example we started with two additional gilded tube beads.
This necklace is 80cm long, that’s why you don’t need to attach a clasp. You simply pull the necklace over the head. Just tie a knot in the neck, apply a bit of jewellery glue and hide the knot with a crimp cover.
Have fun making and designing your own jewellery with seashells!
We will publicly show your name and comment on this website. Your email is to ensure that the author of this post can get back to you. We promise to keep your data safe and secure.