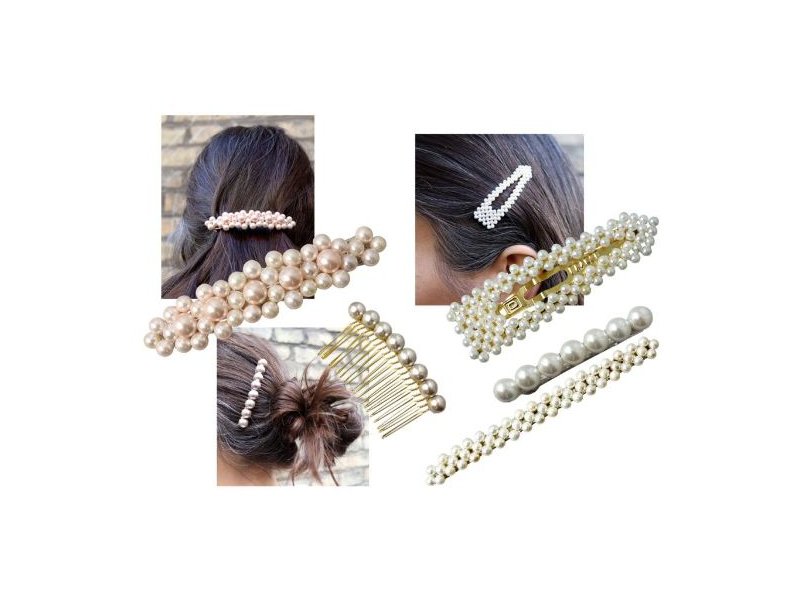
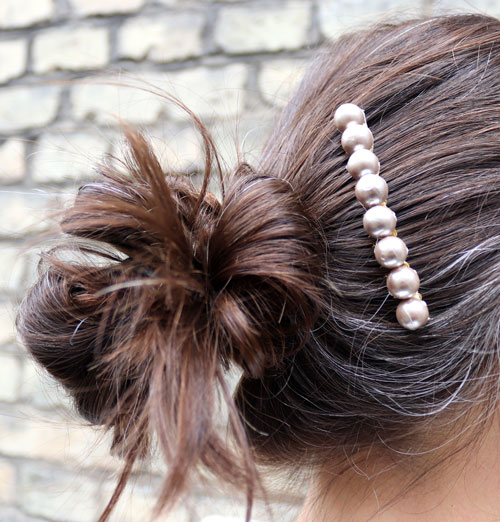
Hairslides and hair combs with shell pearls and baroque pearls.
Hair accessories like clips, combs and hairslides are in vogue. In this blog post you find step-by-step instructions on how to make your own hairslides with pearls.
We show you various models with different difficulty levels. Jump in at the deep end and try the difficult version or scoll down to the easier hair clips and combs.
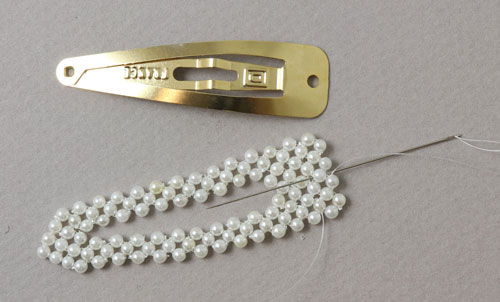
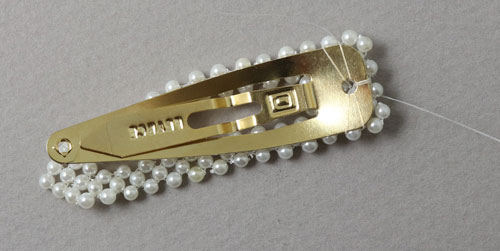
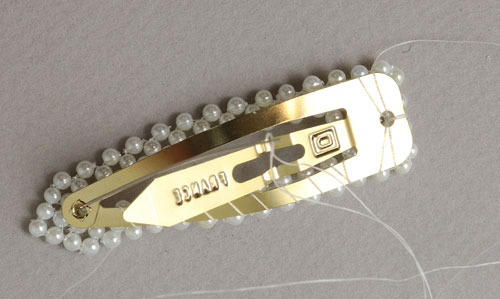
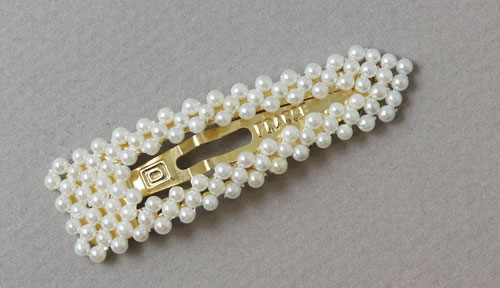
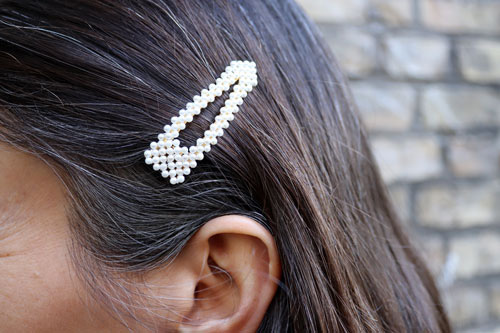
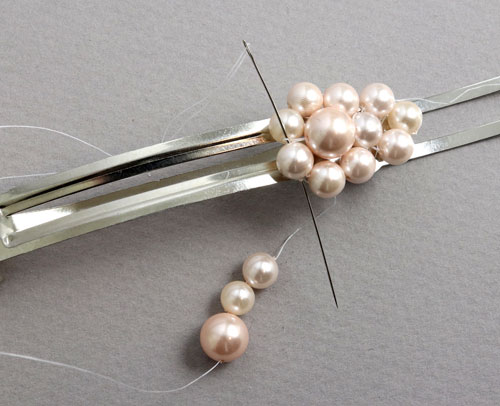
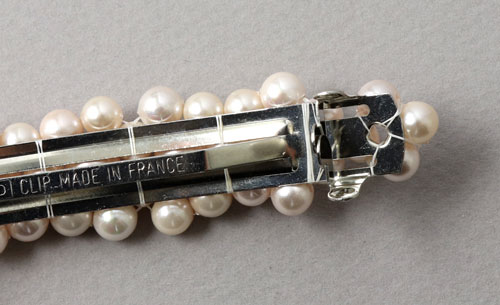
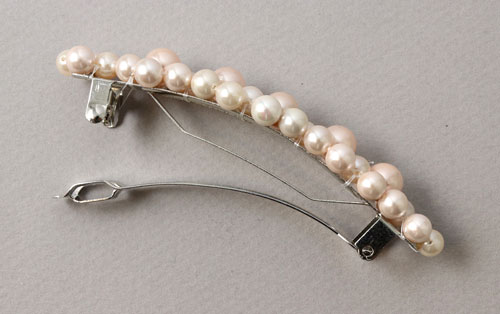
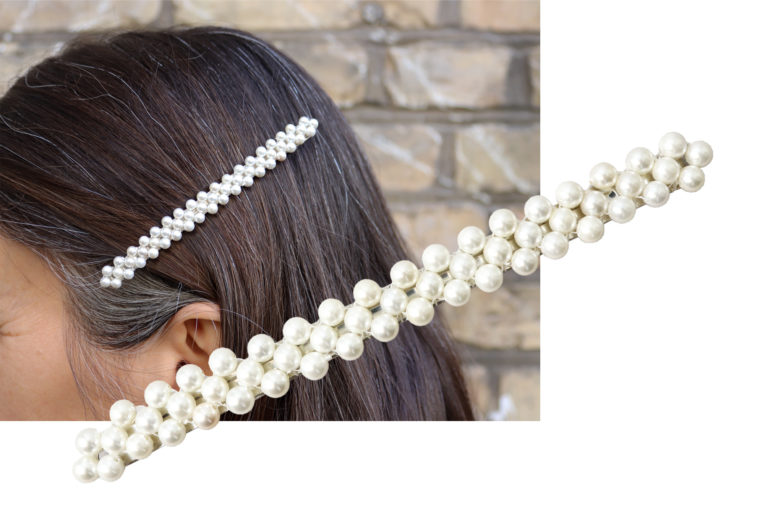
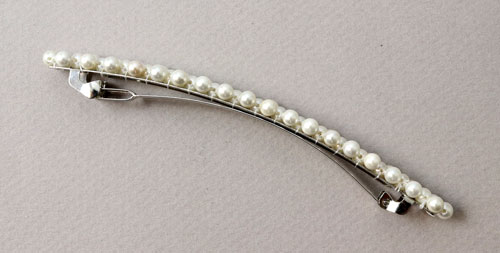
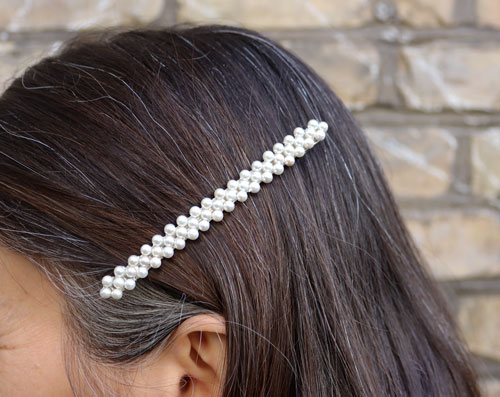
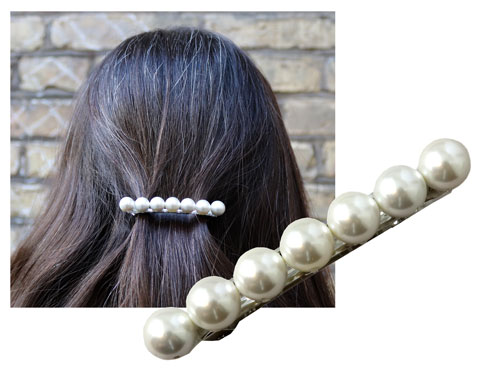
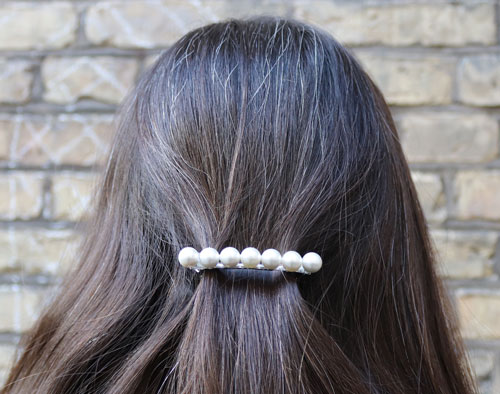
Hairslide with small shell pearls
This hairslide has been decorated with 2mm shellpearls to make an elegant version of the popular hair clips.
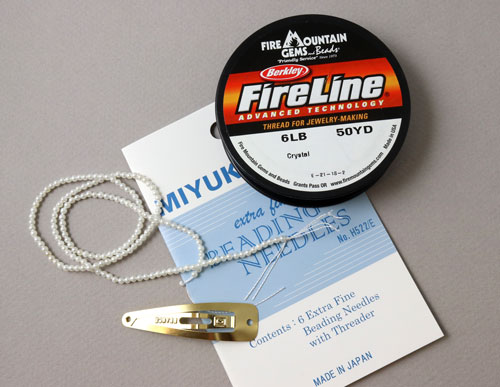
You need the following DIY materials to make this hairslide:
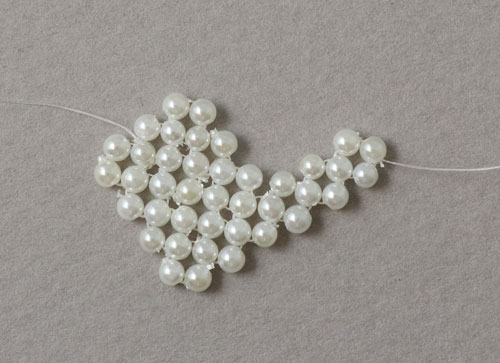
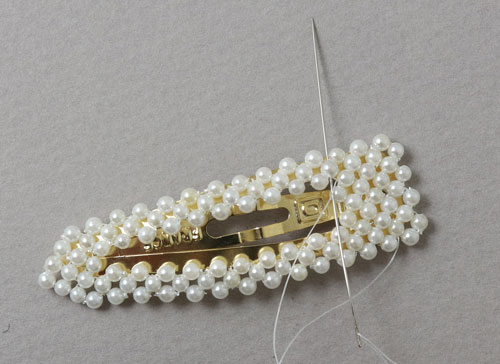
The decoration on this hair clip consists of small circles of pearls which are sewn together.
When you have to take a new thread, tie the threads together with a few knots and apply a bit of glue so they do not open up again.
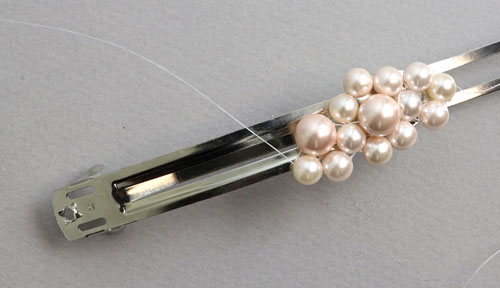
Further down in this blog post we show you a larger version of the same kind of hair clip. The procedure is the same.
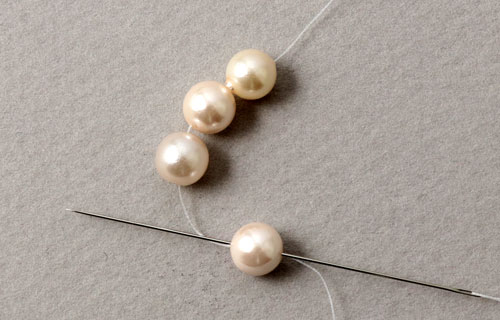
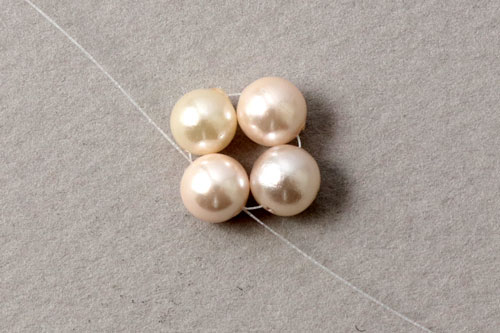
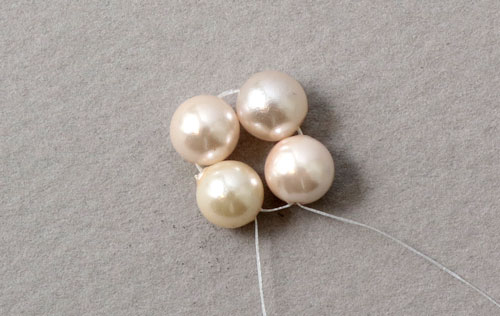
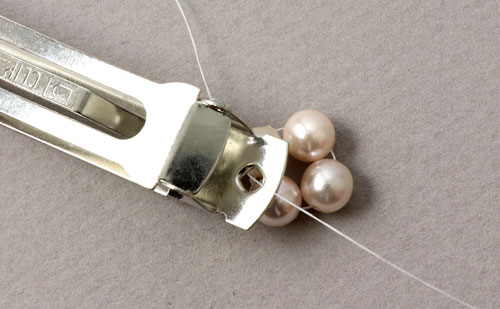
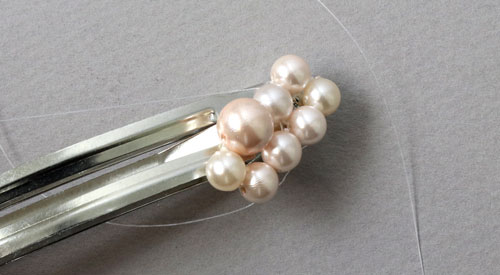
First, you thread approx. 2m of FireLine. String 4 pearls on the thread and sew through the first pearl in order to form a ring. You will have to take a new thead in between, but it is difficult to sew with a thread longer than 2m.
Tighten the thread so the pearls sit tightly together. Make sure to leave approx. 8cm of thread left over. Later it will be used to fasten the end with.
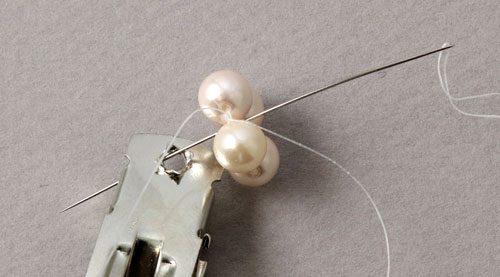
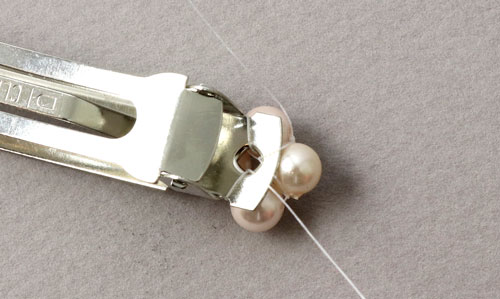
String 3 pearls and sew back through the pearl the thread is coming out of.
Tighten the thread. Now we have got 2 circles of pearls.
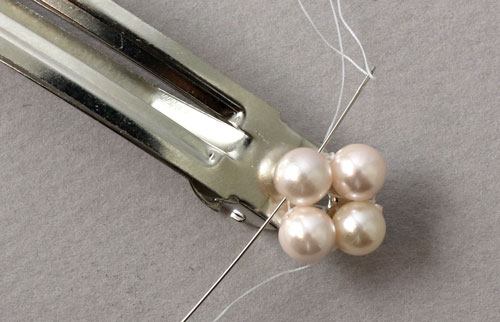
Sew through the adjecent pearl in the new circle.
Then you sew through the pearl next to that one. Now the thread comes out of the right pearl and you can proceed with the next circle.
Again you thread 3 pearls and sew through the pearl the thread is coming out of.
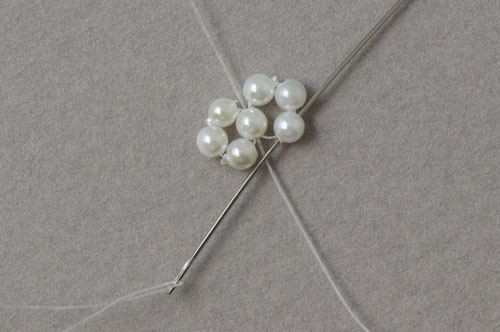
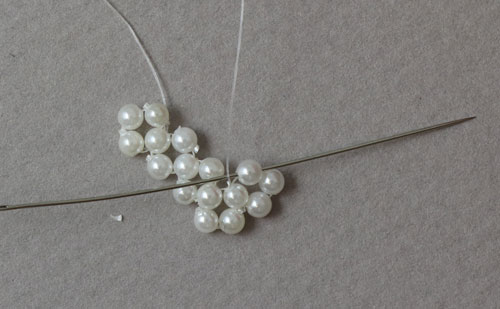
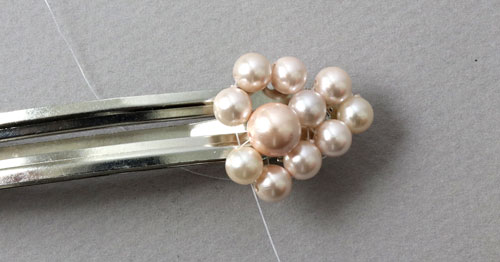
Tighten the thread. Now you have completed 3 circles.
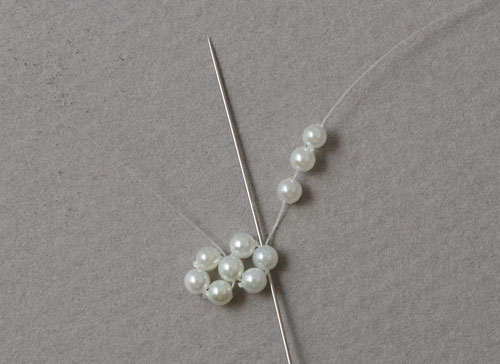
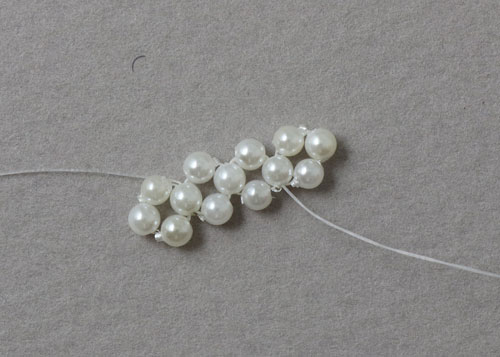
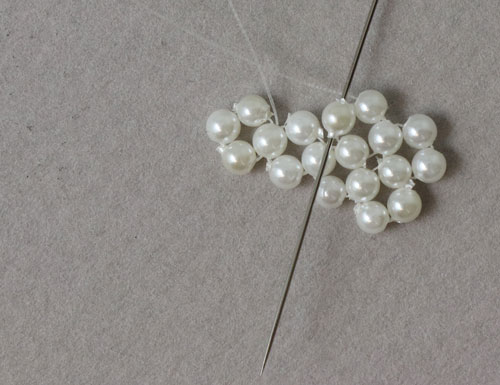
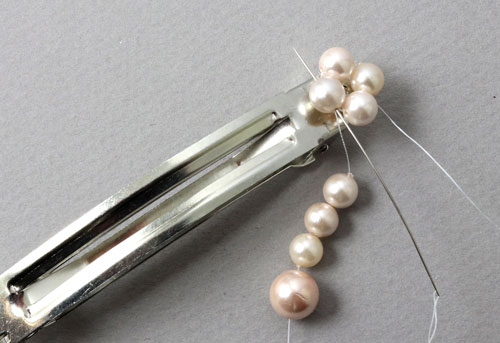
Again you sew through 2 pearls so the next circle can be made. Remember to sew into the same direction within the circles all the time. You start by sewing through the first pearl.
Then the second pearl.
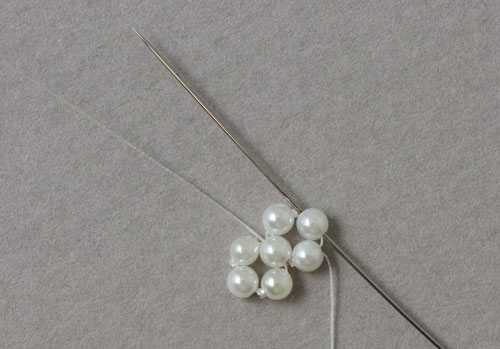
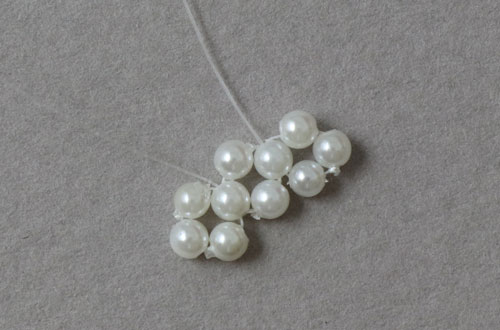
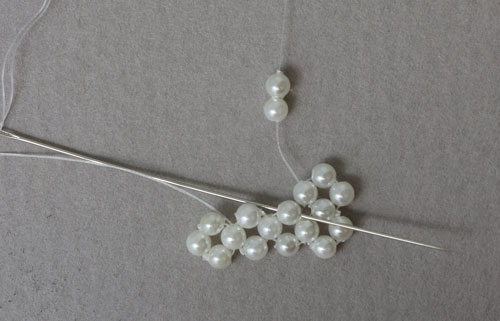
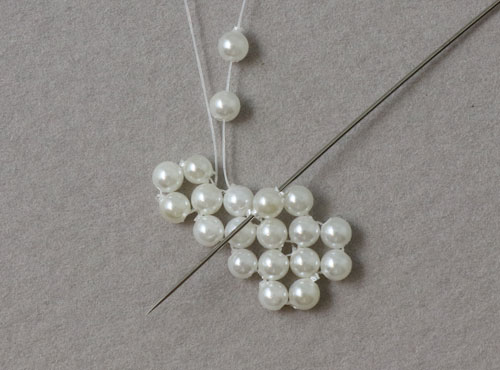
Again you string 3 pearls and sew through the pearl the thread is coming out of. Now you have completed 4 circles.
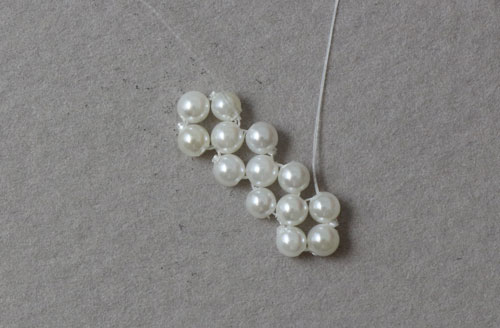
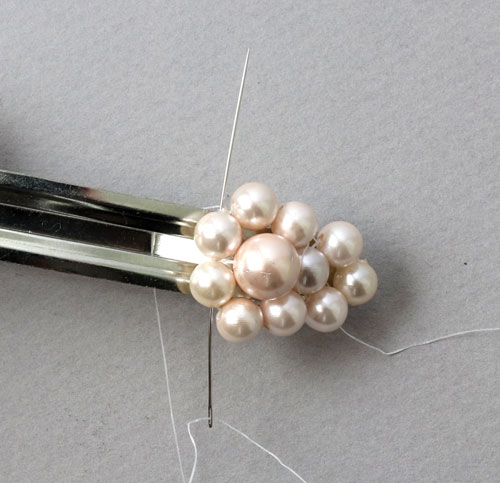
The wide part of the hairslide is done. Now the next row of 4 circles has to be added to the first. Sew through the adjacent pearl.
Sew through the pearl next to that one. Please note that you now work into the opposite direction.
Thread 3 pearls and sew through the pearl the thread is coming out of.
Tighten the thread. Now the first circle in the new row is done.
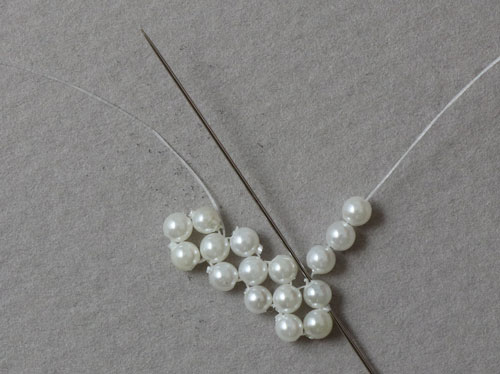
Continue by sewing through the next pearl in the circle.
String 2 pearls and sew back through the pearl shown in the picture ...
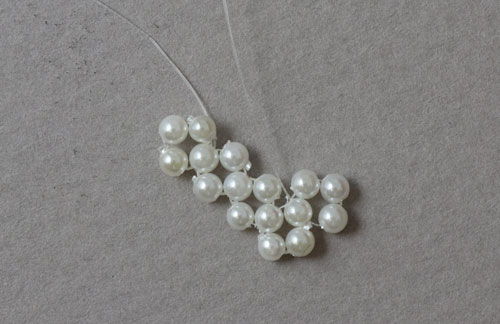
... and through the adjacent pearl, going through the circle.
And through one more pearl ...
... and one more pearl. You go through the circles you have already sewn until the thread comes out the right place and the next circle can be added.
Through one more pearl ... then you string 2 pearls and sew through the pearl in the previous circle.
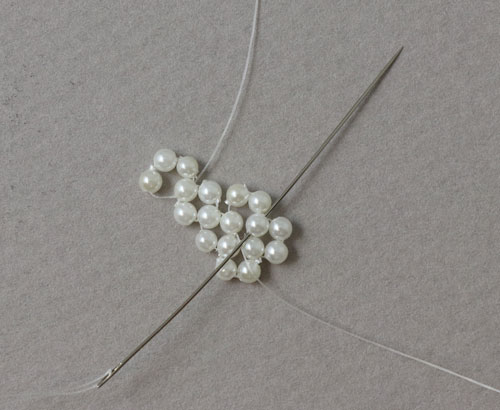
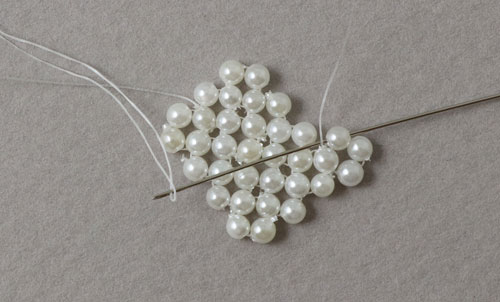
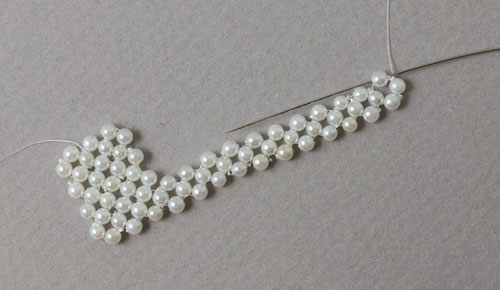
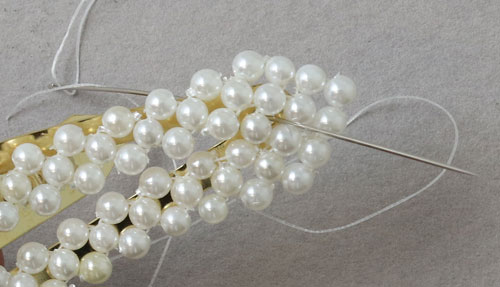
Continue adding circles this way. When you have made 3 rows consisting of 4 circles each, you sew the sides of the hair clip. Make sure the thread comes out of the right pearl as shown in the picture. If it comes out of another one, you simply sew through a couple of pearls until it comes out the right place. Then you string 3 pearls and sew through the pearl the thread comes out of.
Tighten the thread and sew through the adjacent pearl in the circle...
... and then through the pearl next to that one. Now the thread comes out of the right pearl and the next circle can be added.
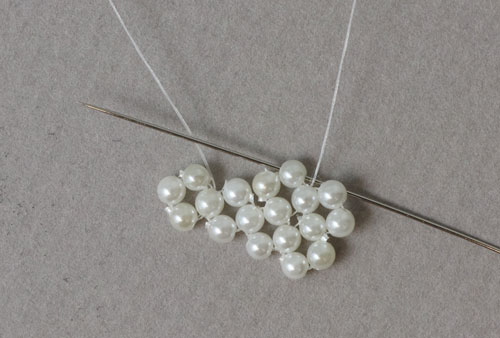
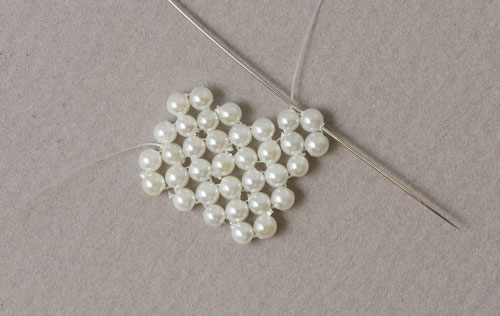
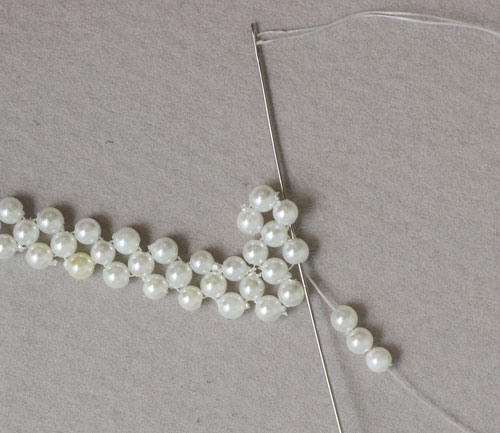
String 3 pearls and continue sewing circles in one long row.
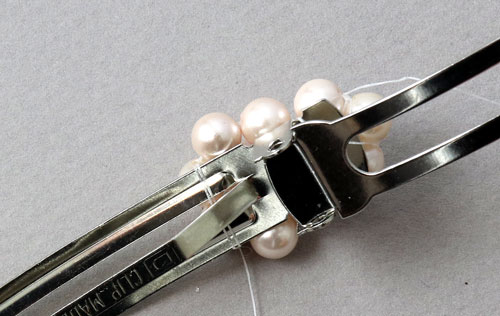
When you have finished 14 circles in one long row along the side of the hair clip, you sew through 1 pearl.
String 3 new pearls and sew through the pearl the thread is coming out of. Next, you sew 3 circles across the hairslide.
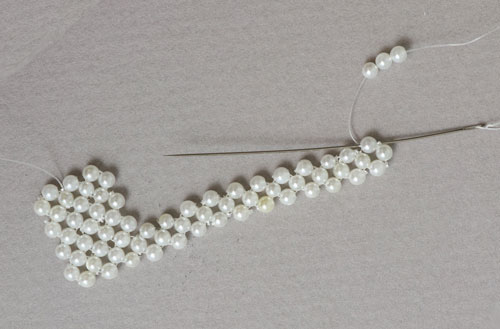
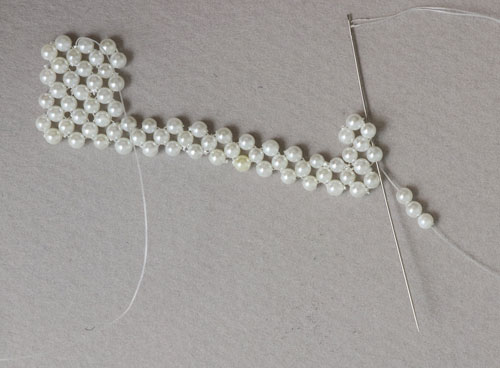
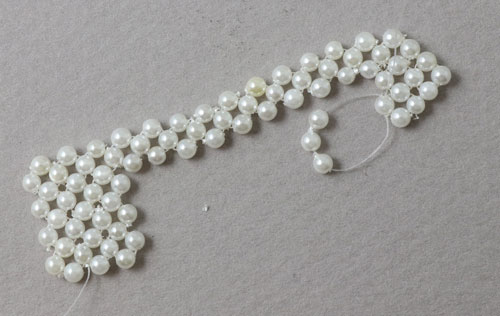
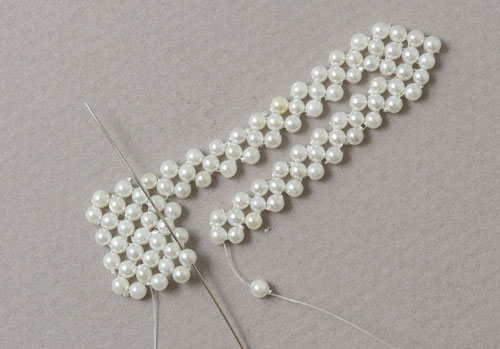
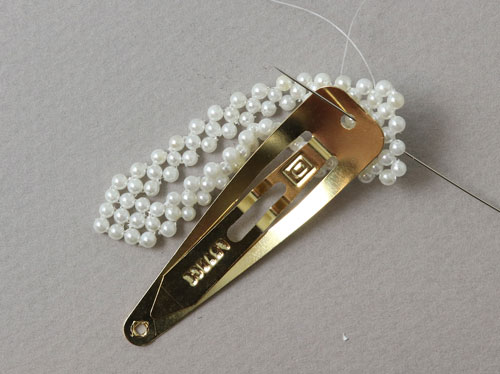
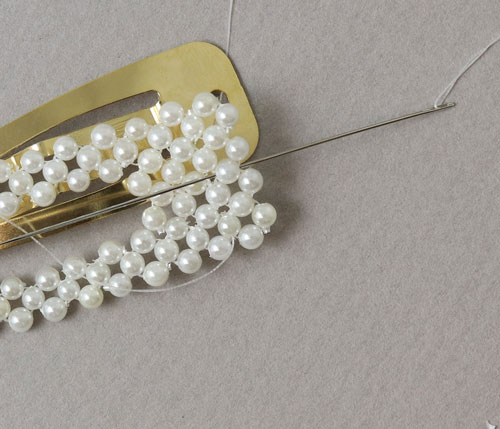
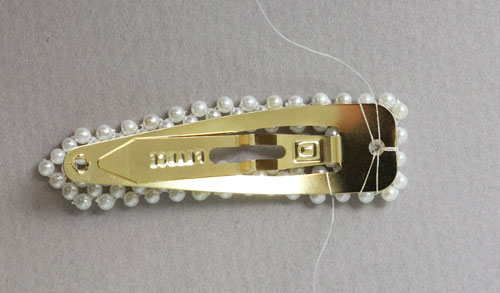
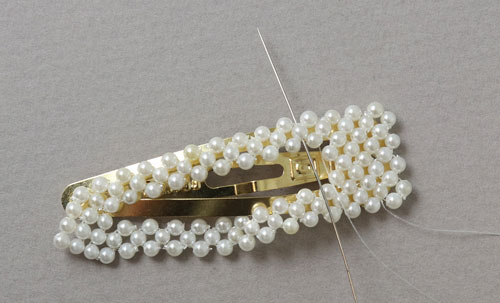
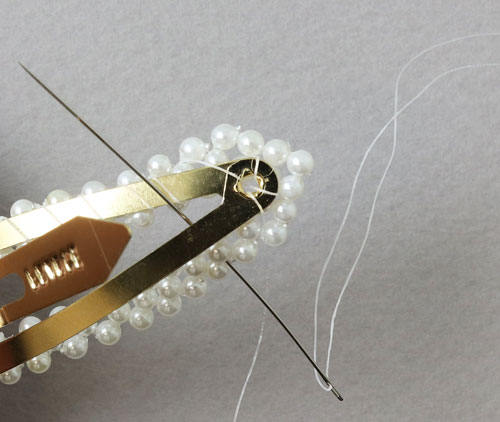
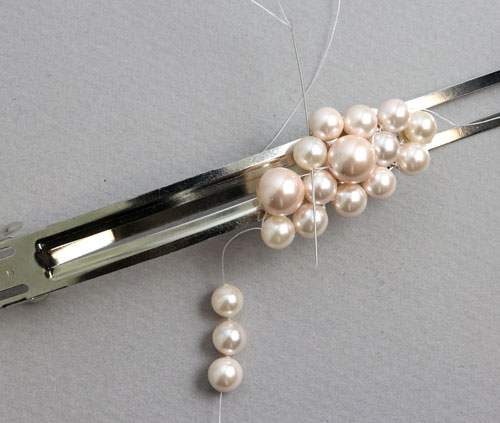
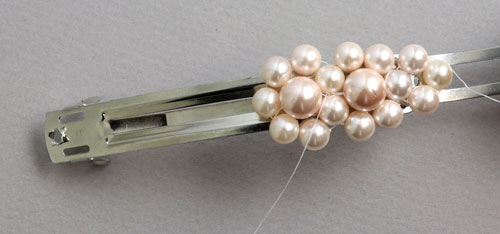
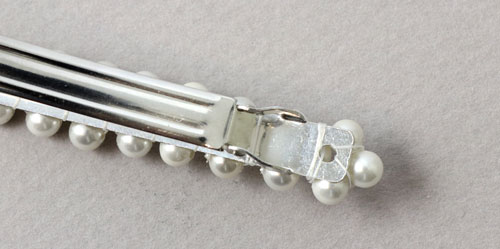
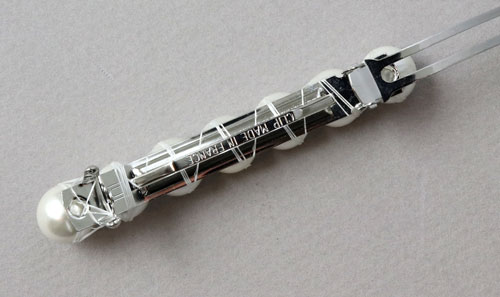
Now you are going to make the tip of the hairslide.Make sure the tread comes out of the pearl in the middle. String 3 pearls and sew through the pearls the thread is coming out of. Tighten the thread. Now the tip of the hair clip is done.Again you sew through the circles until the needle comes out of the pearl shown in the picture. String 3 pearls, sew back through pearl the thread is coming out of and tighten the thread.Continue sewing circles in one row for the other side of the hair clip. When 9 circles are finished, they have to be fastened to the wide end of the hairslide. By fastening it, you complete the 10. circle and reach the same amout of circles as on the other side. String 1 pearl and sew through the pearl shown in the picture.String 1 pearl. Then you sew through the last pearl in the long row of pearls. Tighten the thread. Now the pearls are sewn together in a way that matches the shape of the hairslide.Now the pearls have to be fastened to the hair clip. Sew through the pearls until the needle comes out of the pearl in the middle, as shown in the picture.Put the hairslide on top of the pearls and sew through the hole in the hairslide.Turn the hair clip and pearls so the pearls are on top and sew through the pearl in the middle again.Repeat this procedure one more time. Then you sew through the second pearl on the side of the hair clip, as shown in the picture.Sew back through the hole in the hairslide and repeat this procedure on the other side of the hair clip. Now the pearls are attached to the wide end of the clip.Sew through the pearls until the needle comes out of the pearl shown in the picture.Turn the hairslide. Sew around the egdes of the hairslide and through the same pearl again.Turn the hair clip. Sew through the pearl shown in the picture. Now you fasten the pearls along one side of the hair clip.Sew around the hairslide and through the same pearl again. Continue like that all the way around the clip, sew through a pearl, around the clip and back through the same pearl again.At the tip of the hairslide, you sew through the hole in the clip, through a pearl, around the clip and up through the hole again.
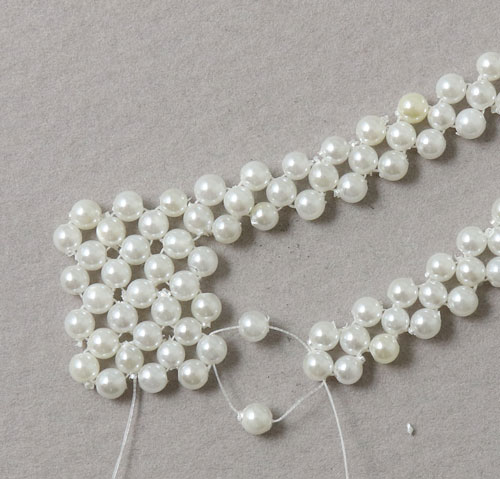
Sew through a pearl, up through the hole and through a pearl. Make sure that the pearls are fastened well at the tip. Now the other pearls have to be stiched down to the hairslide.
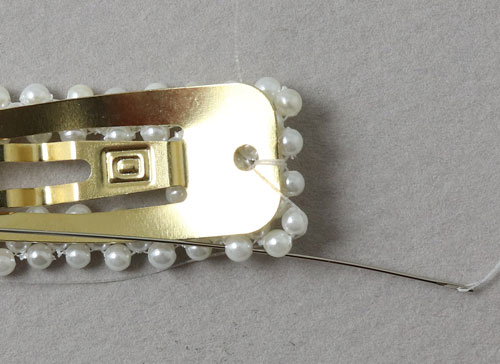
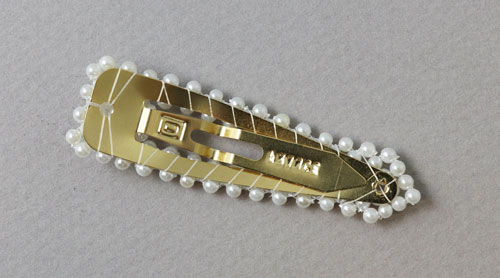
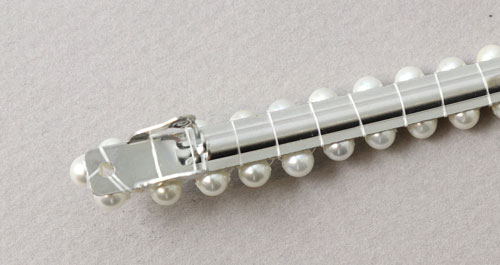
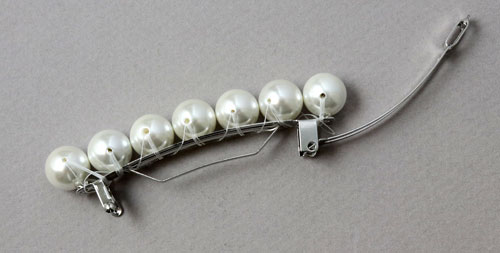
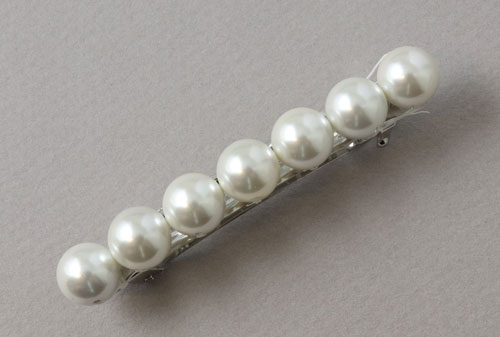
Sew all the way along the hairslide, in the same way as you did on the other side.Here you can see the back of hairslide where the thread is wound around. Finally, you tie the ends with knots and apply a bit of jewellery glue on the knots so they won't open up again.Your hairslide is done. This technique with circles can be used for the decoration of any kind of hair clip.
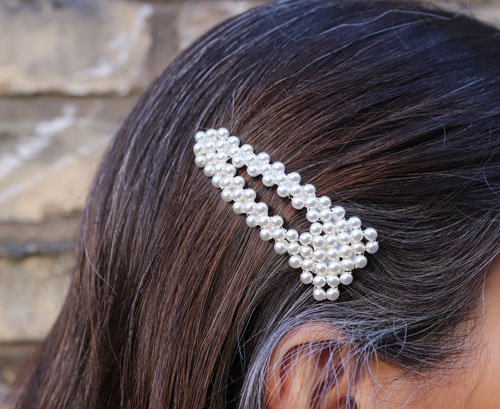
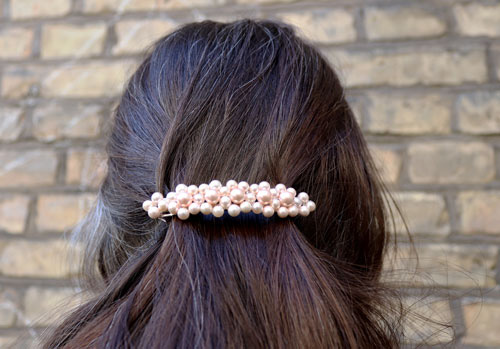
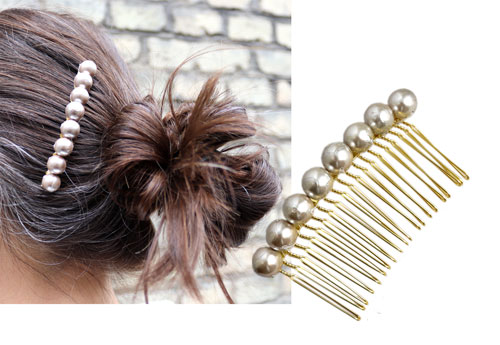
Hairslide with 4mm shell pearls
This is a larger version of the the same hair clip.
For this hairslide we have used the following materials:
When you have to take a new thread, tie a few knote and continue sewing. Apply a bit of gle on the knots so they won't open up again.
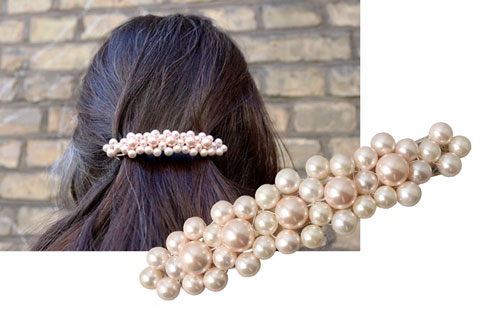
First, you string 4 pearls with a diameter of 6mm. Then you sew through the first pearl again in order to form a ring.Tighten the thread so the pearls sit tightly together.Tie a few knots, sew through the middle of the 4 pearls and then through the hole in the hairslide. In this tutorial the pearls are sewn together and fastened to the clip at the same time.Here you see the back of the clip where the thread comes out of the hole.Sew around the pearls, down through the hole in between the pearls and through the hole in the clip. Repeat this a couple of times until the pearls are fastened very well.Next, you sew through the pearls as shown in the picture.Now you string 3 pearls with a diameter of 6mm and 1 with a diameter of 8mm. After that, you sew through the same pearl the thread comes out of, as shown in the picture.Tighten the thread and position the pearls as shown in the picture.Now you string 3 pearls and sew through the pearl shown in the picture. Now you have made a ring with 7 small pearls around the 8mm pearl. If you don't think it is tight enough, sew one more round through the ring af pearls.Sew around the hairslide and back through the 2 pearls.Repeat this one more time so the pearls are fastened firmly to the clip.Now the flower needs to be assembled. String 2 pearls with a diameter of 6mm and 1 pearl with a diameter of 8mm. Sew around the hairslide and through the pearl shown in the picture.Tighten the thread and sew through two more pearls in the ring so the thread comes out from the pearl shown in the picture.String 3 pearls and sew through the pearl shown in the picture.Tighten the thread. The second flower is done. If the pearls don't sit tightly enough, sew one more round through the ring of pearls.Sew through 3 pearls, around the hair clip and through the pearl in the centre of the hairslide.Go on in the same way and assemble the next flower. Remember to tighten the thread around the hair clip while sewing the pearls together.Finally, you fasten the thread tightly with knots and apply a bit of glue so they won't open up again. The end of the thread is fastened in the same way, with knots and a bit of glue.Your hairslide is done. This one has a lovely pattern with large pearls surrounded by garlands of smaller ones.
Hairslide with circles pf pearls
This hairslide is decorated with one row of circles made of 4mm shell pearls.
For this hairslide we used the following materials:
Thie decoration of this hairslide consists of one row of circles. They are made in the same way as described in the first tutorial in this blog post. You start in the same way assembling pearls to circles in the same way. For this version you simply make one low row of circles which are sewn to the hairslide while sewing the pearls together. Read the first tutorial for step-by-step guidance.Here you see the back of the hairslide where the thread is wound around the hairslide once for every circle.You fasten the thread ends by tying knots. Apply a bit of glue so the knots won't open up again.
Your hairslide with pearls is done.
Hairslide with one row of shell pearls
This hairslide is decorated with one simple row of shellpearls which are wrapped around the hair clip on FireLine thread. This hair accessory is simple and easy to make.
For this hairslide we used the following materials:
This hairslide was decorated by winding beading thread around it. You string one pearl at a time and wind the thread twice ot three times around the hairslide so the the pearls are fastened well.
Here you see the hairslide from the side. Make sure you wind around the hairslide and through the pearls several times in order to fasten the pearls very well. For all these hair clips we have used FireLine which is a strong and solid thread. Other kinds of beading thread kan possibly also be used.
Finally, you tie a few knots and apply jewellery glue on them.
This is how the finished hairslide looks.A simple and elegant hairslide.
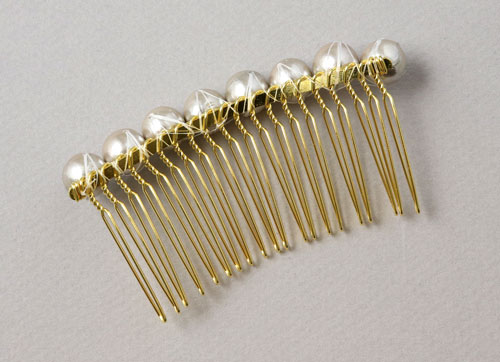
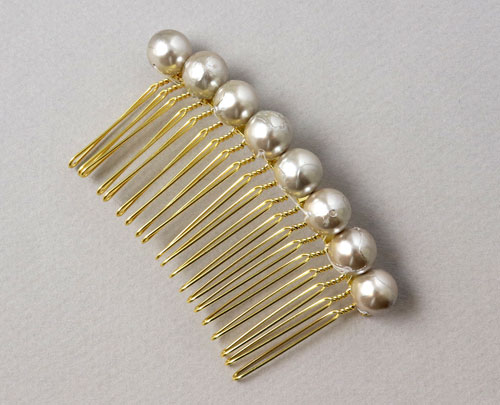
Hair comb with baroque freshwater pearls
Hair comb with silver-grey baroque freshwater pearls
For this hair comb you need the following materials:
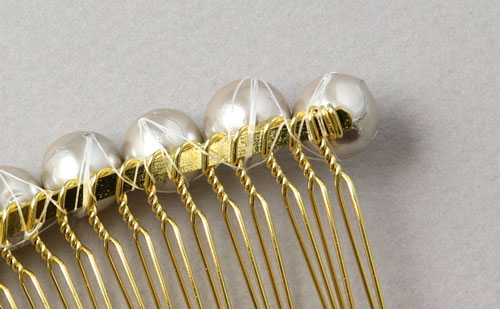
The baroque pearls are fastened to the hair comb one by one, for each pearl one the hair comb the thread is wound around the comb 3-4 times.The first pearl is tied to the comb with a few knots and the thread is wound around the comb and pulled through the pearl several times until it fastened well and sits tightly on the comb.
The following pearls are fastened one by one and the thread is pulled around the hair comb and through the pearl until it sits firmly and tightly. Continue like that until the edge of the hair comb is studded with pearls. Fasten the thread by tying a few knots. Finally, you can apply a bit of jewellery glue on the knots.You hair comb is done and a row of silver-grey baroque pearls keeps you hait beautifully in place.
We will publicly show your name and comment on this website. Your email is to ensure that the author of this post can get back to you. We promise to keep your data safe and secure.


Response
We will publicly show your name and comment on this website. Your email is to ensure that the author of this post can get back to you. We promise to keep your data safe and secure.