Many people ask us how to best make a pearl necklace; which cord is the right one and how to mount a clasp, but the answer depends on many different variables.
For “soft” beads such as fresh water pearls, wooden beads, as well as small delicate beads, silk beading thread works best, but for stone and glass beads, it’s a good idea to use Tigertail beading wire, which is a strong nylon coated steel wire, which can take a lot of rubbing against the sharp edges found inside such beads. Beading wire is also easy to mount due to its sturdiness and the fact that it doesn’t fray easily. The simplest way to mount a clasp onto a pearl necklace with beading wire, is with the nifty screw-tite crimp ends. The benefit of using this method of closing is first and foremost its simplicity and sturdiness. It also makes it possible to open and close the cord ends at will, which is relevant if you wish to make the necklace (or bracelet) longer or shorter. A noteworthy disadvantage when using wire is that it will never be as soft as silk thread, and that it isn’t very mallable which can lead to the necklace breaking when folded if the beads are too tightly packed onto the wire.
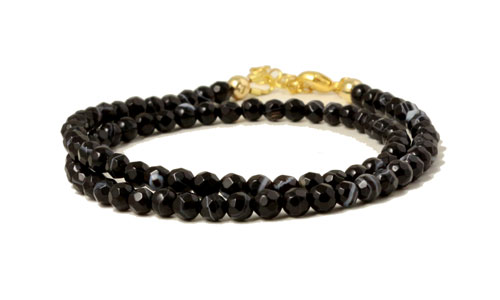
If you choose to use wire with your beads, you can make a very nice closing using screw-tite crimp beads. Smyks will now show you how to finish off a necklace or a bracelet using this method.
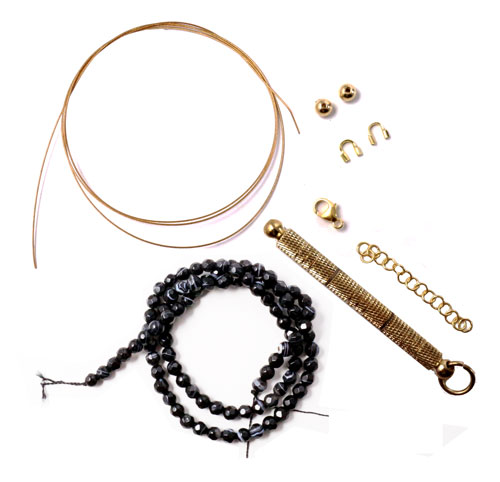
You’ll need the following materials:
1pc. cobber coloured 0.38 Tigertail beading wire, approx. 50cm.
1pc. strand of beads, we have used black 4mm agate beads, approx. 36cm.
1pc. screwdriver for screw-tite cord ends
2pcs. 4mm round gilded brass screw-tite crimp cord ends
2pcs.4 x 4mm gilded brass wire protector
1pc. 9mm gilded Sterling silver lobster claw clasp
1pc. gilded Sterling silver cable chain, approx. 3 – 4cm.

This kind of screwdriver comes with 10 extra crimps and 6 extra screw-tite screws. The screwdriver can be disassembled into 3 pieces. You find the screwdriver itself in the middle part, and the extra screws and crimps in the back part.
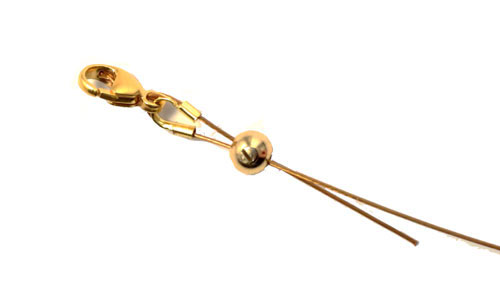
Start out by carefully unscrewing the screw on the crimp bead, only as much as to allow the wire inside the crimp bead twice. Feed the wire through the crimp bead, then through the protector, and lastly back through the bead again. You can choose to attach your lobster claw clasp now, as shown above, or you can mount it later with a jumpring.
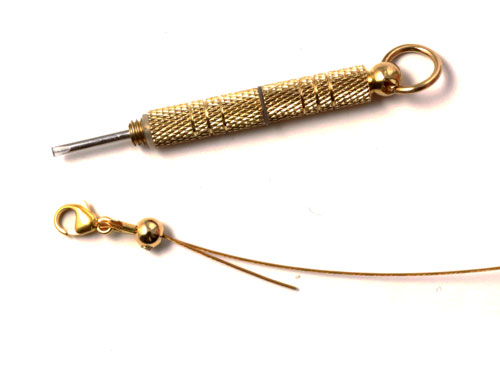
Carefully pull at the wire to make sure the protector and the crimp bead touch. Then tighten the screw with the screwdriver to secure the wire in place.
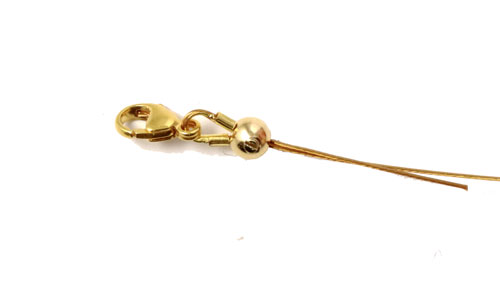
This is what it should look like when the pieces are assembled and the screw is tightened.
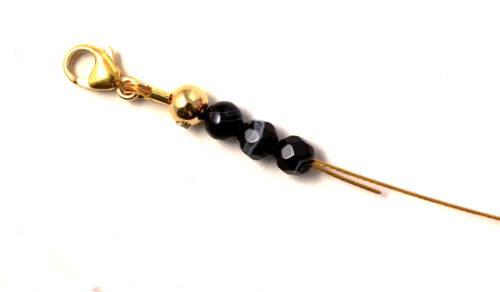
You can now start adding beads to the wire. Let a little bit of the wire pass through the beads twice, this strengthens the necklace and makes it easy to make the neklace longer. Add as many beads as you want – we have used approx. 37cm for a double wrap bracelet for a standard woman’s wrist.
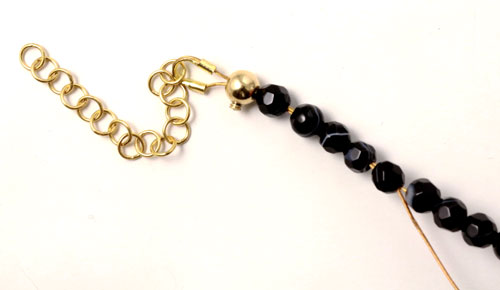
Finish off your bracelet the same way as when you started. Feed the wire through the screw-tite crimp bead, through the protector and back through the crimp bead. We have mounted the cable chain now, but you can attach it later with a jumpring. Lastly feed the wire back through 5-6 beads.
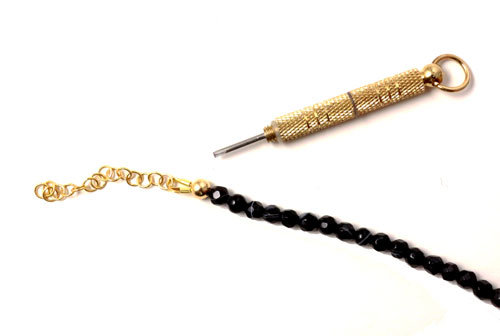
DIY onyx necklace tutorial gold gilded silver screw tite clasp closing chain lobster claw clasp
Pull at the remaining wire peeking out after having fed it back through 5-6 beads, tightening the wire and making sure that the ends are not with too much excess space. Then tighten the screw and cut off the remaining bit of wire..
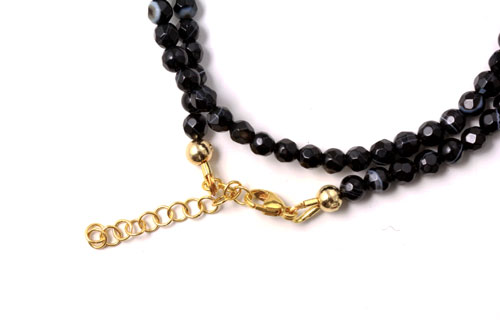
Your closing is now done. The little bit of cable chain makes the bracelet adjustable. If you do not wish to adjust the length, you can leave out the cable chain and close the lobster claw clasp directly onto the wire protector.

Your bracelet is finished, enjoy.
See also our other blog entries using similar methods:
Have any questions? Feel free to comment below.

We will publicly show your name and comment on this website. Your email is to ensure that the author of this post can get back to you. We promise to keep your data safe and secure.