Create Your Own Christmas Decorations with Wooden Beads
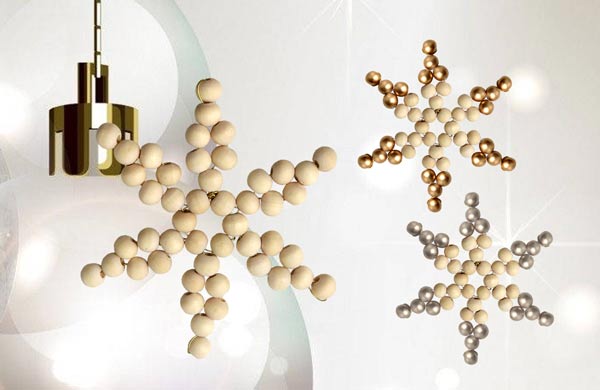
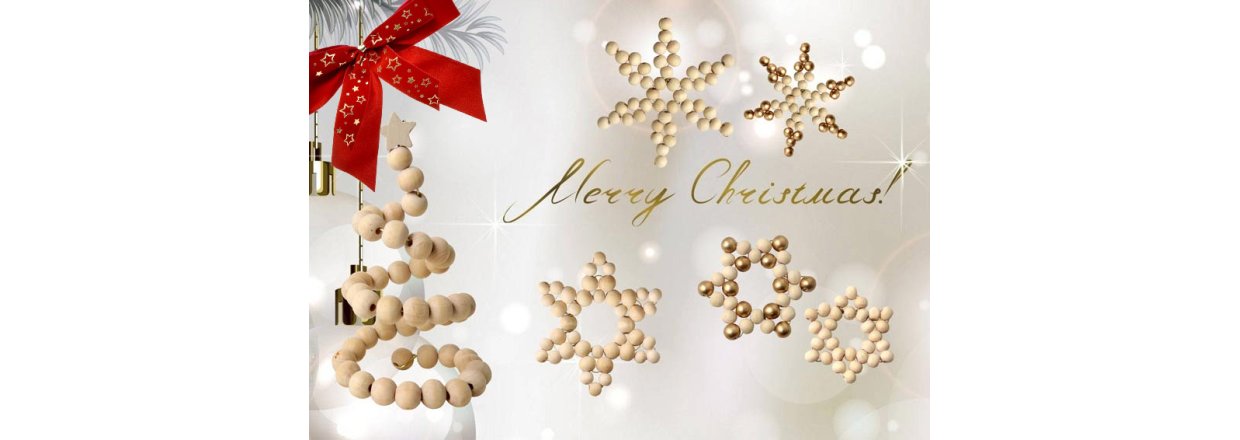
Make your own Christmas decorations with wooden beads and create a unique and personal holiday atmosphere in your home. Here, we offer inspiration and guidance on how to craft beautiful stars, snowflakes, and Christmas trees with simple materials and a bit of creativity.
These handmade decorations can be used in many ways. Hang your beautiful creations on the Christmas tree as part of your festive decor, place them in the window to spread coziness both indoors and out, or use them as a personal touch for gift wrapping that will delight the recipient.
Experiment with different types of beads – wooden beads, glass beads, or plastic beads – to create the exact look you desire. Combine colors, sizes, and shapes to design decorations that match your style or Christmas theme. The possibilities are endless, and only your imagination sets the limits.
All the materials used in this blog post are gathered in a practical jewelry-making kit. The kit includes everything you need to start your creative projects, so you can easily make your own Christmas decorations. Whether you're a beginner or experienced in crafting, this is a fun and cozy activity for both children and adults. Make it a family activity or enjoy a relaxing moment alone – either way, you'll end up with decorations filled with personality and love.
Christmas decoration with wooden beads - golden
Christmas decoration with wooden beads - silver
Click here for other blog posts on Christmas decoration:
DIY Christmas Crytals and
DIY Stars with Delica Beads
Star


Thead 12 beads on the wire. For our example, we used approx. 40 cm wire, 0.5mm, gilded copper and beads with a diameter of 8mm.

Shape a circle and wind the wire ends arount each other in order to close the circle. The end of the wire is approx. 5cm long.

Thread 3 beads on the wire. Skip 1 bead and pull the wire through the next one. Then you tighten the wire. You can use chain-nose pliers or flat-nose pliers for that.

Again you thread 3 beads ... skip 1 bead ... and pull the wire through the next bead.

Tighten the wire. Now the first 2 points of the star are done.

Continue like this ... threading 3 beads for every new point.

Wind the wire around the inner wire a few times. Now both wire ends are secured.

Cut off the excess wire. The star is finished. Now you can pull a ribbon through one of the outer beads to round it off.
Snow Flake

Thread 6 beads on the wire. For our example, we used approx. 60cm wire, 0.5 mm, gilded copper and beads with a diameter of 6mm.

Shape a circle and wind the wire ends around each other in order to close the circle. The wire end is approx. 5cm long.

Cut off the wire end.
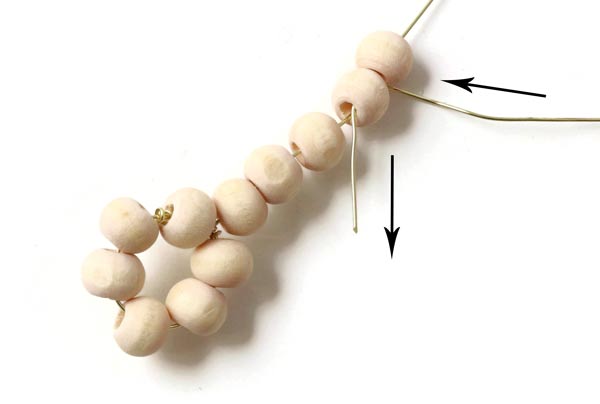
Thread 5 beads ... and pull the wire through the bead next to the last.
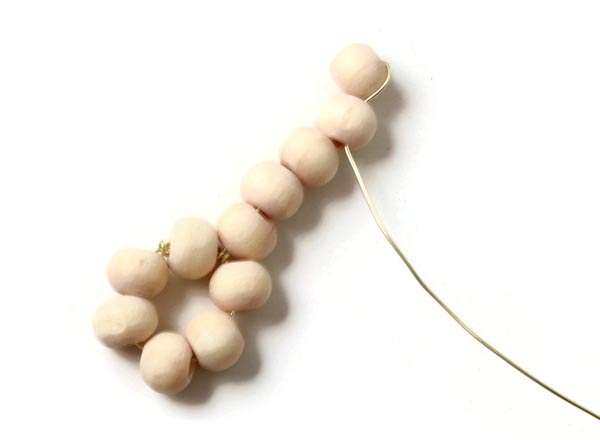
Tighten the wire.
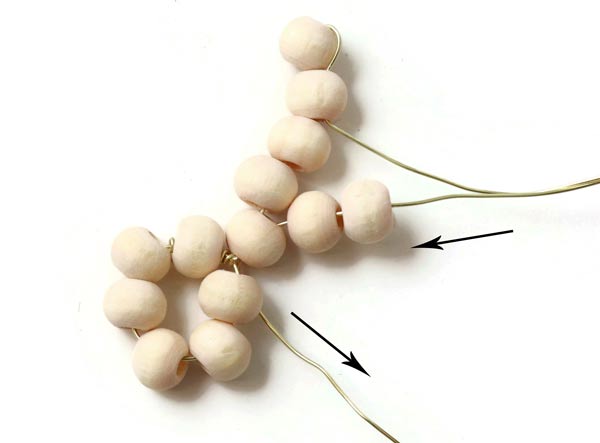
Thread 2 beads ... and pull the wire through the first one of the 5 beads.
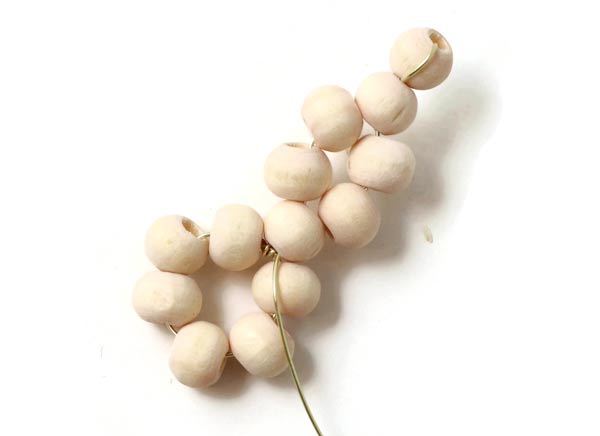
Tighten the wire.
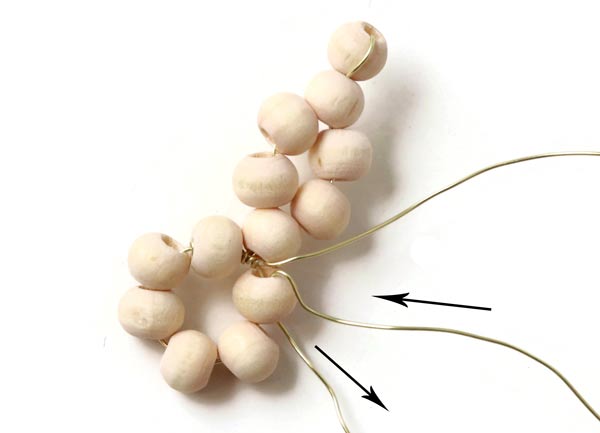
Now you pull the wire through the bead right beside it, which is a bead in the inner ring.
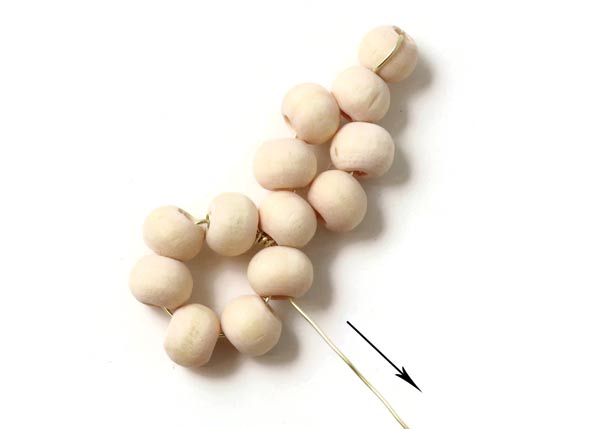
Tighten the thread. Now you make the next point of the snow flake in the same way.
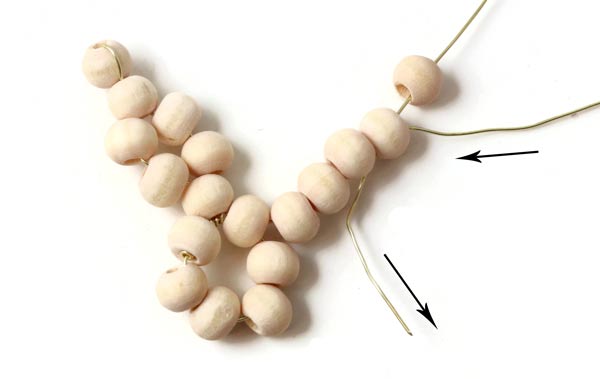
Again you thread 5 beads ... and pull the wire through the bead next to the last.
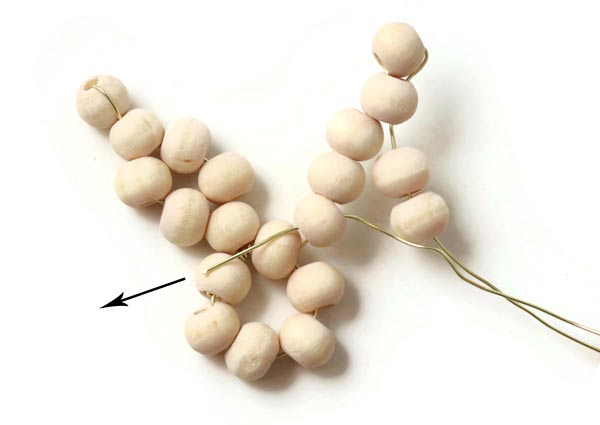
Then you thread 2 beads again ... and pull the wire through the first one of the 5 beads.
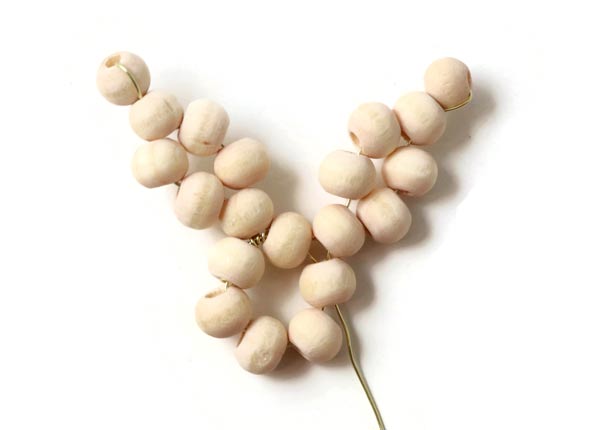
Tighten the thread.
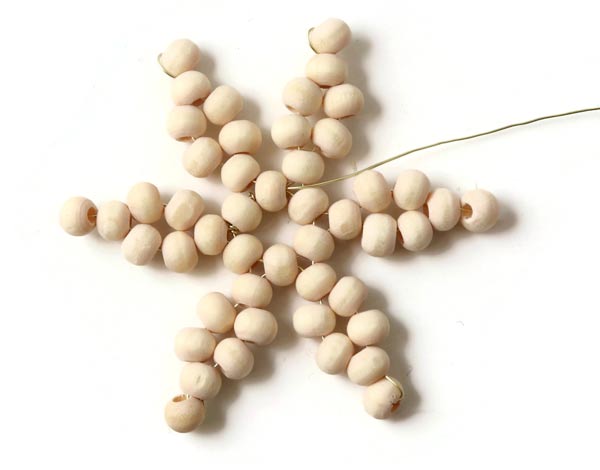
Continue like that all the way around the inner circle. Once you are done, the snow flake will have 6 points.
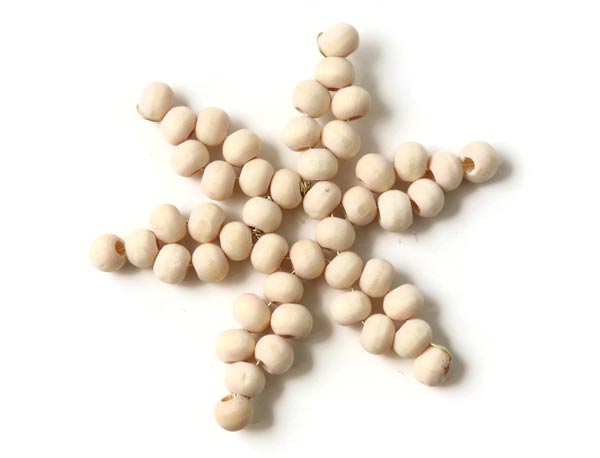
Wind the wire around the wire in the inner circle a few times and cut off the excess length. The snow flake is done. Now you can pull a ribbon through one of the outer beads.
Double Star

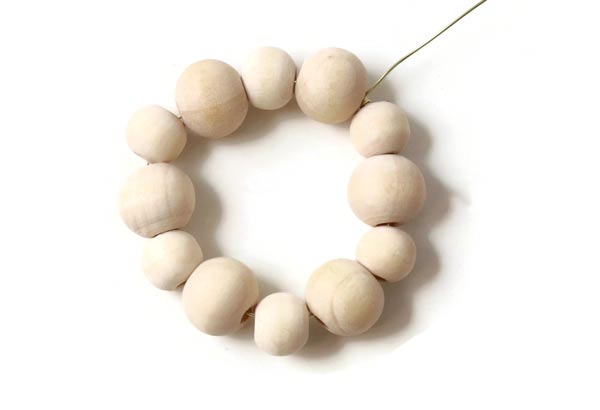
For this star, we used beads in two different sizes - 6mm and 8mm. (All sizes can be used)
Thread 12 beads on the wire: 1 large followed by a small one and so on. We used 80cm wire, 0.5 mm, gilded copper.
Shape a circle and wind the wire ends around each other in order to close the circle. Cutt off the excess wire, approx. 5cm.
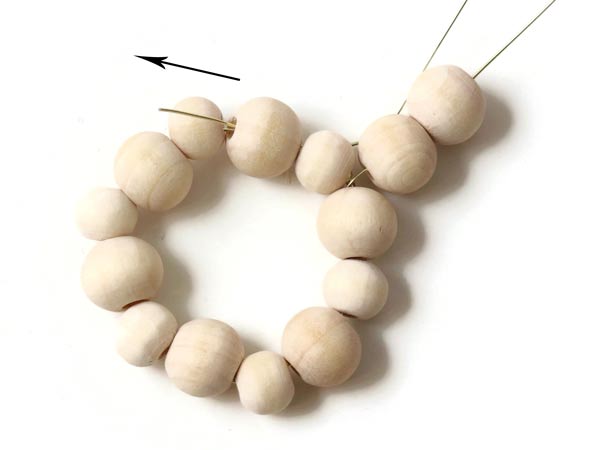
Thread 2 large beads. Skip one little bead and pull the wire through the large bead next to it.
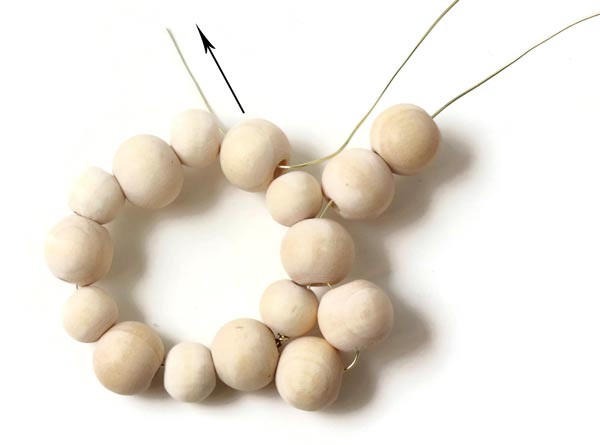
Tighten the wire. Thread again 2 large beads ... skip one little bead ... and pull the wire through the large bead next to it.
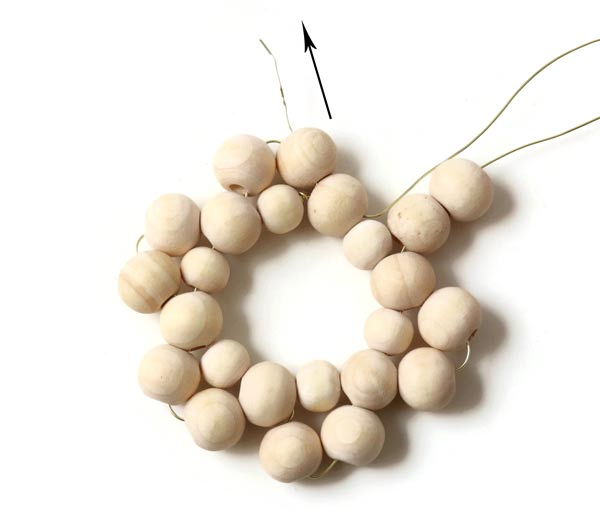
Continue like that ... thread 2 large beads ... skip the little bead and pull the wire through the large bead next to it ... all around the inner circle. When you thread the last 2 large beads, you pull the wire through 2 large beads, so the wire comes out of a bead in the outer row (the first of the 2 first large beads).
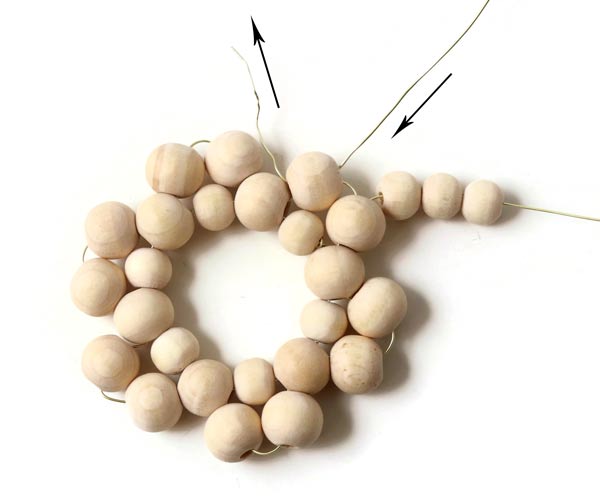
Tighten the wire. Thread 3 small beads ... and pull the wire through the next large bead.
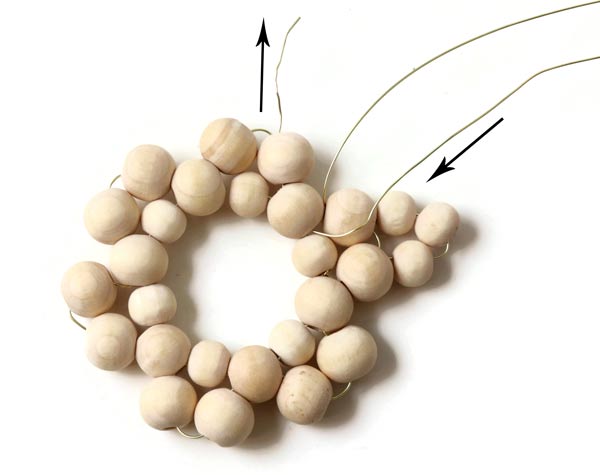
Tighten the thread. Pull the wire through the next 2 large beads, so it comes out of a bead in the outer row again.
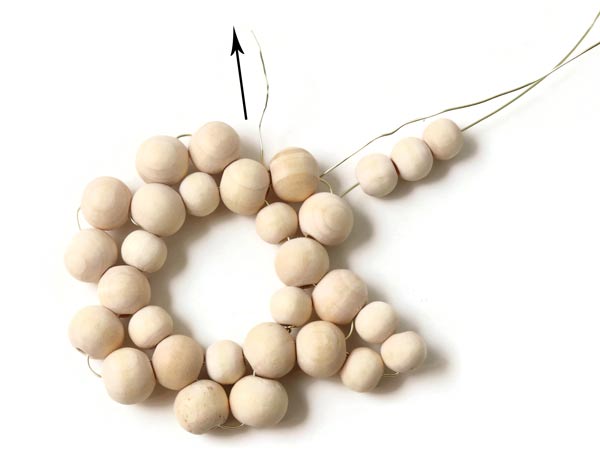
Now, the first point of the star is done. Continue like this ... thread 3 s,mall beads ... and pull the wire through 3 large beads, before you thread the 3 new small beads.
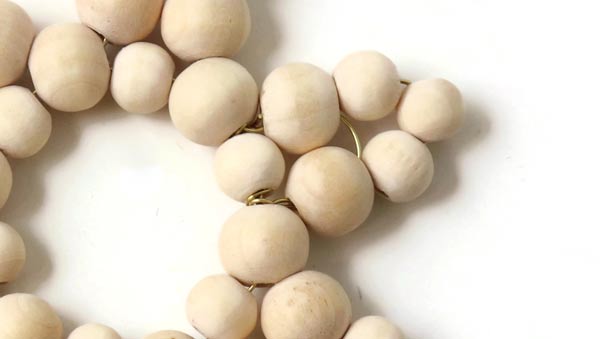
Continue like this all around the star, forming all in all 6 points. Then you wind the wire end around the wire in the inner circle a few times and cut off the excess length.
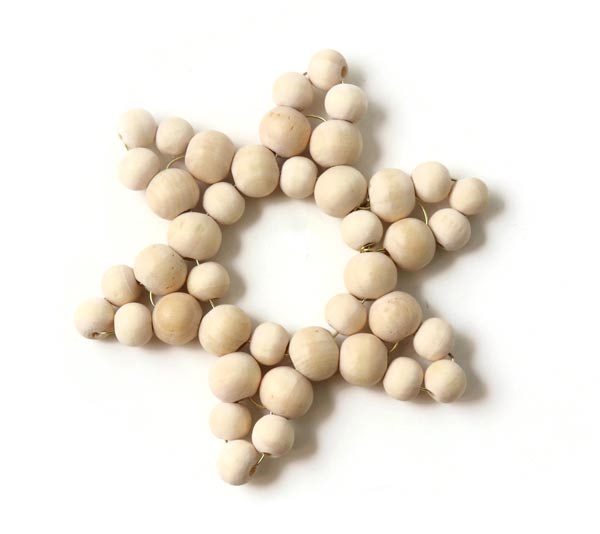
The star is finished. Now you can pull a ribbon through one of the outer beads.
Christmas Tree
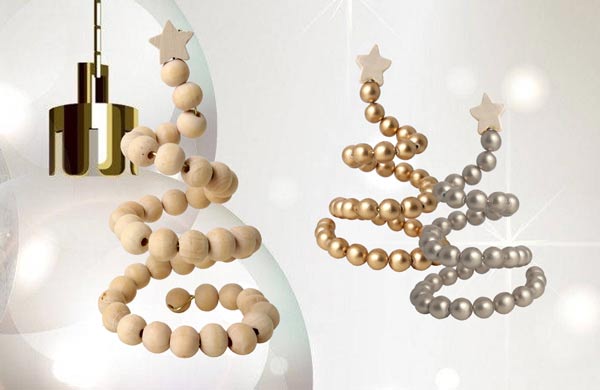
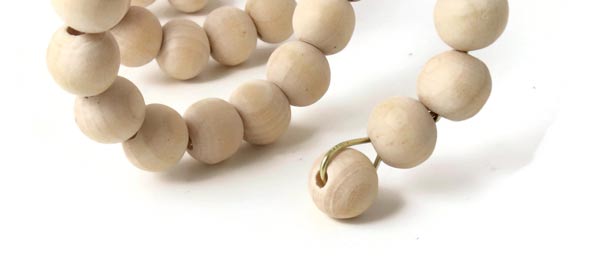
Thread 1 bead on the wire. Bend the wire around the bead. This is the stopper bead.
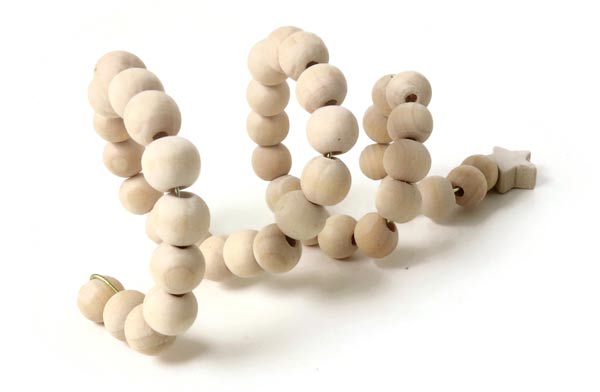
Thread the number of beads you like and shape a conical spiral. When the tree has got the shape and height you like, you round it off with a star.
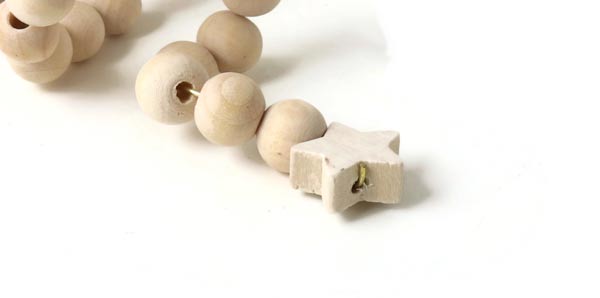
Bend the wire and cut off the excess length.
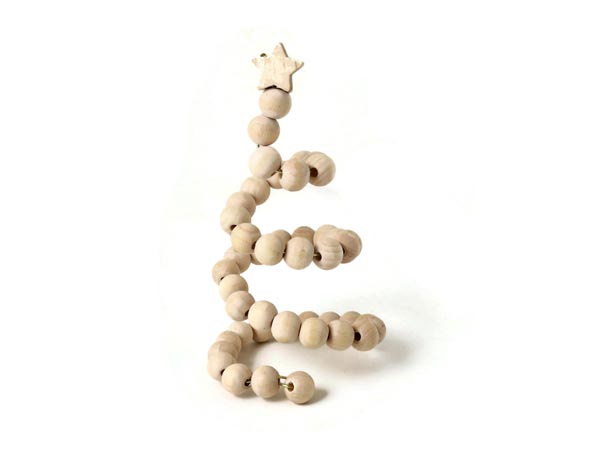
The Christmas tree is done :-)
Why Make Christmas Decorations with Wooden Beads?
Handmade Christmas decorations are not only a cozy activity but also give you the chance to design ornaments that perfectly match your style. By using wooden beads, you can add a natural and timeless touch to your holiday decor. Experiment with different colors, sizes, and shapes to create your own unique designs.
How to Use Your Handmade Decorations
- Decorate the Christmas Tree: Hang your finished stars, snowflakes, or Christmas trees on the branches to give your tree a personal touch.
- Window Decorations: Create a warm and inviting atmosphere by hanging the ornaments in the windows.
- Gift Wrapping: Use the decorations as a special detail on your gift wrapping – it will impress and delight the recipient.
Materials and Inspiration
All the materials you need are included in a practical jewelry-making kit. The kit contains wooden beads, string, and instructions to help you get started right away. This makes it the perfect activity for both children and adults. Turn it into a cozy family project or enjoy some creative time alone.
Benefits of Handmade Christmas Decorations
- Personalized: Design decorations that match your style and holiday theme.
- Sustainable: Use reusable materials like wooden beads.
- Creative: Let your imagination run wild and experiment with colors and patterns.
Start a creative holiday tradition and make Christmas decorations filled with personality and love. With our jewelry-making kit and easy DIY guide, you can quickly get started and craft ornaments that are both decorative and meaningful.
Order your jewelry-making kit today and get ready for a creative and memorable holiday season with handmade Christmas decorations!
We will publicly show your name and comment on this website. Your email is to ensure that the author of this post can get back to you. We promise to keep your data safe and secure.