DIY Bags and Accessories with Crystals
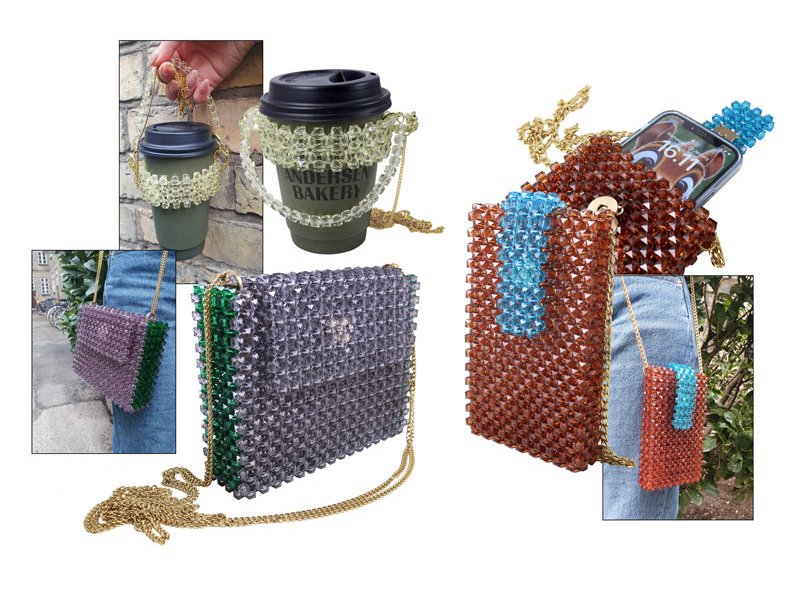
One of the hottest trends at the moment are bags and accessories covered with sparkling crystal beads. There are handbags, mobile phone cases, mug holders, key rings and much more. The technique is simple, but can be a little time-consuming if you have a large bag :-)
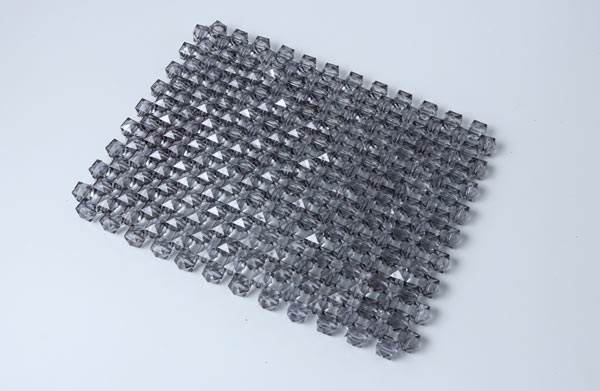
In this blog post, Charlotte presents detailed instructions on how to make your own bag or mug holder with crystal beads. In the examples, we use square acrylic beads that resemble real crystals as they are lightweight, durable, cheap. They fit well together and create a dense surface. However, there's nothing wrong with using round beads or others for a more varied look. We have acrylic beads, wooden beads and stone beads in many colours and shapes in stock . Of course, you will find locks and inserts for bags in our range of products as well as various chain straps - so you can get started with your DIY project right away.
Go to the mobile bag tutorial here
Go to the cup holder tutorial here
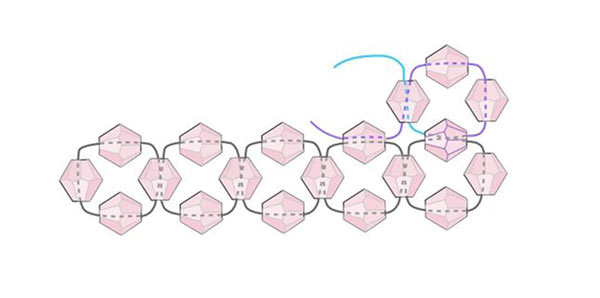
The weaving technique used to make these bags consists of circles. Each circle consists of 4 beads that are sewn together into the shape you want.
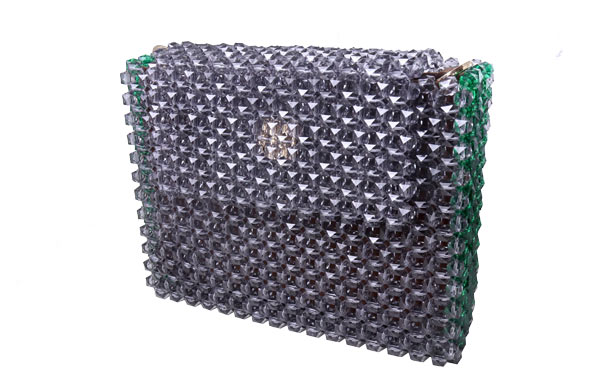
Beaded Bag with Crystals and Chain

We used the following materials to make this bag:
1 large bag Acrylic bead square faceted, light grey, 8x8x7.5 mm, 1700 pcs.
Approx. 168 pieces Acrylic bead square faceted dark green, 8x8x7.5 mm
Nylon cord full coil 0.6mm (approx. 26 metres)
1 magnetic bag clasp, golden brass
1 bag insert, dark brown 16.5x13x5 cm
(Note: the bag insert is also available in black or light grey)
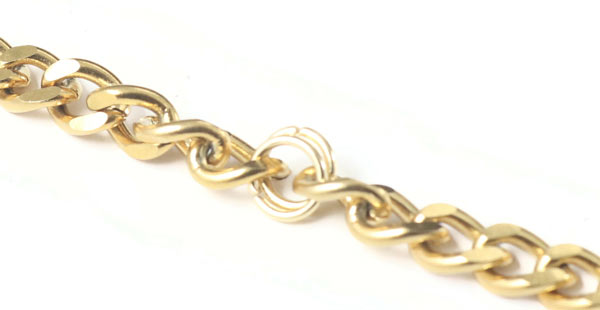
Approx. 2.6 metres Twisted flat anchor chain, gold-plated steel
2 jumprings open 5mm, gold-plated steel
Sew with about 2 metres of cord at a time.
Further down in the blog post, you will see how to tack the ends and attach the new cord.
This sewing technique consists of circles sewn together. There are 4 beads in each circle.
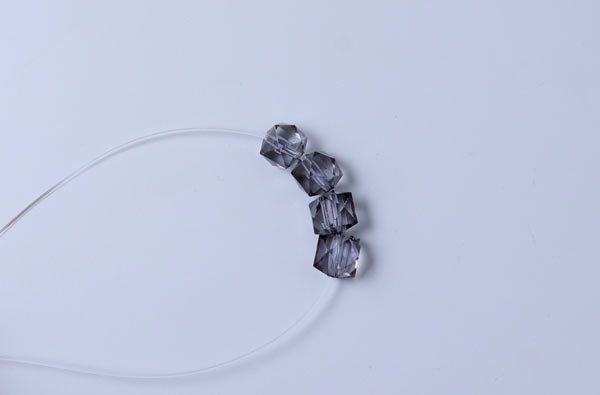
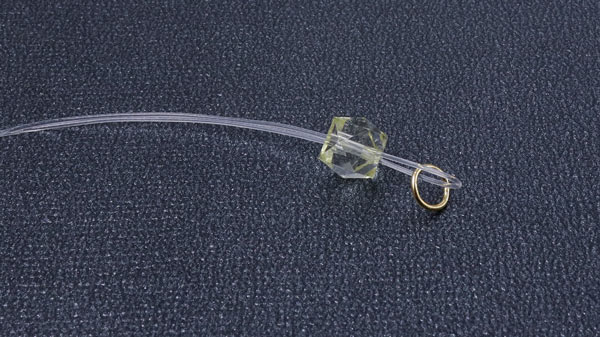
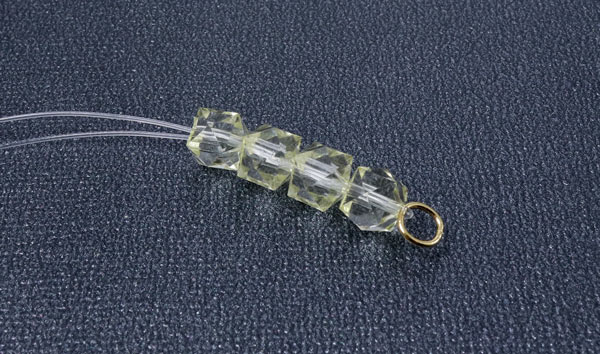
Start by cutting about 2 metres of neylon cord. Thread 4 beads onto the string and place the beads in the centre of the cord.
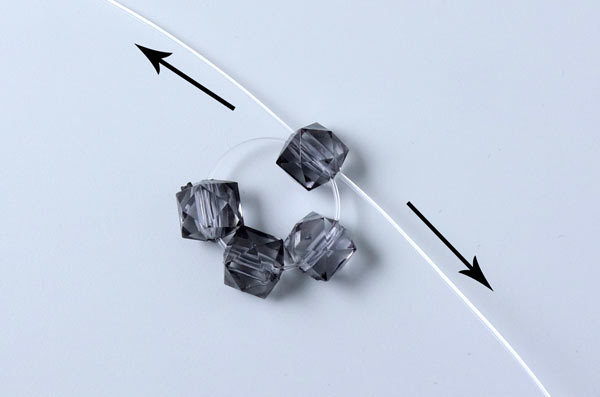
Pass one of the string ends through the last bead (in the opposite direction) to form a circle.
Tighten the string.
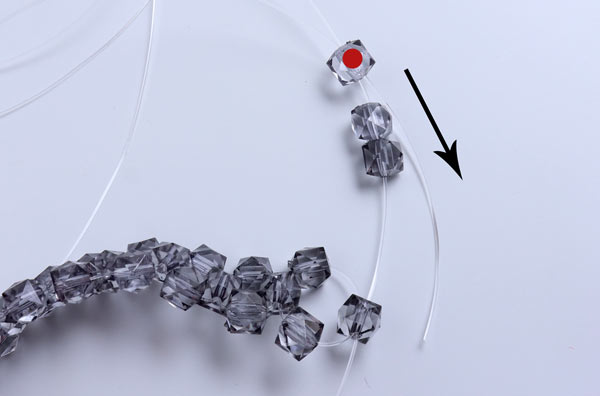
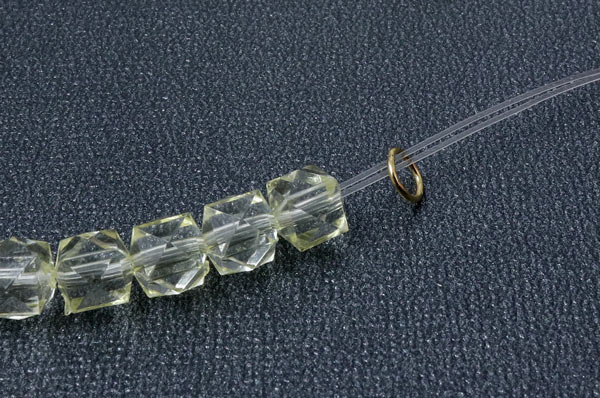
Thread 2 beads on the left string and 1 bead on the right string.
Pass the right string through the 2nd bead on the left string in the opposite direction ... all the way through, as this bag consists of circles.
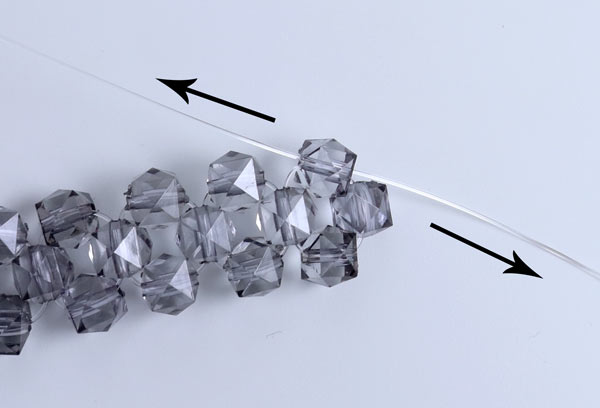
Tighten the string ...
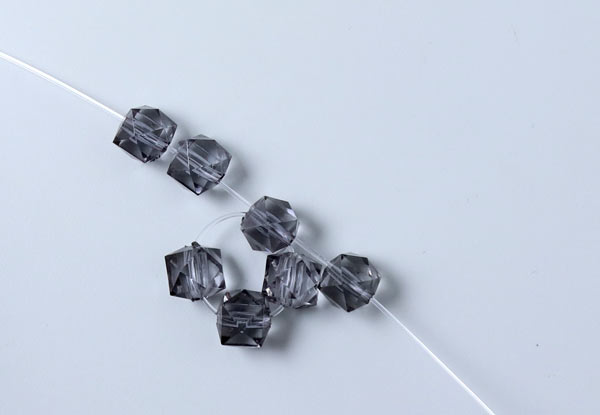
Continue in the same way making circles..... in total 15 circles. Now it's time to make the last circle...
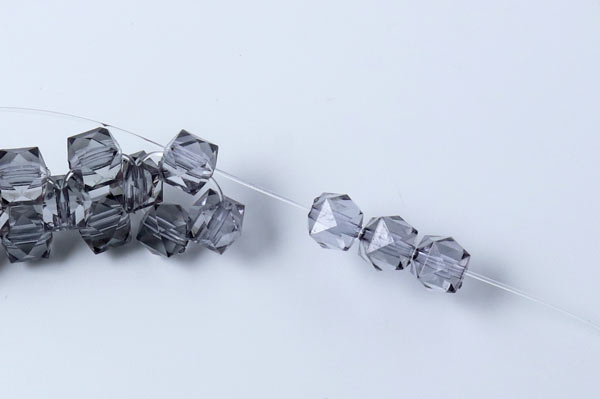
Thread 3 beads on the right string.
Pass the left cord through the 3rd bead.
Tighten the thread... Now both ends of the string come out of the same bead at the top, so you are ready to make the 2nd row of circles.
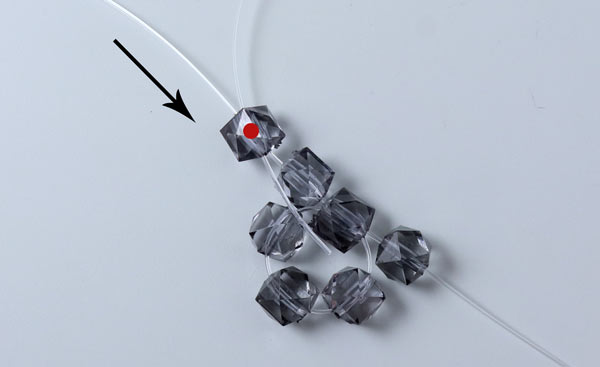
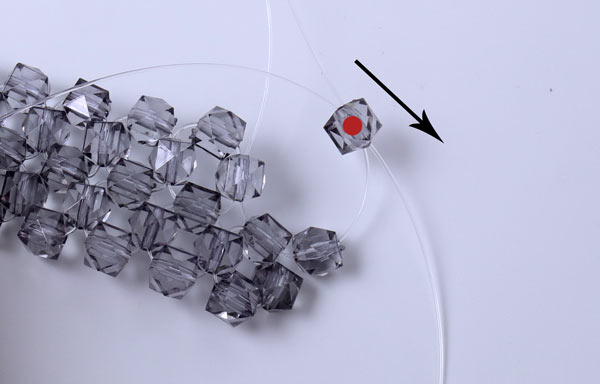
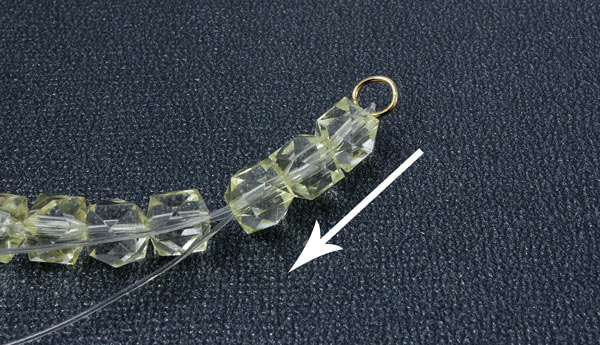
Thread 3 beads on the right string.
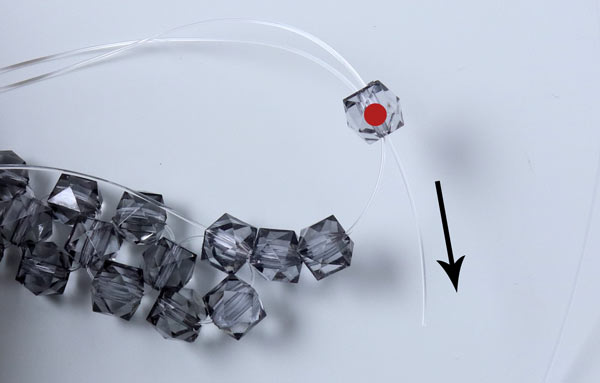
Pass the left cord through the 3rd bead.
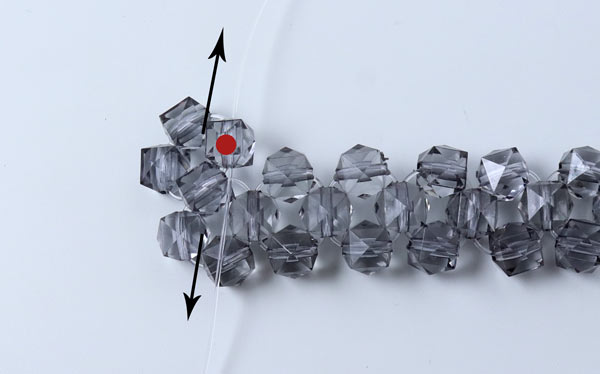
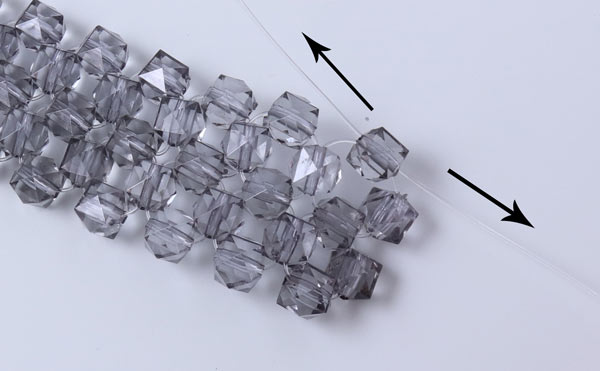
Turn your work around... tighten the strings...
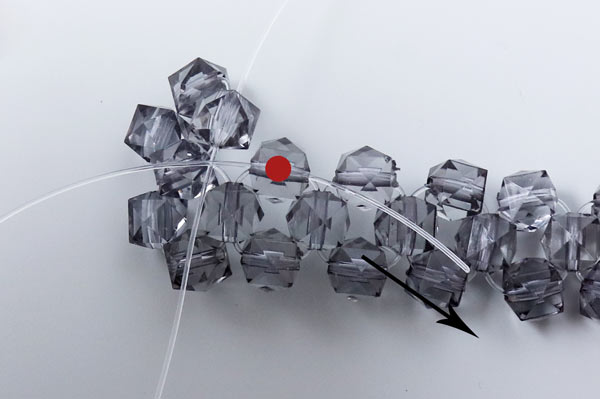
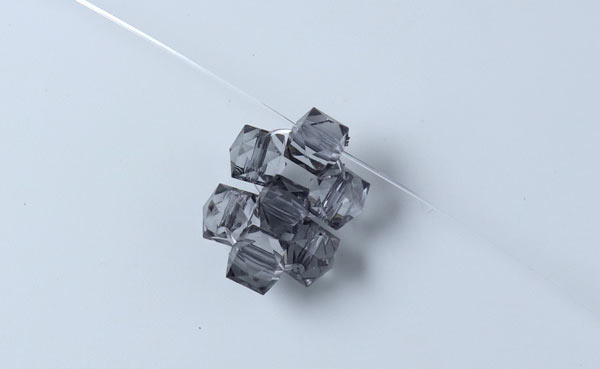
Pass the bottom string through the next bead on the right.
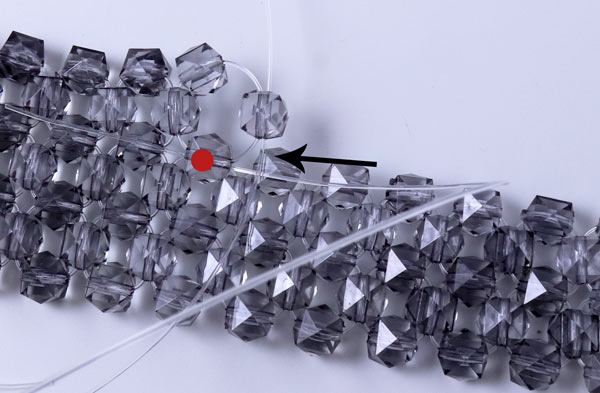
Thread 2 beads onto the top string.

Pass the right cord through the 2nd bead.
Tighten the string .... Pass the right string through the bead on the right...
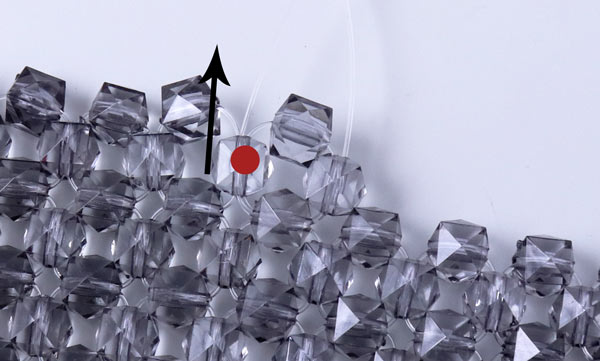
Continue in the same way... String 2 beads on the thread.... make a circle and move the string one bead to the right.
When you make the last circle, you place 2 beads on the thread to the right.
Pass the thread on the left through the 2nd bead...
Turn your work over. Pass the right cord through the next bead on the right....
Continue in the same way making circles. When the last circle is done, you thread 2 beads on the right string.
Pass the right string through the 2nd bead.
Tighten the strings .... and the 2nd row is done.
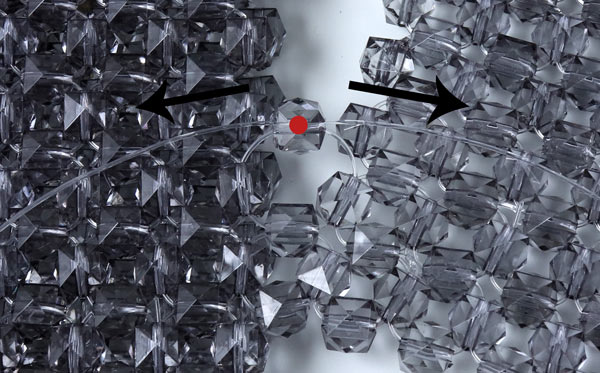
How to change the thread :
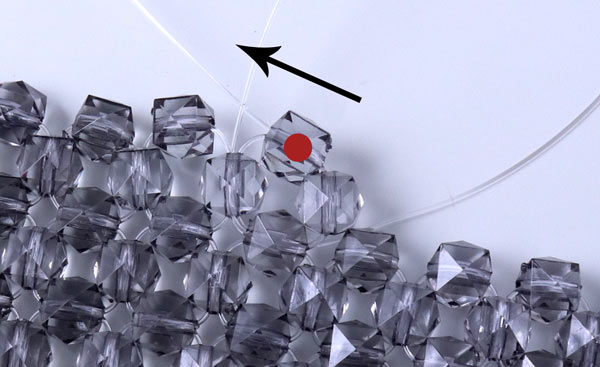
Pass the right thread through the bead on the left...
... through the pearl above on the left...
... the right thread through the bead on the left.... Both thread ends now come out in the same place.
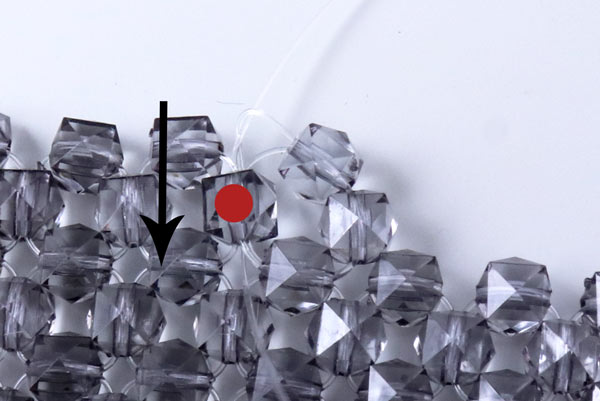
Tie a knot... tighten the threads ... and pass one end through the bead underneath.
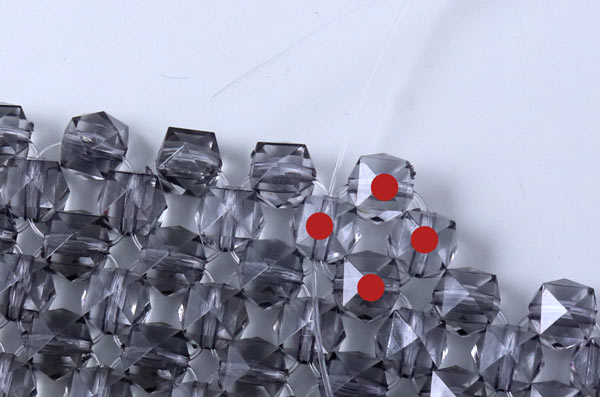
If there is space, pull the knot into the bead. Pass the other end of the string through random beads. If necessary, add a little glue to the knot. Cut off the excess string.
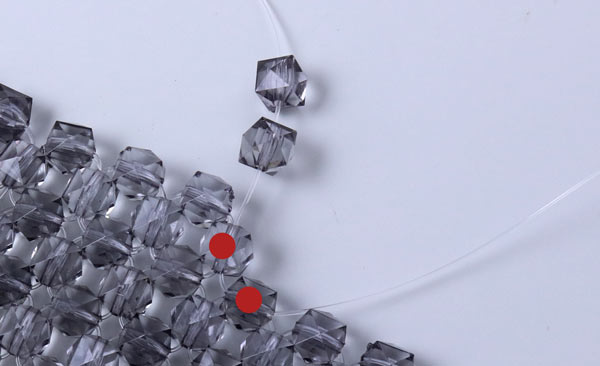
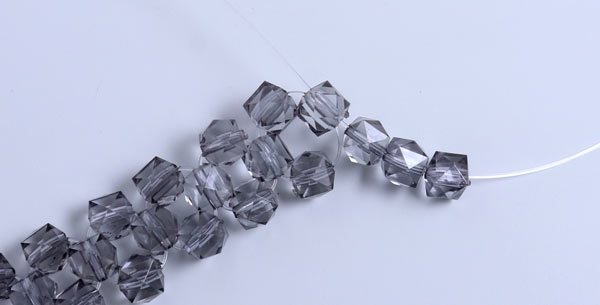
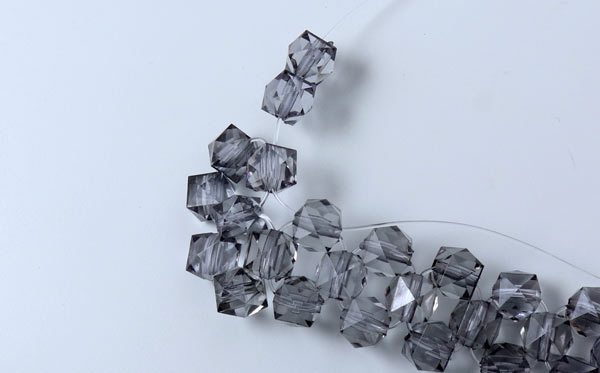
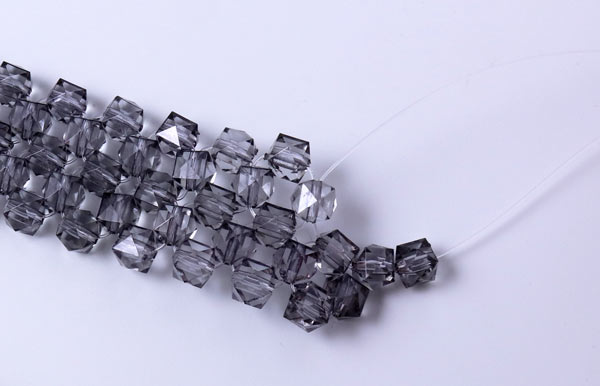
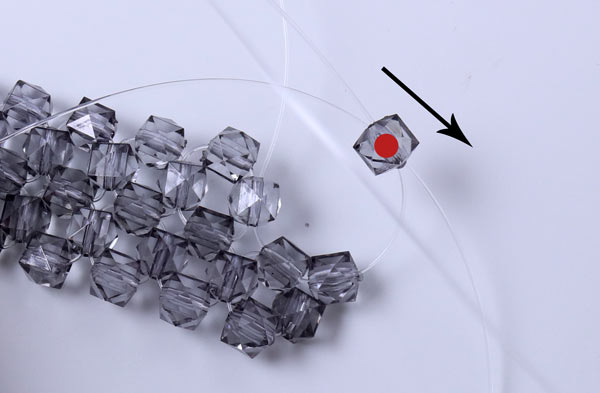
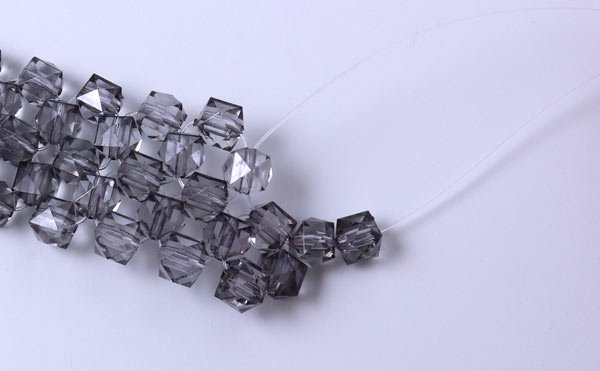
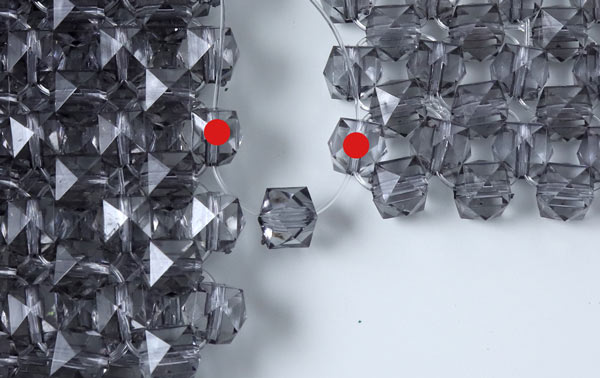
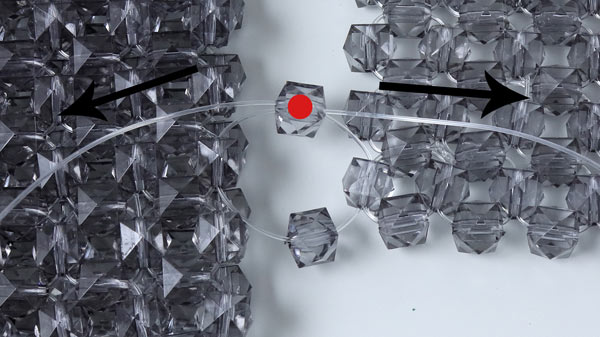
Cut a new piece of string... pass it through 2 beads (see image) and continue making rows of circles in the same way.
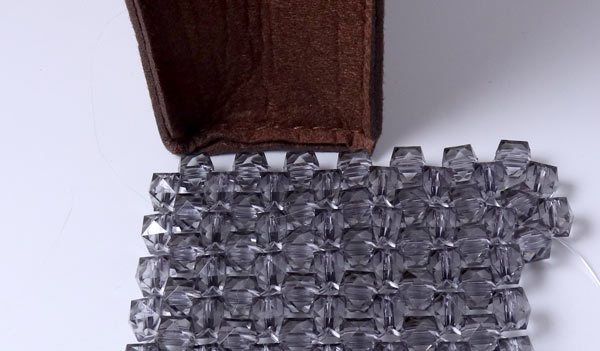
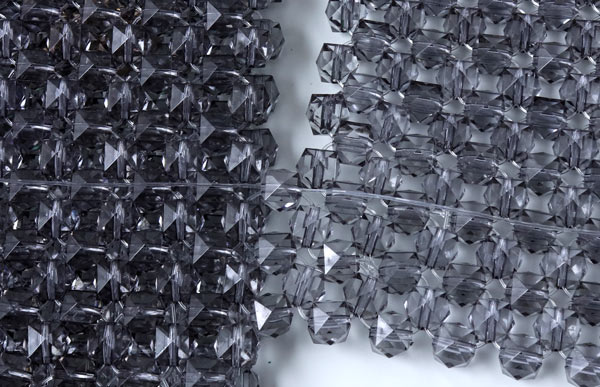
This shows the width of the bottom of the insert. It corresponds to 4 rows of circles.
Check when the bead bag has got the right length. For this insert, you need to make a total of 28 rows of circles. 12 circles for each side and 4 for the bottom.
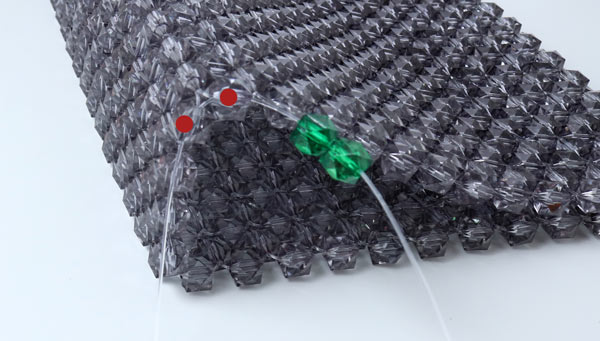
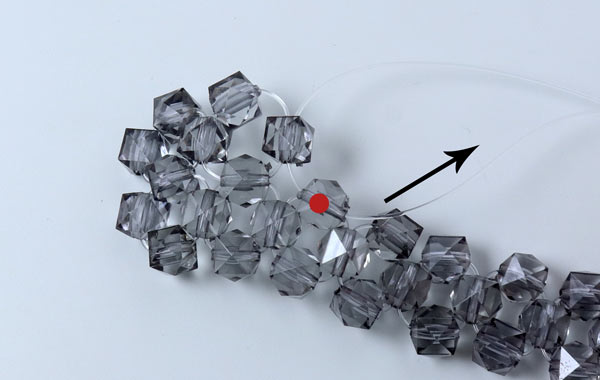
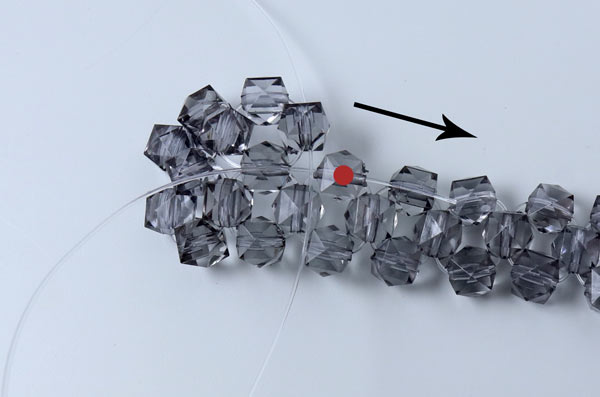
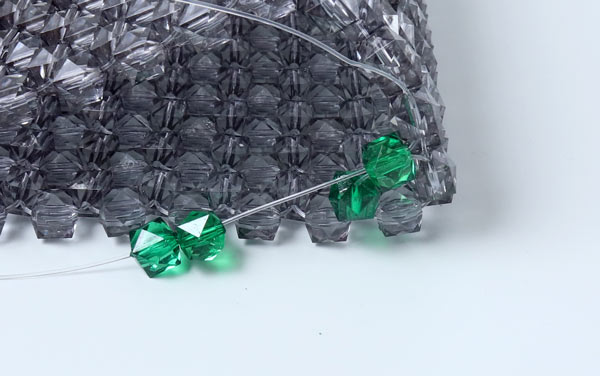
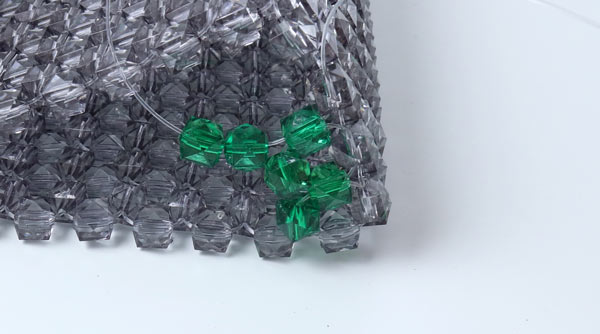
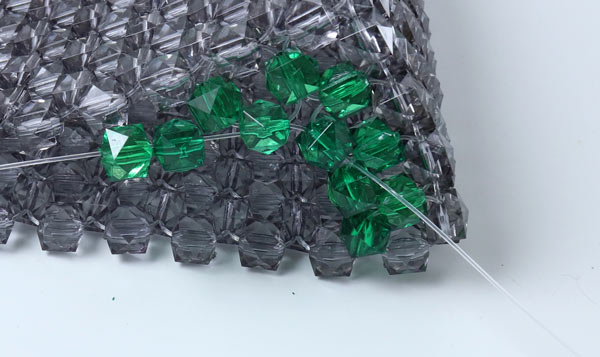
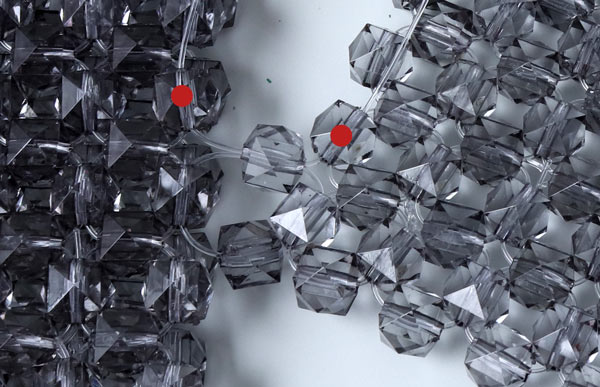
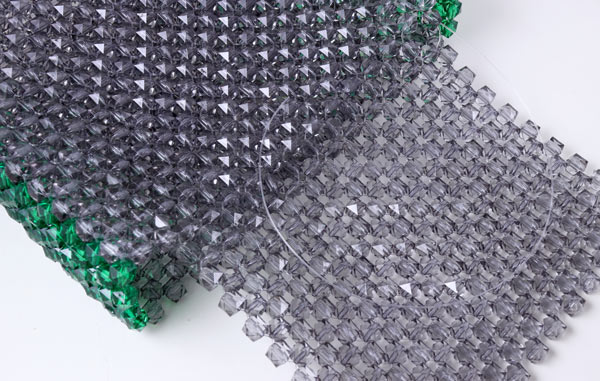
Now it's time to make the sides. Cut about 2 metres of string. Pass the string through the 2 corner beads (see image) and place the beads in the centre of the string. Thread 2 green beads on the right-hand string.
Pass the left string through the 2nd green bead. Tighten the strings...
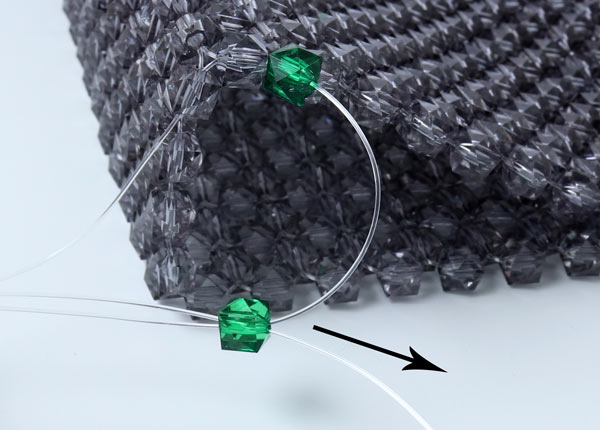
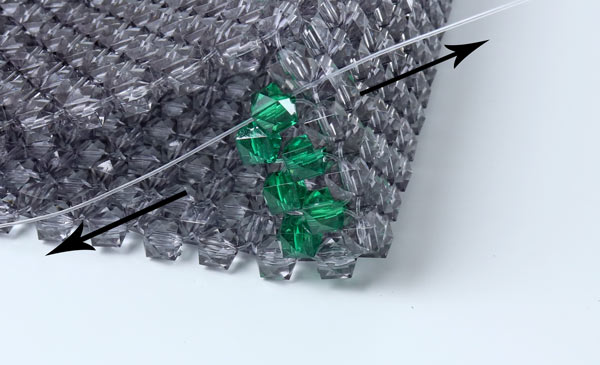
Turn your work around... Pass the right string through the next grey bead (see image).
Thread 2 green beads on the left string.
Pass the right cord through the 2nd green bead. Tighten the string.
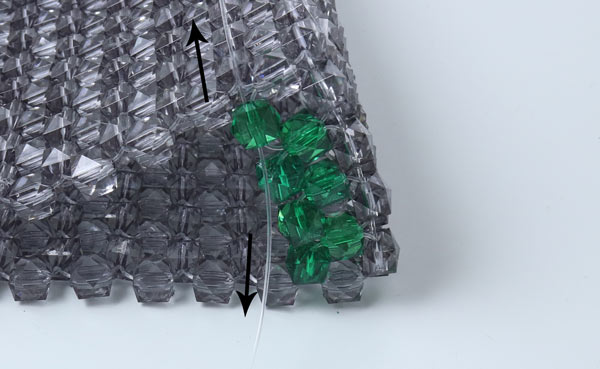
Pass the string to the right through the next grey bead.
Thread 2 green beads on the left string. ... and pass the right cord through the 2nd green bead again.
Tighten the string ...

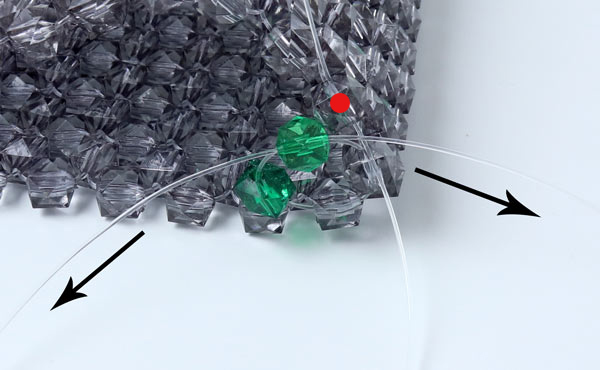
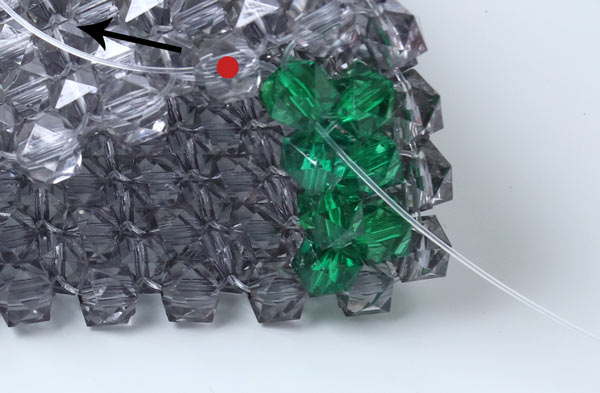
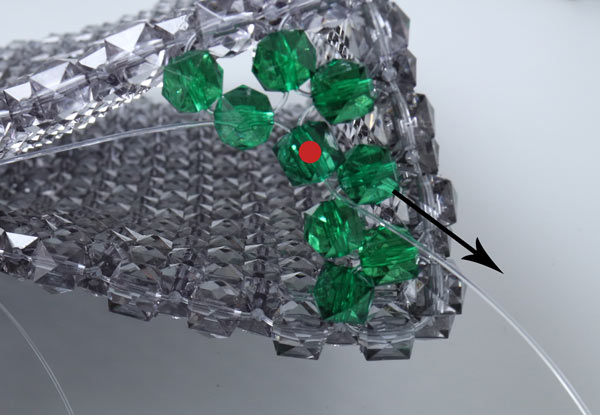
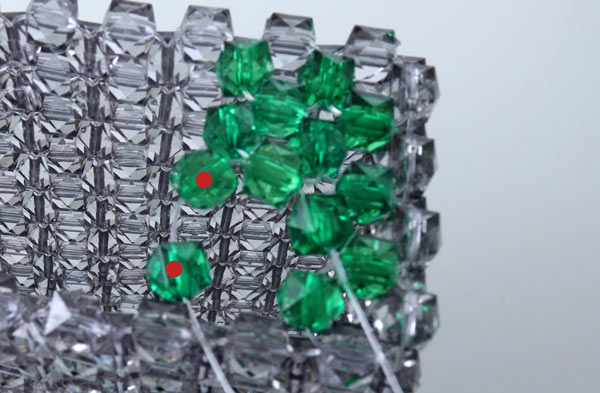
Now it's time to make the corner. Pass the right string through the next 2 grey beads.
Thread a green bead on the string and pass the other string through the same bead. Tighten the string...
Pass the top string through the next grey bead.

Thread 2 beads onto the left string.

Pass the right cord through the 2nd green bead.
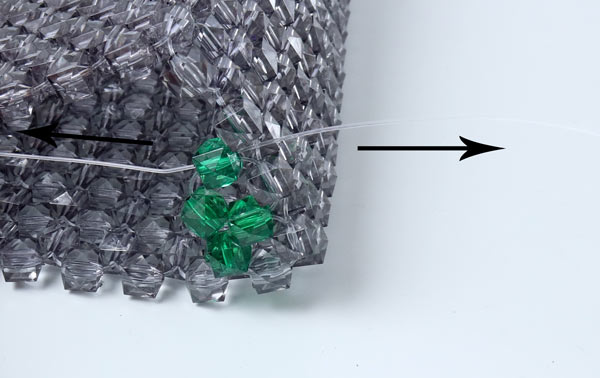
Tighten the string ... Pass the right string through the next green bead.
Thread 2 green beads on the left string.
Pass the right cord through the 2nd green bead.
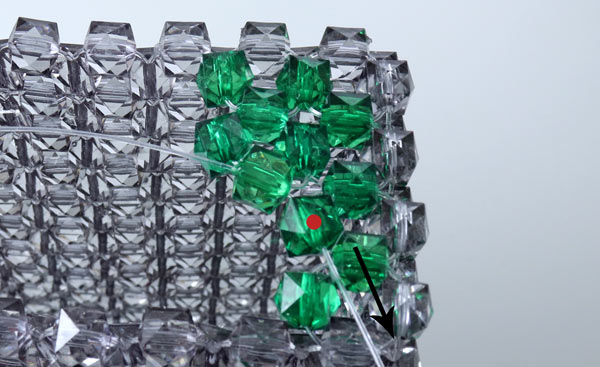
Pass the right string through the next green bead.
Thread 2 green beads on the left string.

Pass the right cord through the 2nd green bead.
Pass the right string through the next green bead.
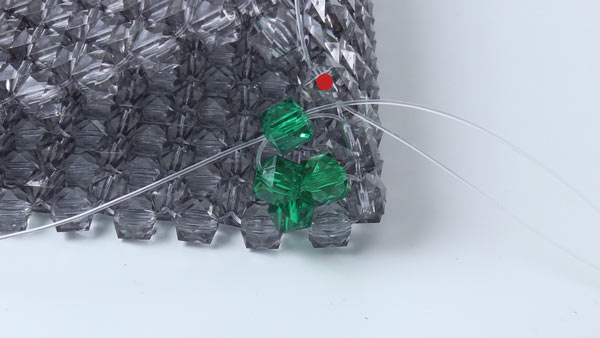
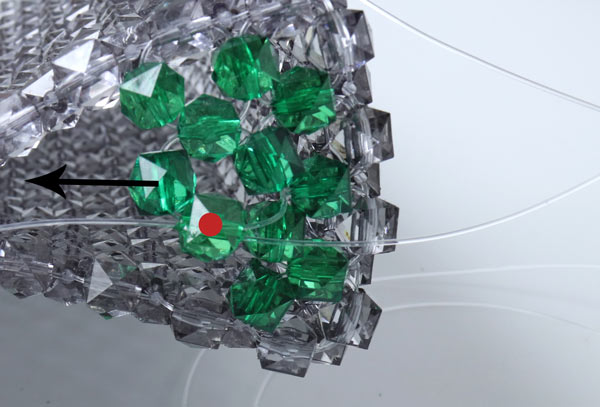
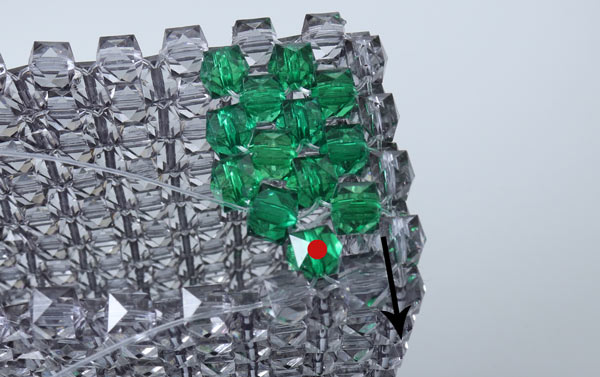
.... on through the next grey bead .... and thread a green bead on the same string.

Pass the left cord through the green bead (see image).
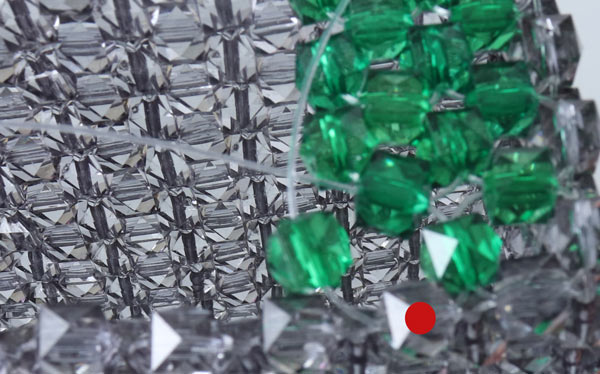
Continue adding green beads in the same way. Weave in the strings. One side of the bag is now complete.
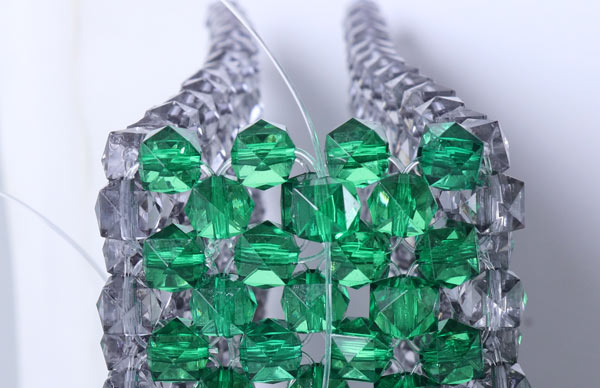
Sew the other side of the bag in the same way.
Now it's time to make the flap for the bag. Make a square of circles of grey beads. It is 10 x 12 rows.
Cut a new piece of string. Thread a bead onto the string and place it in the centre of the string. Pass one end of the string through the first bead in the flap (you sew the side with 12 rows on the bag). Pass the other end of the string through the 3rd bead sticking out on the bag.
Thread a bead on one string and pass the other string through the same bead. This will form a circle again.
Pass each of the string ends through the next bead (see image).
Thread a bead on one string and pass the other string through the same bead. This will form a circle again.
Tighten the strings.
Continue in the same way until the flap is fastened to the bag. Secure the string ends by weaving them in.
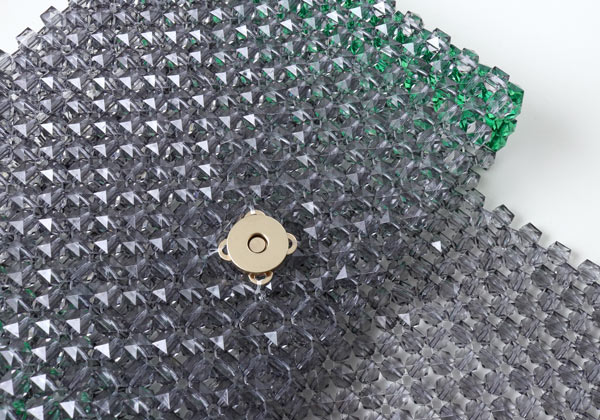
Now, you sew one part of the magnetic clasp to the front of the bag.
Place the magnetic clasp approximately 3.5cm from the edge of the bag. We used Fireline 8lb white to sew on the magnetic clasp. Nylon cord can also be used.
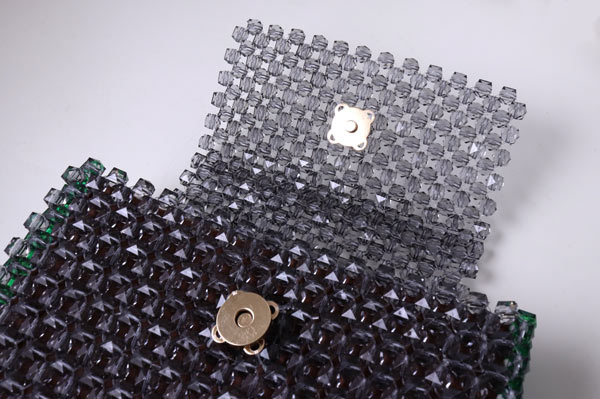
Sew the other part of the magnetic clasp to the inside of the flap.
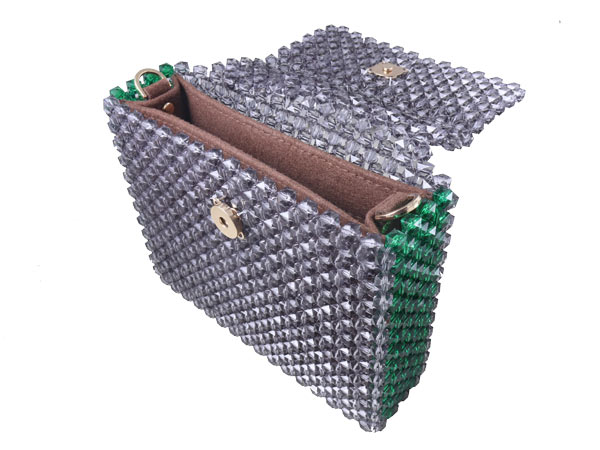
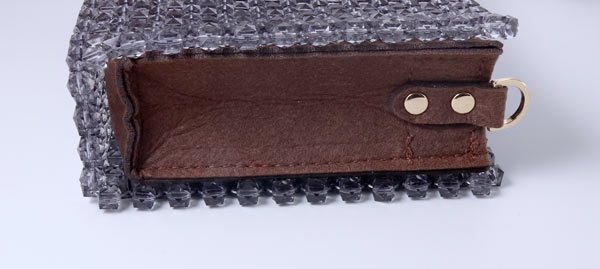
Put the insert into the bag. Sew it on to the bag if necessary. .... with a few stitches at the edge or the bottom.
Lastly, you attach the chain to the bag. You can also make a row of beads as a handle instead of using a chain.
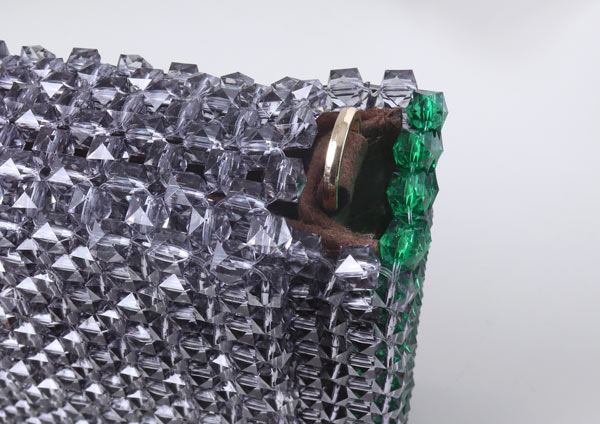
Pass the chain through the rings on each side of the insert.
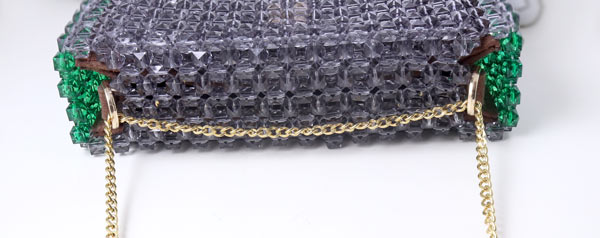
Pass the chain through the 2 rings as shown in the picture.
Here, the chain ends are joined together with 2 jumprings. If you connect the chains this way, it becomes a double chain.
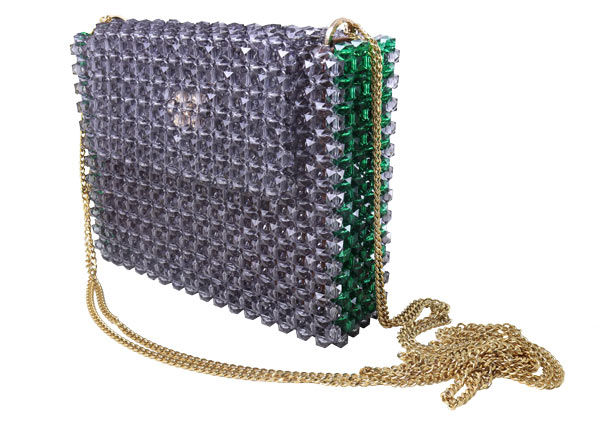
Your beautiful crystal bead bag is now done.
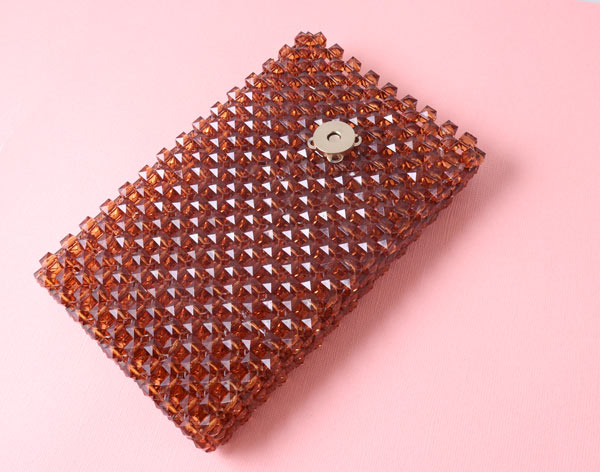
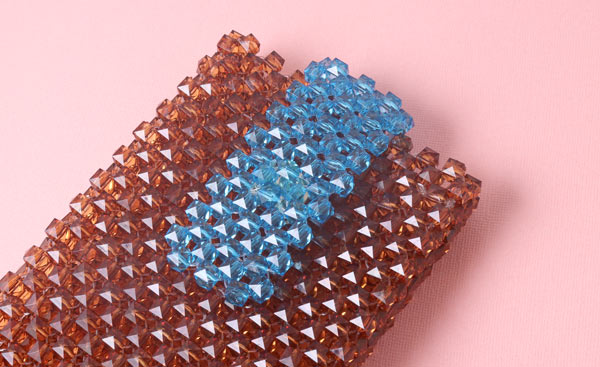
Mobile Phone Case with Crystals and Chain
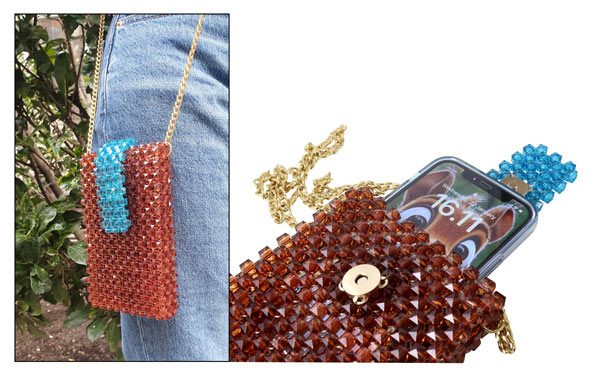
WE used the following materials to make this bag:
approx. 700 acrylic beads, square, faceted, transparent coconut brown
approx. 70 acrylic beads, square, faceted, transparent dark turquoise
Nylon cord, full spool 0.6mm (used approx. 18 metres)
1 magnetic bag clasp, golden brass
approx. 1.3 metres Twisted flat anchor chain, gold-plated steel
2 eyelets 12mm, gold-plated steel
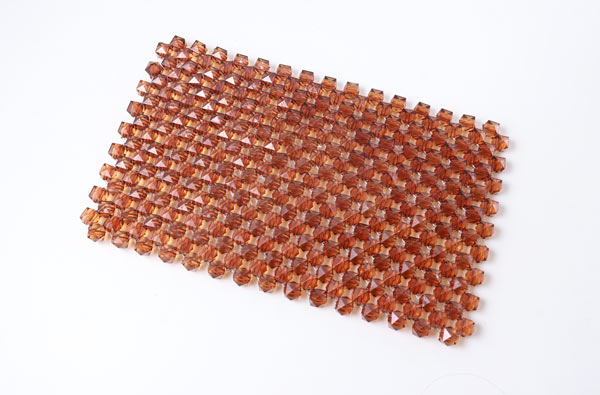
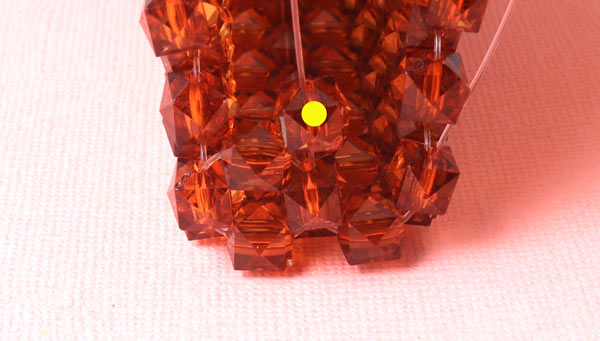
Start by making one side of the bag. This bag is 9 rows wide and 15 rows long.
The procedure is the same as explained above.

Make the other side of the bag the same way. Front and back.
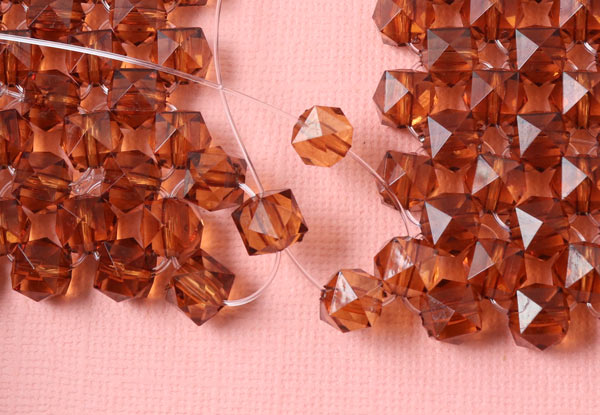
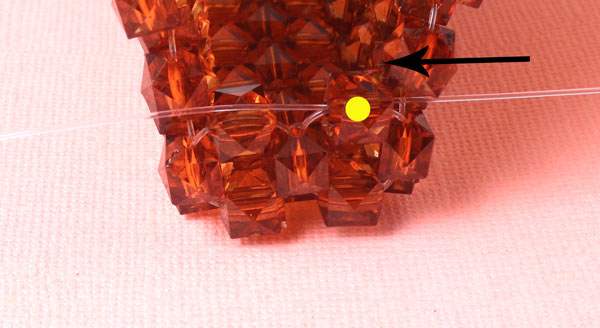
Now you sew the 2 sides together. The sides and the bottom of the bag consist of 2 circles.
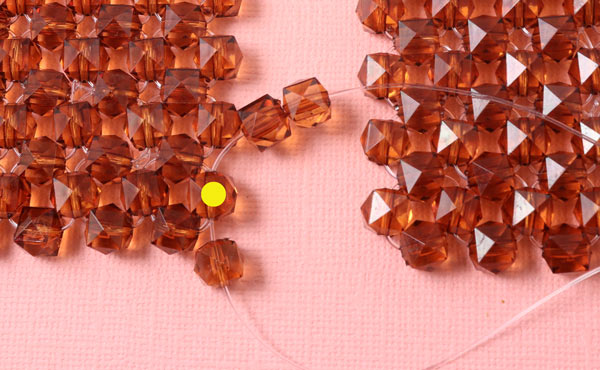
Place the 2 pieces next to each other as shown in the picture.
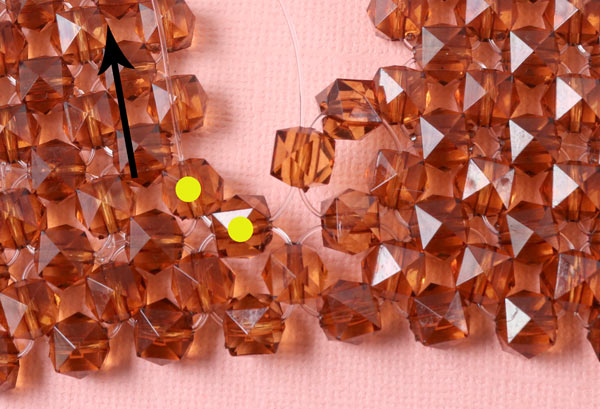
Thread a new string through the side to the left.... through the bead sticking out at the bottom. Place the bead in the centre of the string. Thread 1 bead on the bottom string and 2 beads on the top string.
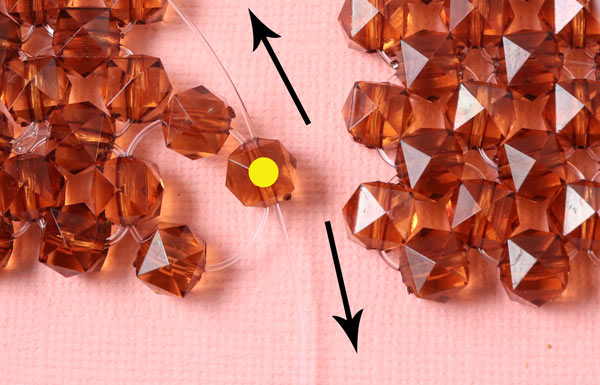
Pass the bottom string through the 2nd bead. Tighten the string.
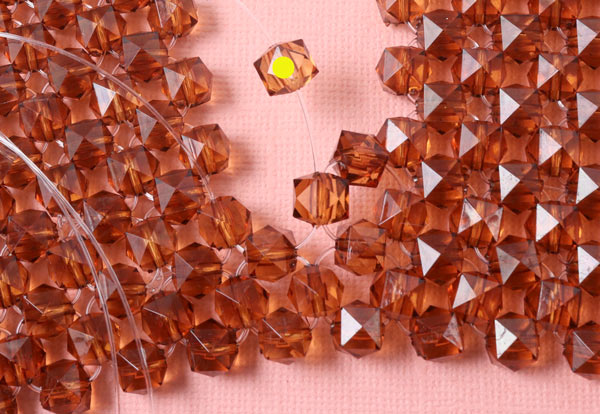
Thread 1 bead on the bottom string... Pass the string through the bottom bead sticking out on the right side.
Thread 1 bead on the right string.

Pass the left cord through the same bead. Tighten...
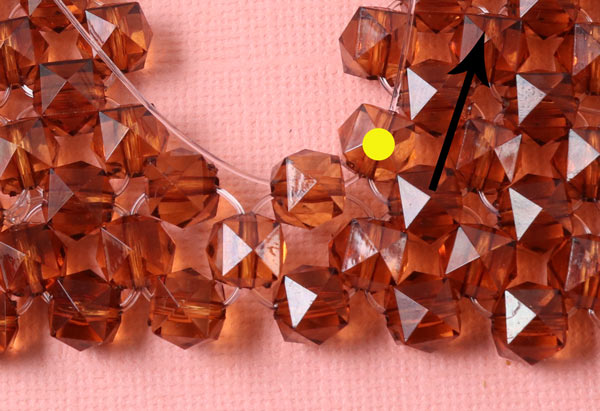
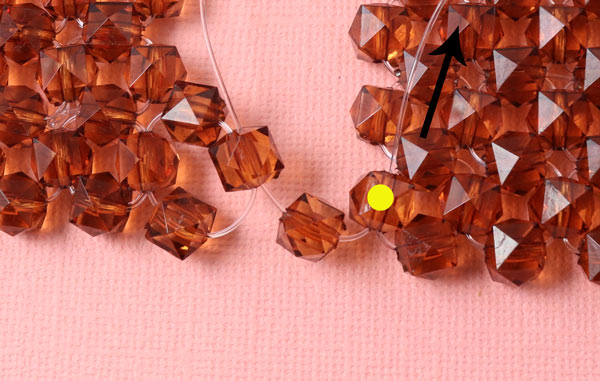
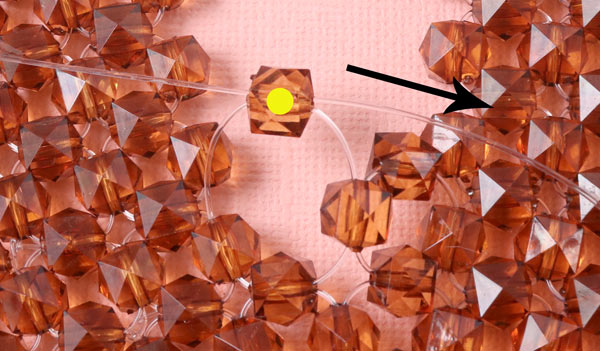
Pass the right string through the next bead that sticks out.
Thread 2 beads on the right string.
Pass the left cord through the 2nd bead.
Pass the bottom string through the bead on the left... and then through the next bead... (see image).
Thread 1 bead on the right string.
Pass the left cord through the same bead. Tighten the string.
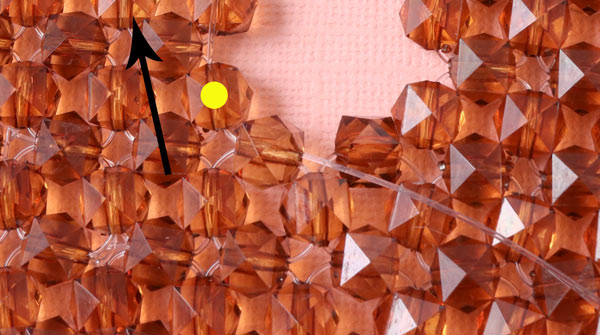
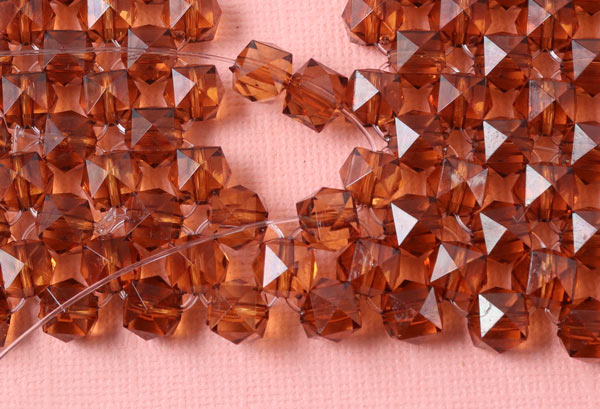
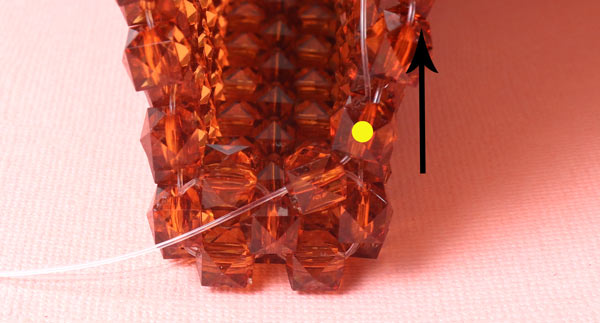
Continue in the same way.... Pass the left cord through the next bead that sticks out. Continue in the same way until the end of one side.
Now it's time to sew on the bottom. The thread ends now come out of the bead as shown in the picture.
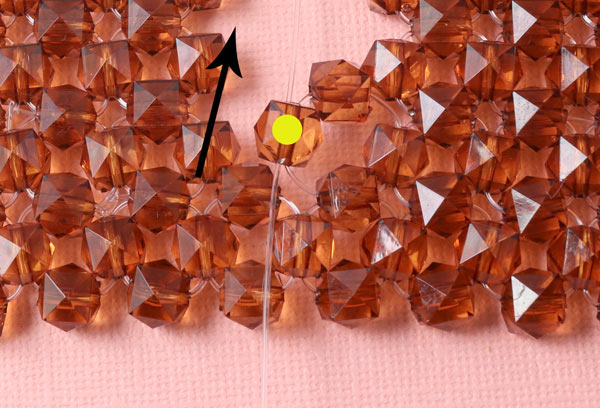
Pass the left string through the bead on the left... and thread 2 beads on the same string.
Pass the right cord through the 2nd bead. Tighten the string.
Pass the bottom string through 2 beads on the right.
Thread 1 bead on the string to the left.
Pass the right string through the same bead.
Pass the right string through the next bead that sticks out.
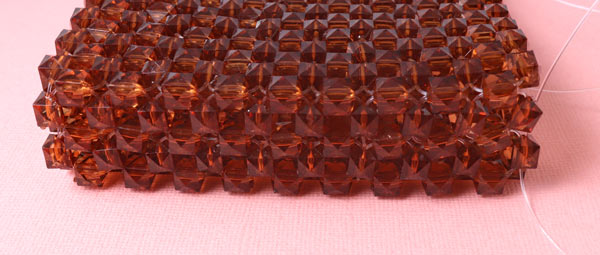
Continue in the same way to finish close bottom.
Now you sew the other side of the bag together in the same way. Sew one part of the magnetic clasp to the bag.
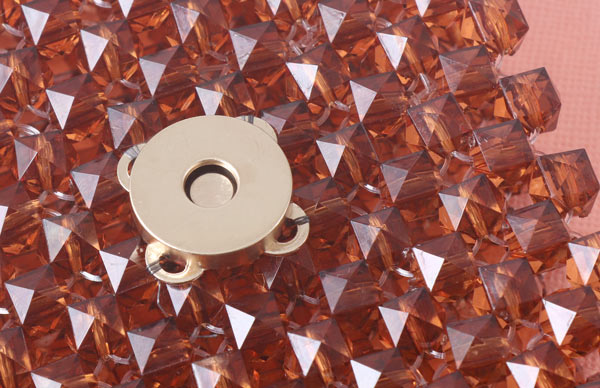
We used Fireline 8lb black for that. The magnetic clasp can be sewn on before the sides are weaved together.
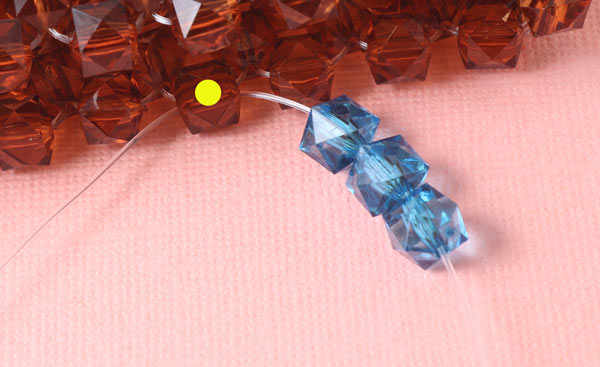
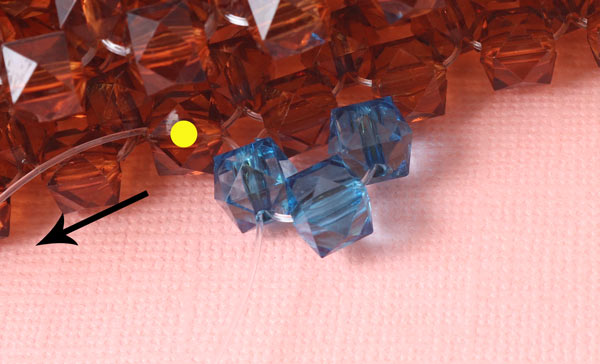
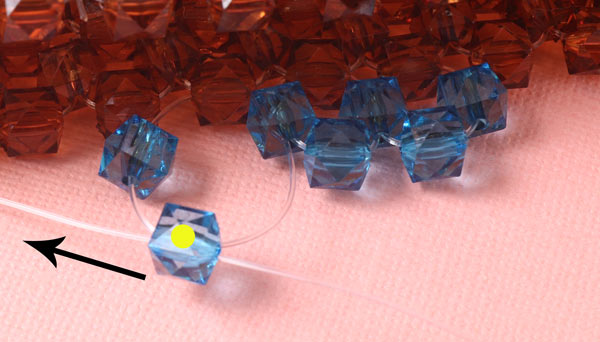
Now you sew on the flap for the bag. Pass a string through the 4th bead sticking up. Thread 3 blue beads on the right string.
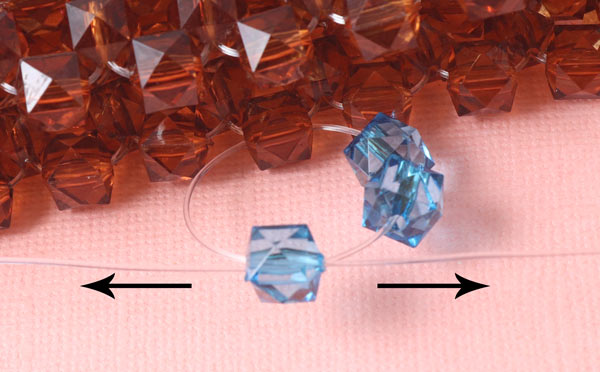
Pass the left cord through the 3rd bead. Tighten...
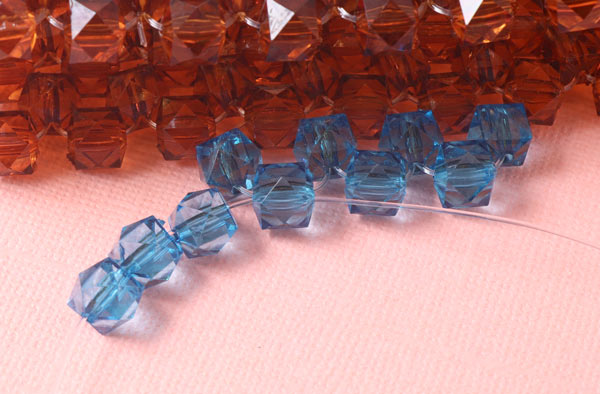
Pass the left string through the next bead sticking out.
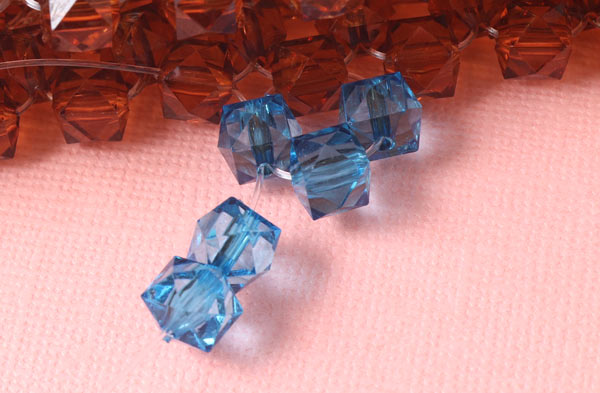
Thread 2 beads on the right string.
Pass the left cord through the 2nd bead... Pass the left cord through the next bead that sticks up.
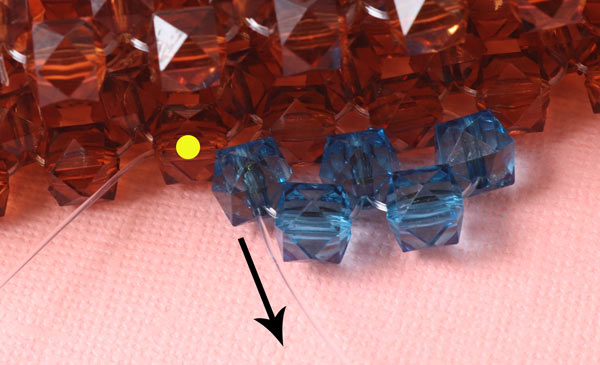
Thread 2 blue beads on the left string.
Pass the right cord through the 2nd bead. Now, the first row in the flap is complete.
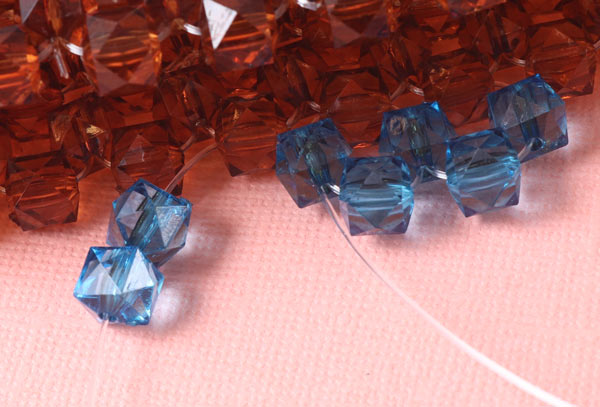
Thread 3 beads onto the left string.
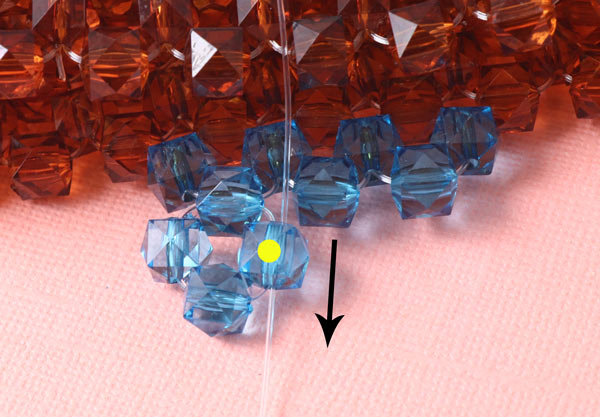
Pass the right cord through the 3rd bead. Continue in the same way until the flap is 10 rows long.
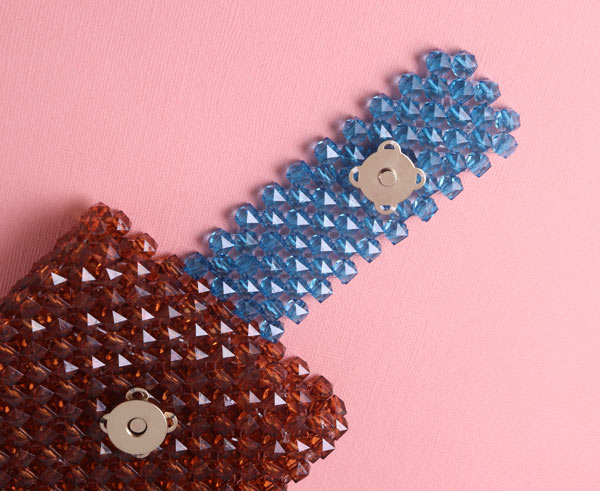
Sew the second part of the magnetic clasp to the flap.
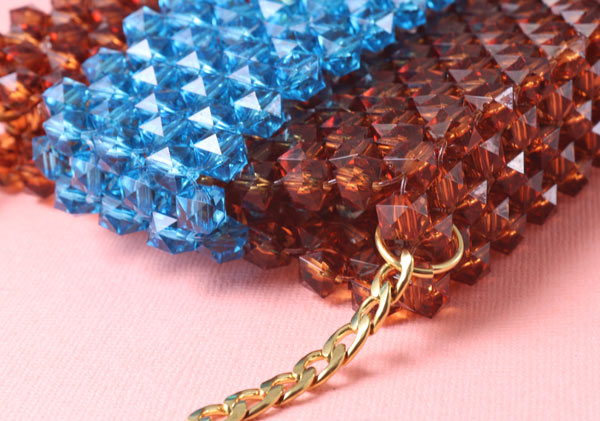
Attach the chain to the bag with eyelets.
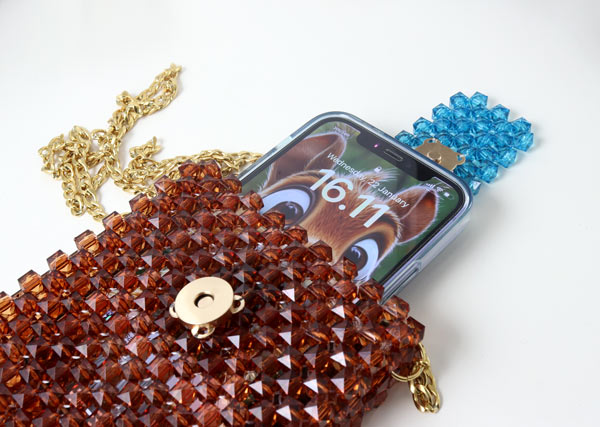
Your mobile case with crystals is now done.
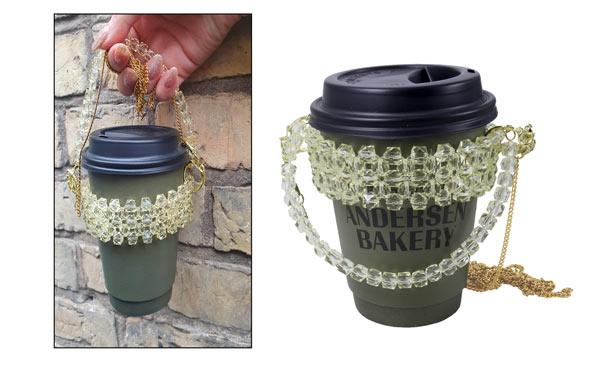
Cup Holder with Crystals
W used the following materials to make this cup holder:
approx. 150 acrylic beads, square, faceted, transparent light golden yellow
2 key rings with flap and chain, gold-plated brass
2 pcs. Jumpring closed 6mm, gold-plated steel
4 pcs open jumpring 5mm, gold-plated steel
1.25 metre twisted flat anchor chain, gold-plated steel
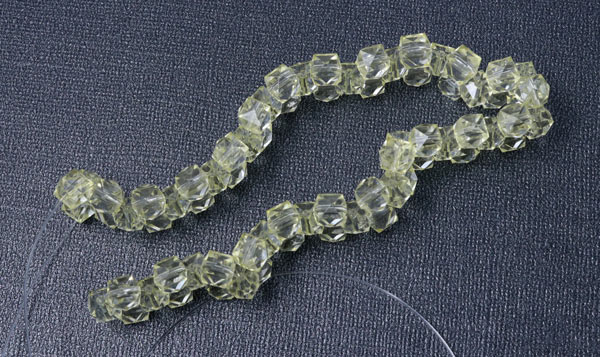
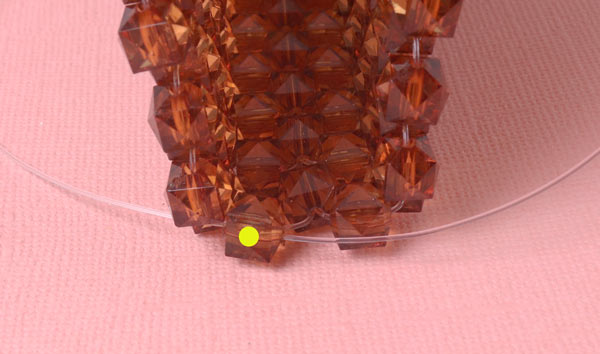
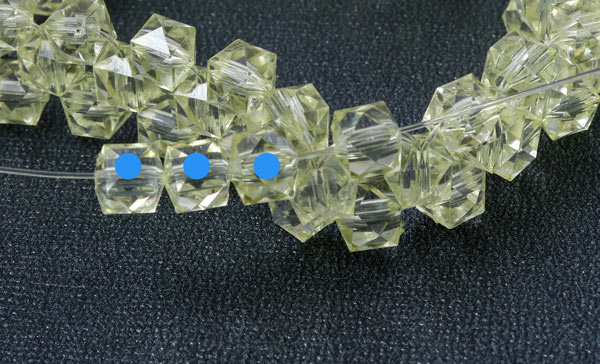
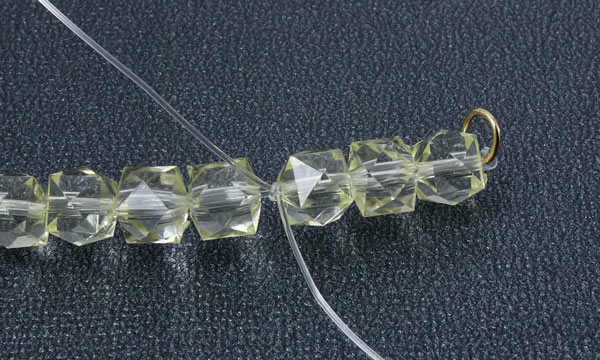
Make a row of circles as described in the first example. Continue until you have reached the length you want. Our row of circles here has a length of 24 rows.

The 24th circle joins the two ends together. Place a bead on each string end.
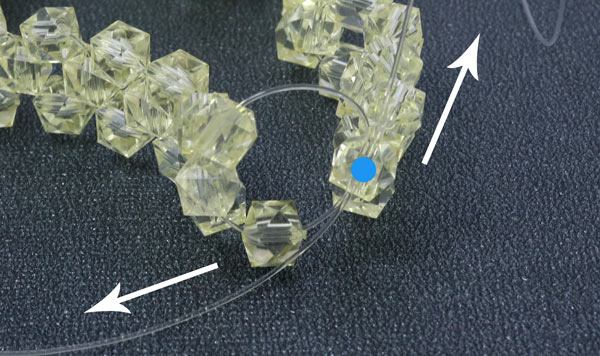
Pass both string ends through the 1st bead at the start of the row. Tighten...
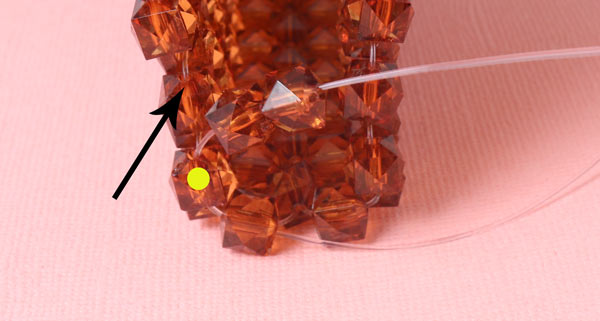
Continue passing one string through the next 2 beads in the last circle.
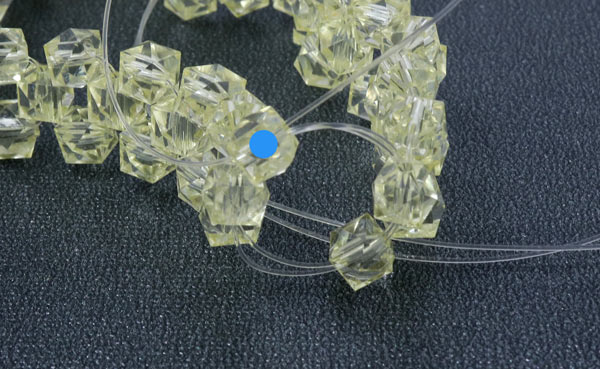
Tighten... now the string ends come out on either side of the same bead. The first row is now gathered into a ring.
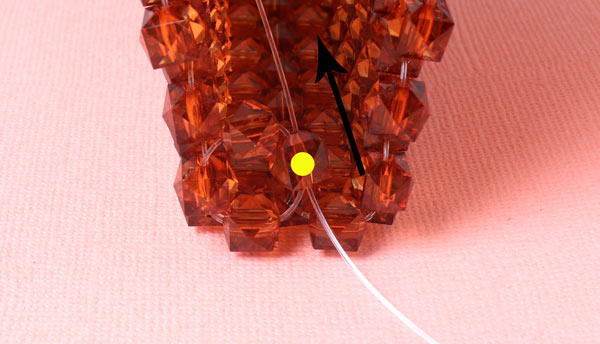
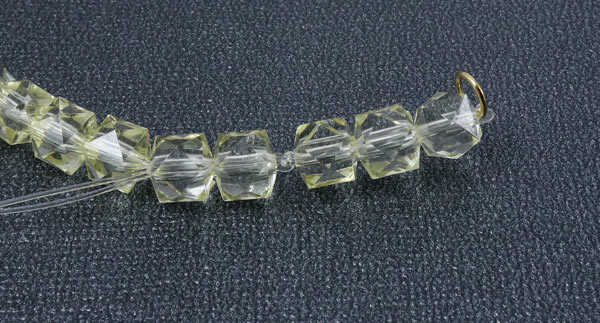
Thread 3 beads onto the left string.
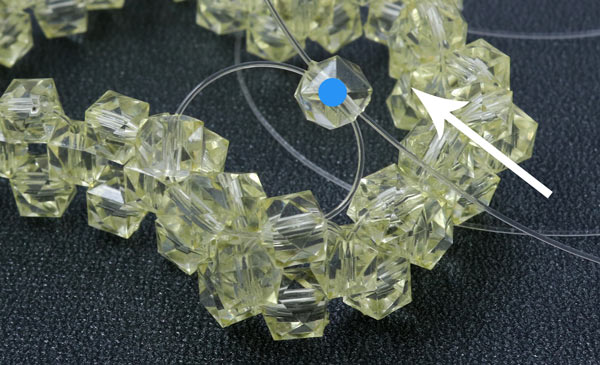
Pass the right cord through the 3rd bead.

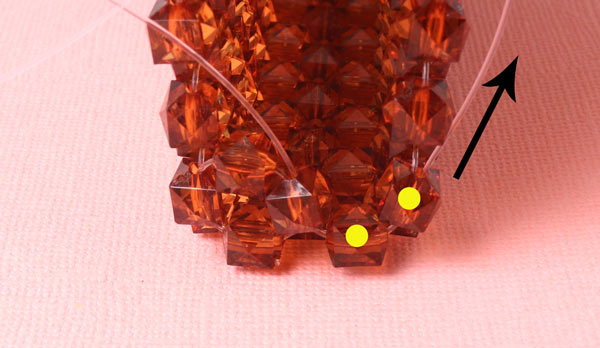
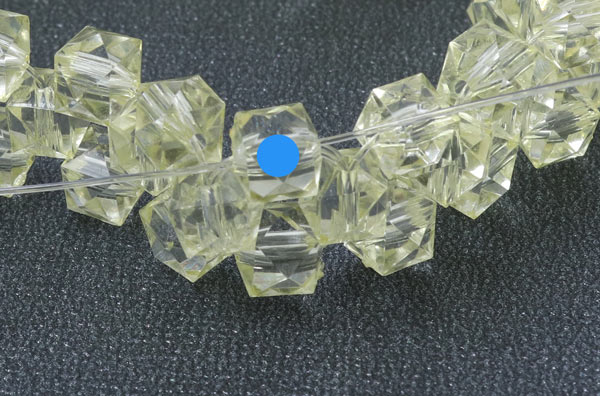
Tighten the string. Pass the right string through the bead on the right.
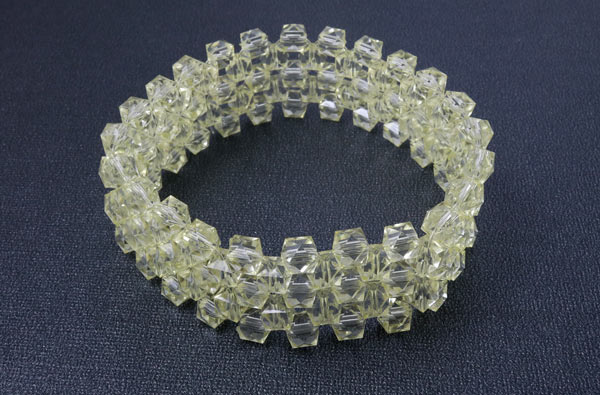
Finish the 2nd row. Weave in the ends.
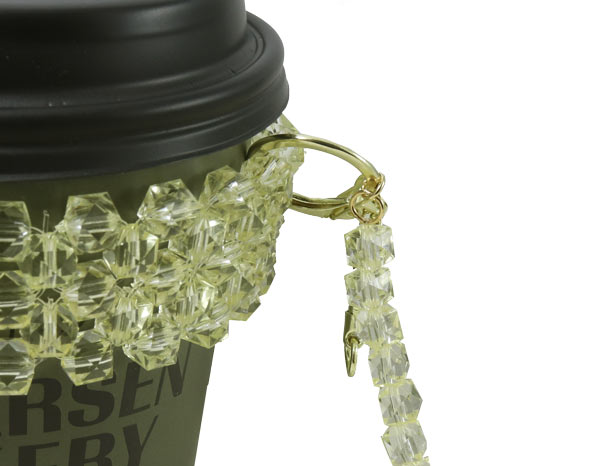
Attach a keychain to each side.
Now it's time to make the handle. Pass the string through a closed eyelet... place it in the middle of the string.
Pass both string ends through a bead.
Continue adding beads to the strings until the handle has reached the length you want. For this handle, we used 28 beads.
Pass both cord ends through a closed eyelet.
Pass both string ends back through the last 3 beads.
Tie a knot.
Pass the string ends through 2 more beads. If necessary, add a bit of glue to the knot. Cut off the excess string.
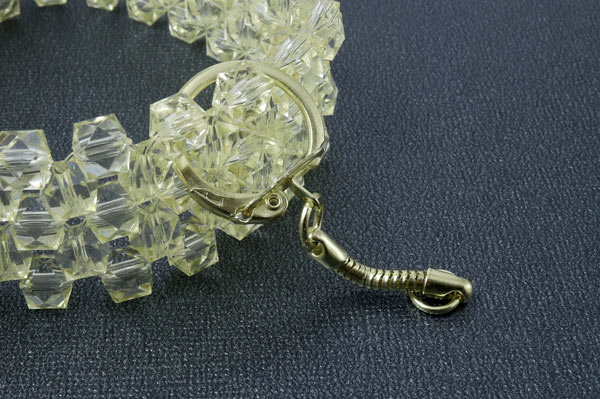
Attach the handle directly to the keychain or secure it with an open eyelet.
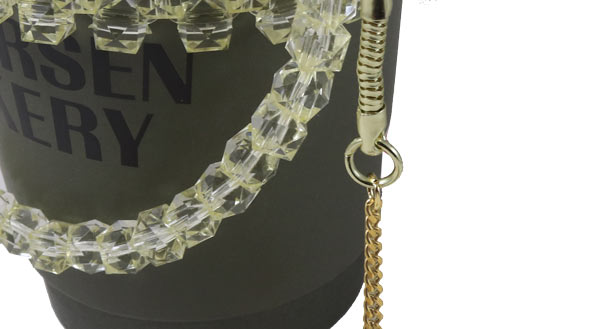
Attach the chain to the keyring with an open eyelet.
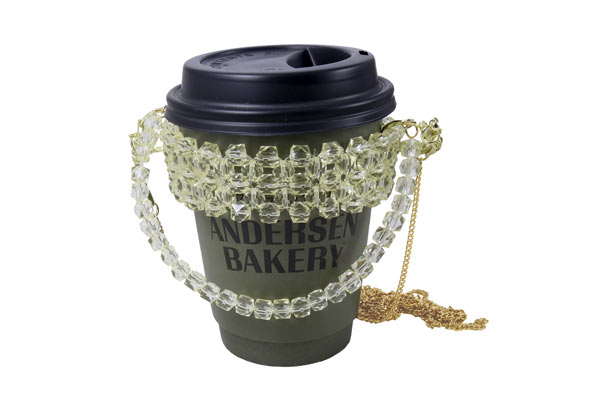
Your cup holder is now done :-)
Don't forget to stop by our bead shop in Copenhagen, where we are ready to help you :-)
We will publicly show your name and comment on this website. Your email is to ensure that the author of this post can get back to you. We promise to keep your data safe and secure.