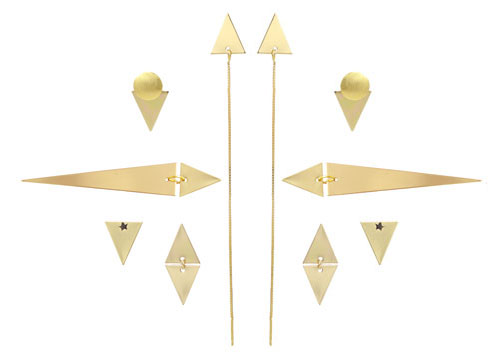
Make your own line of exciting designs with beautiful triangular jewelry pieces.
Below we show you five examples on how to use the triangle jewelry pieces to make beautiful earrings, simple and easy. Note, the triangles are available both silver plated and gilded brass, as well as with a frosted or shiny surface. All the examples can be made in both colours with supplies from Smyks.com
Earrings made of triangles
You will need the following materials:
4pcs.gilded brass triangles
1 pair of gilded earstuds wih a flat pad
2pcs. 4mm gilded jumprings
Glue the earstud onto one of the triangles. (grind or sand the earstud pad with sandpaper or a file before you start gluing, as this will help the glue sticking). Connect the two triangles with a jumpring. Viola! Your earrings are now done.

Earrings with black star earstuds
For these earrings you’ll need the following materials:
2pcs. small gilded brass triangles
1 pair of earstuds with small stars, black silver
The only thing you need to do here is to put the earstuds through the hole of the triangles, and your earrings are done, it doesn’t get easier than that.

Earrings with long triangles
For these elegant earrings you’ll need the following materials:
2pcs. gilded brass triangles
2pcs. oblong gilded brass triangles
1 pair of 4mm gilded earstuds with a flat pad
2pcs. 6mm gilded jumprings
First glue the earstud on the small triangle. Next attach the little and the long triangle with the jumpring. Your earrings are now done.

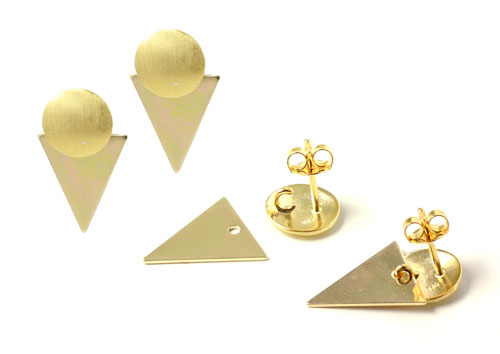
Earrings with brushed earstuds
For these earrings you’ll need the following materials:
2pcs. small gilded brass triangles
1 pair of brushed gilded round coin earstuds with an eye
Carefully open the eyeof the earstud, attach the triangle and then close the eye again. Your earrings are now done, quick and easy.

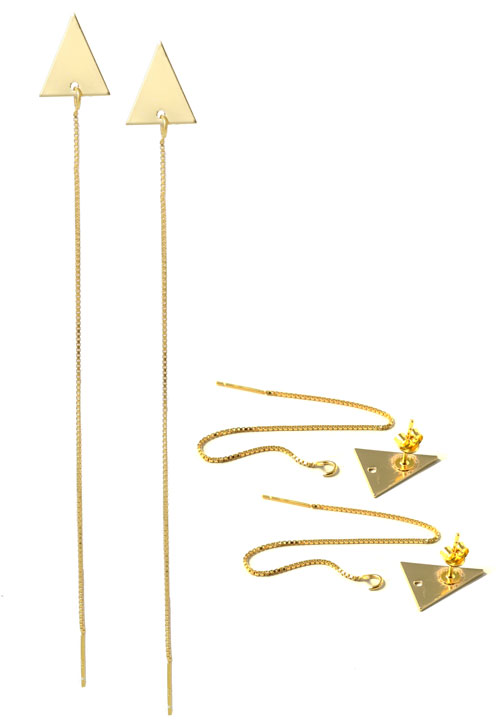
Triangular earstuds with a dangling chain
For these earrings you’ll need the following materials:
2pcs. gilded brass triangles
1 pair of gilded 4mm earrings with a flat pad
1 pair of gilded earwires with a peg and eye (only available in silver & oxidised)
First you glue the pad of the earring onto the triangle. Because the eye is closed, you will have to open it. Use a pair of flush-cut pliers to cut it open. Open it so that you can attach the triangle, then close the eye again. Your earrings are now done.

Do you have any questions or comments? Feel free to write them in the comment section below.

We will publicly show your name and comment on this website. Your email is to ensure that the author of this post can get back to you. We promise to keep your data safe and secure.