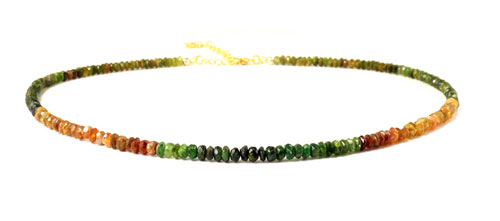
At this blog post from Smyks.com we show you how you can make a beautiful necklace or bracelet with tiger-tail beading wire and genuine semi-precious stones.
Beading wire or Tiger-tail wire, as it is also known, is the best choice when making jewellery with either sharp or large beads such as stone or glass beads. Beading wire is basically a very fine and flexible steel wire coated with a layer of clear nylon to prevent fraying. This type of wire should not be knotted, instead you should use crimp beads, which are small tubular beads made of metal. The crimp beads hold the chain together by squeezing them tightly around the wire with a pointy-nose plier or possibly a more convenient crimping pliers. Tiger-tail wire is available in several thicknesses and colours, but is typically used for regular necklaces and bracelets in metal or gold-coloured with thickness 0.3 to 0.38 mm. Necklaces with very large beads tend to use wire with a thickness of 0.45 mm.
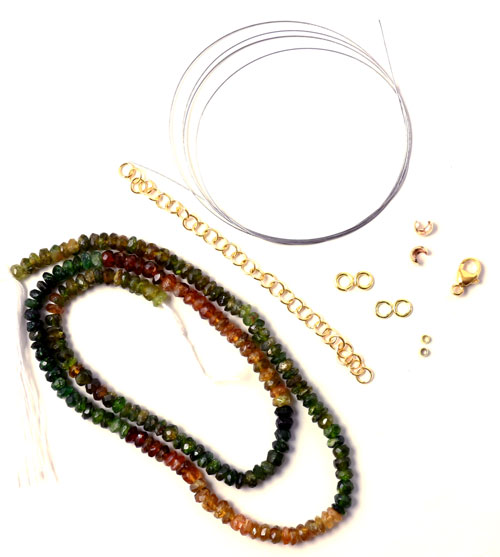
For this necklace you’ll need the following materials:
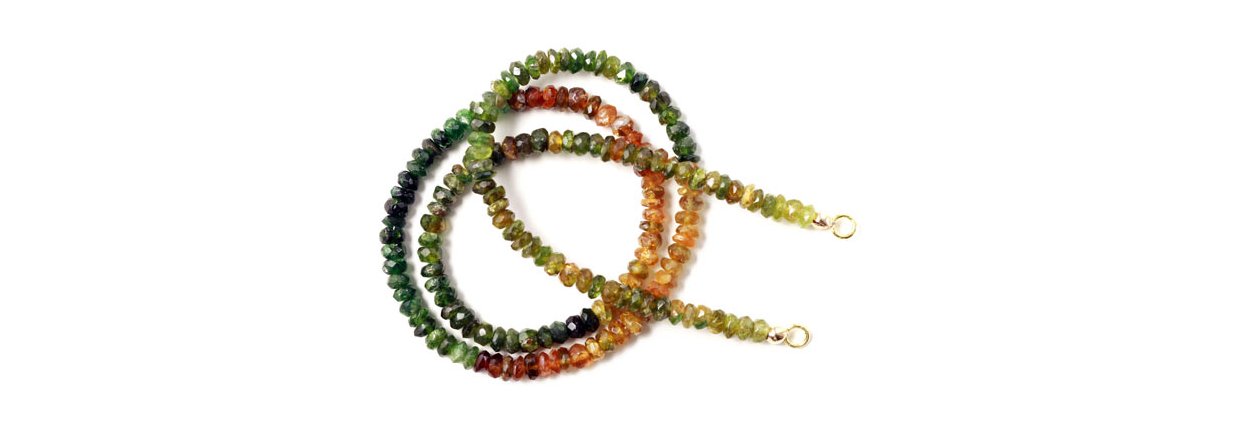
1pc. bead strand with amber and green tourmaline mix
1pc. approx. 60 cm wire (also called tiger tail) metallic 0.2mm
2pcs. gilded silver, closed 4x0,7mm jumprings
2pcs. gilded silver, open 4x0,7mm jumprings
2pcs. gilded brass crimp beads
2pcs. gilded silver 4mm crimp covers
1pc. gilded silver 9mm lobster claw clasp
1pc. approx. 8cm of gilded cable chain.
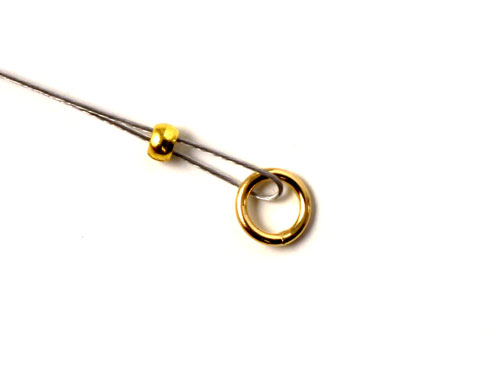
Start out by threading the beading wire through the crimp bead. Next pull it through the closed jumpring, and then back through the crimp bead, creating a loop.
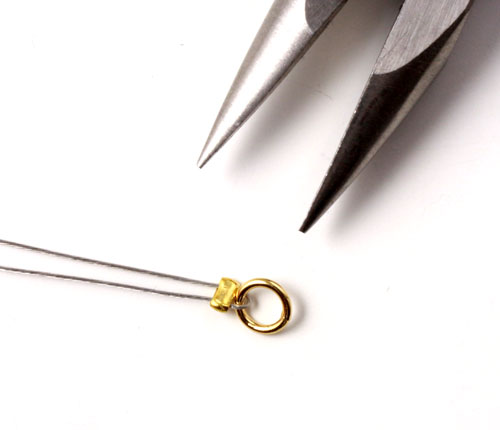
Then push the crimp bead all the way to the jumpring, and with a lot of force, squeeze it completely flat. Alternatively, you can use a pair of professional crimp pliers for maximal durability, or you can use a pair of normal flat-nosed pliers as shown here.
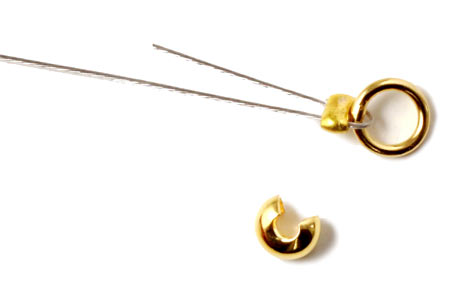
Then cut off the excess wire around 3-4 cm from the crimp bead. It strengthens the wire if a little bit is left, but only if there is enough wire to feed it back through the bead.
A flat squeezed crimp bead doesn’t look very good, and for this purpose you can use a crimp cover to hide it. A crimp cover is an open ball that you put on around the crimp bead, and then carefully squeeze it close, so that it looks like a little ball at the end of the wire.
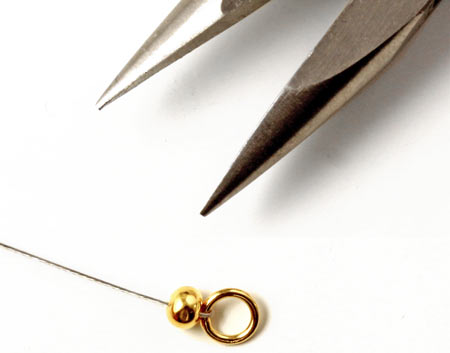
Here you see what it looks like when the crimp cover is closed. You use a pair of normal flat nosed pliers or a pair of narrow flat nosed pliers to carefully close the crimp cover.
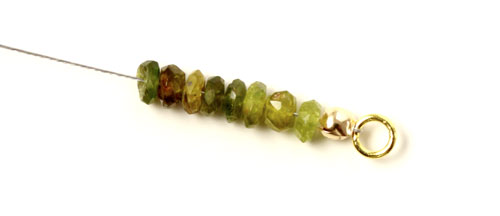
Thread beads onto the wire. As the wire is slightly stiff, you don't need a needle for this purpose, but can thread beads directly onto the wire as it is.
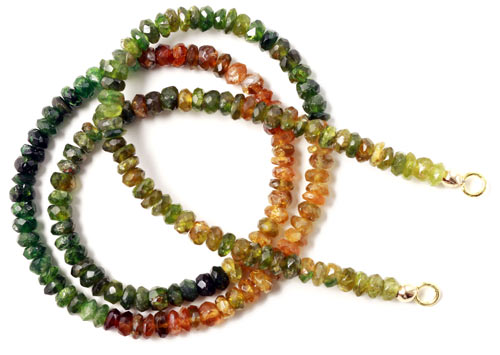
Move to the other end of the necklace. Now in the same way as before, thread a crimp bead through into the wire, then a jumpring and then pull the wire back through the crimp bead and squeeze it flat. Then, as before, cover the crimp bead with a crimp cover.
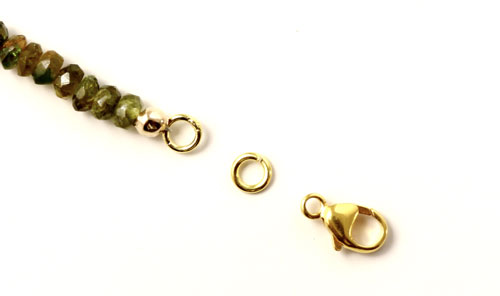
Now you need to add a chain and clasp to your necklace. In one of the ends you’ll need a 4mm jumpring and a lobster claw clasp.
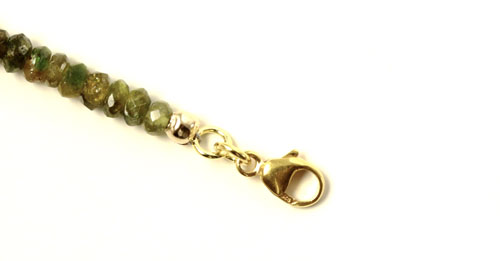
Connect the closed jumpring to the lobster claw clasp with the normal jumpring.
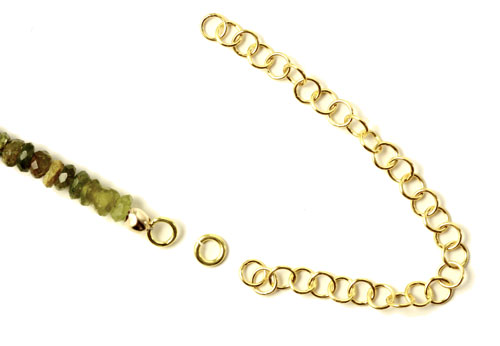
In theo ther end of the necklace you’ll need a 4mm jumpring and approximately 8 cm of cable chain. A cable chain is a chain consisting of closed 4mm jumprings, so the lobster claw clasp can hook itself onto it.
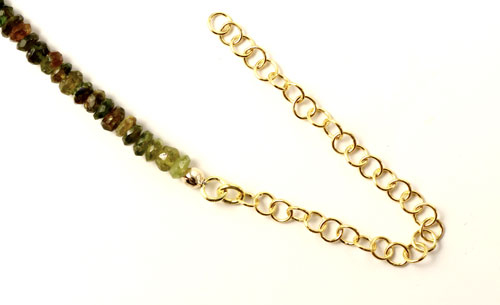
Attach the cable chain to the jumpring with a 4mm jumpring.
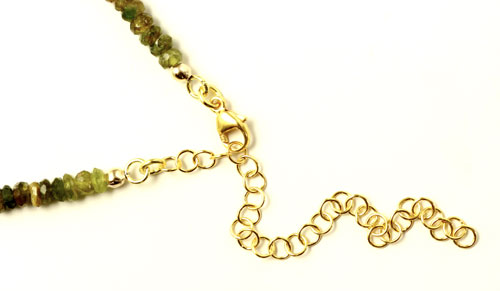
You can now close the necklace in the length you’d like.

Note that you don’t need to add a cable chain to your necklace. The cable chain just adds adjustable length to your necklace.
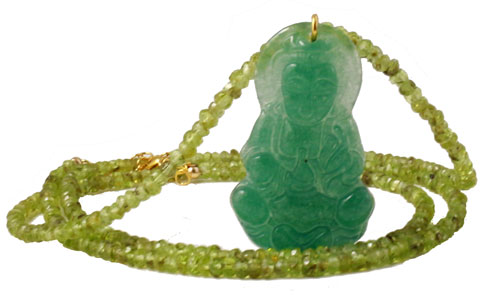
Shown here is a necklace made in the same way. Here is used 2 strands of peridot beads as well as a buddha charm in green jade.
Questions or comments to this entry? Feel free to write in the comment section below.
We will publicly show your name and comment on this website. Your email is to ensure that the author of this post can get back to you. We promise to keep your data safe and secure.