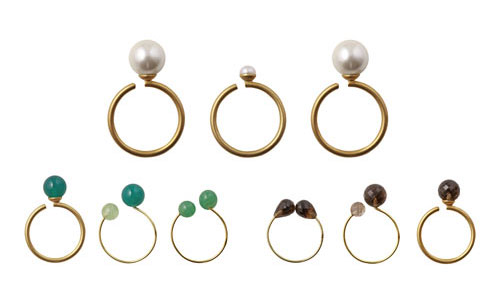
Make these elegant and super easy finger rings.
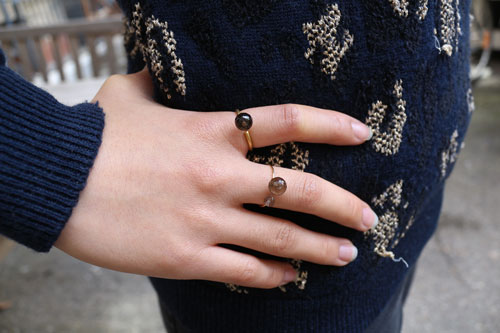
You can mix them, and wear several on one hand, or choose to only wear one of them for a more simple look.
Rings with smoky Quartz
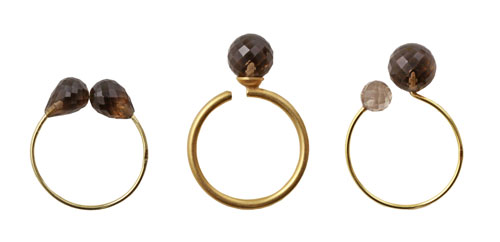
For these rings, we have used the following materials (seen from left to right):
1pc. gilded 18mm hoop earring + 2pcs. faceted smoky quartz teardrops
1pc. gilded brass finger ring with peg + 1pc. half-drilled faceted 8mm smoky quartz bead
1pc. gilded 18mm hoop earring + 1pc. half-drilled 6mm faceted smoky quartz bead+ 1pc. in 8mm
+ glue
NB: The colour on the brass ring fades easily, so avoid washing your hands wearing them. You can choose the ring in gilded sterling silver higher quality and longer endurance – also available in silver. File down the peg to match the hole in the bead.
Rings with aventurine, green agate and prehnite
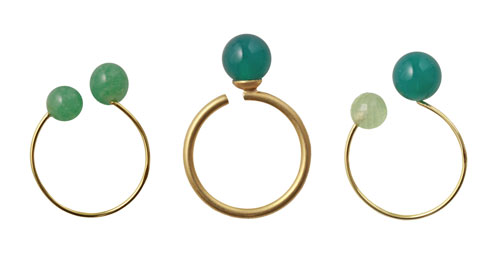
Til disse ringe er der brugt følgende materialer: (set fra venstre mod højre)
1pc. gilded 18mm hoop earring + 2pcs. half-drilled aventurine beads
1pc. gilded brass finger ring with peg + 1pc. 8mm half-drilled green agate
1pc. gilded 18mm hoop earring+ 2pcs. half-drilled beads, 8mm green agate + 6mm faceted prehnite (currently out of stock)
+ glue
Below we’ll show you an example on how to make the rings.
All of the rings shown above are made with the same method, except the single-bead rings, where the peg of the finger ring has just been dipped in glue, and then inserted into the bead.
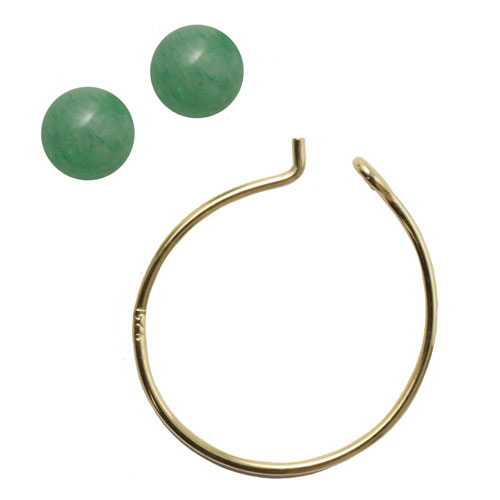
In the example, we are creating the aventurine ring. For rings made with hoop earrings, you will need a side-cutter.
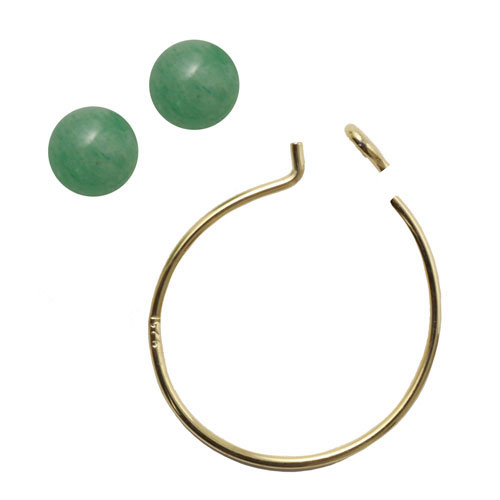
Start out by cutting off the eye of the hoop.
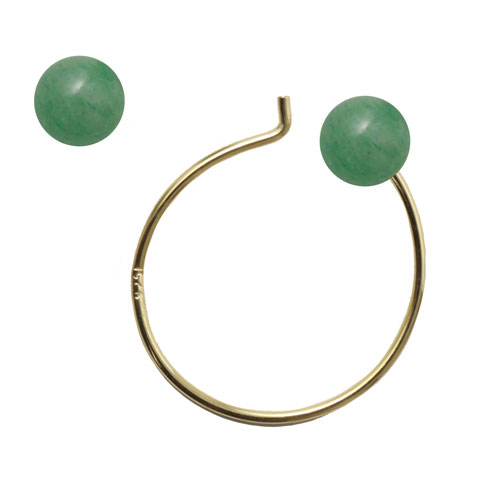
Next put a tiny dab of glue onto the newly cut end of the earring and secure one of your beads.
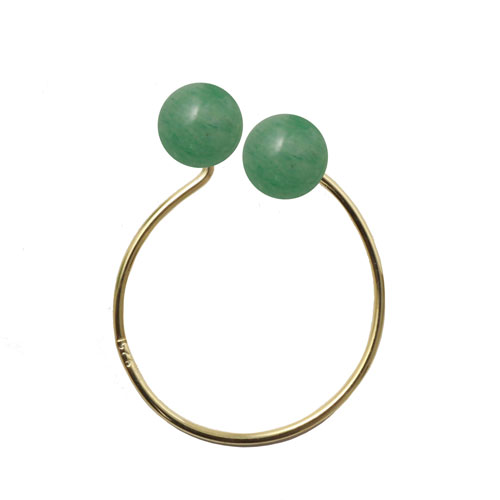
Next add a little bit of glue to the other tip of the hoop, and attach the other bead.
Your ring is now done. Fast, simple and easy to make – and it can even expand and shrink to fit different sizes.
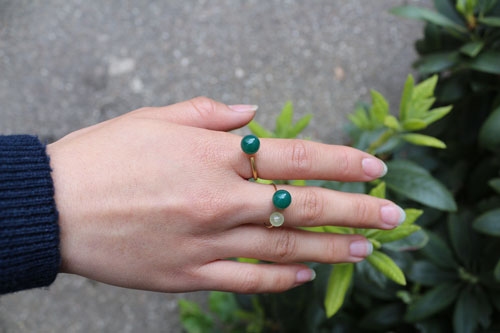
Pearl rings
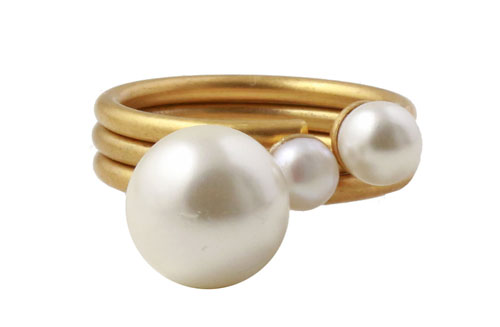
Til disse fingerringe er der brugt følgende materialer:
3pcs. gilded brass finger ring with peg
1pc. 10mm half-drilled shell pearl
1pc. 5mm half-drilled freshwater pearl
1pc. 4mm half-drilled freshwater pearl
Put a dab of glue on the tip of the peg and in the cup, and insert it in your pearl.
Remember to check the depth of your pearl to make sure the peg isn’t showing. If it’s too long, cut off the excess (rather too much than too little) and make sure your bead fits into the cup.
You can use them seperately or together, as shown above, all on one finger.
Berry-bead rings
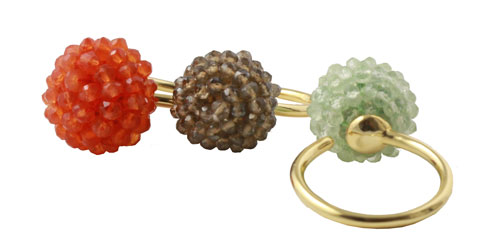
For these rings, you’ll need the following materials:
1pc. gilded sterling silver finger ring with peg
1pc. faceted berry-bead. These beads are available in many different stones, here we have shown carnelian, smoky quartz and prehnite.
These berry-beads consist of faceted stones around a fabric core which can easily be stuck a hole in.
First poke a hole in the berry-bead with the peg of your ring. If you have trouble with this, you can use an awl and make the hole. Next put a little glue onto the peg and into the cup, and press it into the berry-bead.
Your berry-bead finger ring is now done!
Rings with enamel coins
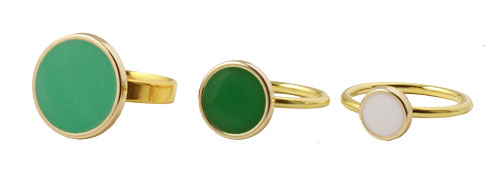
Til disse fingerringe er der brugt følgende materialer: (set fra venstre mod højre)
1pc. finger ring in gilded steel with 10mm plate+ 1pc. 16mm gilded blue-green enamel coin
1pc. finger ring in gilded sterling silver with 7mm plate+ 1pc. 12mm gilded dark green enamel coin
1pc. finger ring in gilded sterling silver with 7mm plate + 1pc. 8mm gilded white enamel coin
+ lim
Note that the finger rings in gilded steel are available in several sizes, including adjustable.
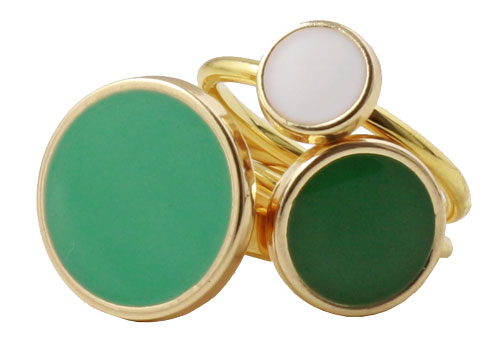
Put a little bit of glue onto the plate, and glue the coin in place. If you scratch the surface of the plate a little bit with a file, it will make the coin stick better.
You can wear several rings at the same time – try wearing 3 rings on the same finger with different coin sizes.
Enjoy your new rings.
Feel free to leave a comment, idea and critique in the section below.

We will publicly show your name and comment on this website. Your email is to ensure that the author of this post can get back to you. We promise to keep your data safe and secure.